Last updated: March 2026 | By: VerdictLab Editorial Team
Dental implants are an investment — in money, in time, and in the surgical process that places them. Protecting that investment means cleaning around the implant abutment and crown more carefully than you clean your natural teeth. The tissue around an implant is structurally different from natural gum tissue and more vulnerable to inflammation. When bacteria accumulate around an implant and aren’t removed, the result is peri-implantitis — the leading cause of implant failure.
String floss can clean around a single-tooth implant adequately if you’re diligent, but it can’t reach under implant-supported bridges, around All-on-4 dentures, or into the deeper sulcus that often forms around implant abutments. A water flosser with the right tip solves this. Here are the four best options for implant care.
For our full comparison across all use cases, see the complete VerdictLab guide to the best water flossers of 2026.
Quick Summary
- Best overall for implants: Waterpik ION WF-12 ($99.99) — 7 tips including Pik Pocket and Implant Denture, cordless wand for precise angle control
- Best countertop for implants: Waterpik Aquarius WP-660 ($79.99) — same Pik Pocket tip, widest pressure range, proven reliability
- Best gentle option: Philips Sonicare Power Flosser 3000 ($79.96) — softest low setting, ADA accepted, ideal for early healing stages
- Best budget: Bitvae C6 ($15.98) — periodontal tip included, Soft mode, low entry cost
In This Guide
Why Implants Need Specialised Cleaning
An implant isn’t a natural tooth — and the tissue around it doesn’t behave like natural gum tissue. Understanding the difference explains why a water flosser matters more for implants than for natural teeth.
The tissue is structurally weaker. Natural teeth are surrounded by periodontal ligament fibres that anchor gum tissue firmly to the tooth root. Implants lack this ligament. The tissue around an implant relies on a weaker connective tissue seal to the abutment surface. This seal is more easily disrupted by bacteria, which is why peri-implant disease progresses faster than periodontal disease around natural teeth once it starts.
The sulcus is often deeper. The gap between the implant abutment and the surrounding gum tissue (the peri-implant sulcus) is typically 2–3mm even in health — deeper than the 1–2mm sulcus around natural teeth. This creates a larger space for bacteria to colonise. If peri-implant mucositis (early-stage inflammation) develops, the pocket can deepen further.
Peri-implantitis is the primary risk. Peri-implantitis — inflammation and bone loss around an implant — affects an estimated 12–22% of implant patients. It’s driven by bacterial biofilm accumulation in the peri-implant sulcus. Once bone loss begins around an implant, it can’t be regenerated as reliably as around natural teeth. Prevention through consistent daily cleaning is far more effective than treatment after the fact.
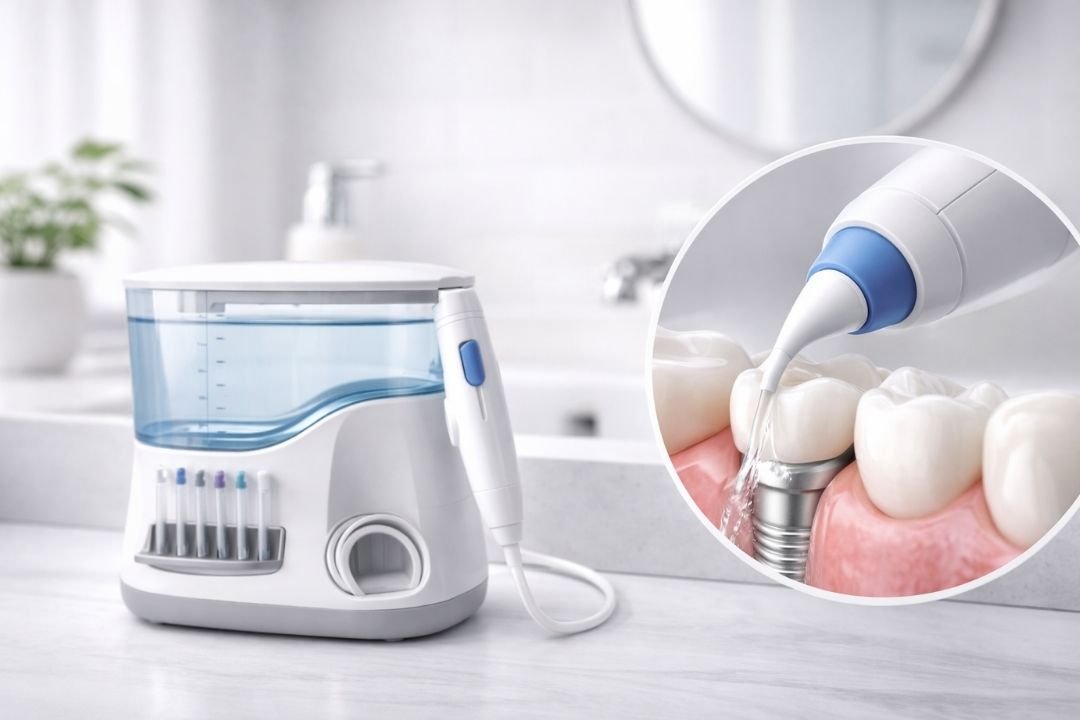
A water flosser with a periodontal pocket tip delivers a gentle stream directly into the peri-implant sulcus, flushing bacteria from the space where string floss can’t effectively reach. For more on the clinical evidence, see: Do Water Flossers Actually Remove Plaque?
What to Look for in a Water Flosser for Implants
A periodontal pocket or implant-specific tip
This is the single most important feature. A standard jet tip delivers a focused, high-pressure stream that’s too aggressive for the tissue around implants. Two specialty tips matter here:
The Pik Pocket tip (Waterpik) has a soft, flexible rubber end that delivers a low-pressure, diffused stream below the gum line. It’s designed for subgingival irrigation — gently flushing the peri-implant sulcus without disturbing the tissue seal.
The Implant Denture tip (Waterpik, included with the ION) is specifically designed for implant-supported bridges and dentures. Its thin, curved end directs water under the prosthetic structure where debris and bacteria accumulate against the gum tissue.
The Bitvae C6 includes a periodontal tip that serves a similar function. The Philips Sonicare does not include a periodontal or implant-specific tip.
Gentle low-pressure setting
The tissue around implants is more sensitive than tissue around natural teeth — both structurally (weaker connective tissue seal) and often clinically (post-surgical healing, early inflammation). You need a water flosser where “setting 1” is actually gentle. The Waterpik Aquarius and ION at setting 1 deliver 10 PSI. The Philips Sonicare’s lowest setting produces even less force. Either is appropriate for implant care.
Wide pressure range for long-term use
In the weeks immediately after implant placement, you’ll use the lowest setting only. As healing progresses and the tissue matures over 3–6 months, you’ll gradually increase pressure. A 10-setting model gives you room to progress; a 3-setting model offers less granularity. Since implants are a permanent addition to your mouth, the water flosser you buy now should serve you for years — the wider range accommodates changing needs over that timespan.
Reservoir capacity
Implant cleaning takes longer than standard interdental cleaning because each implant site needs focused attention. If you have multiple implants — or an implant-supported bridge — budget 2–3 minutes rather than the standard 60–90 seconds. A 650ml+ countertop reservoir handles this without refilling. Cordless models (200–300ml) will need one refill.
Best Overall for Implants: Waterpik ION Professional (WF-12)
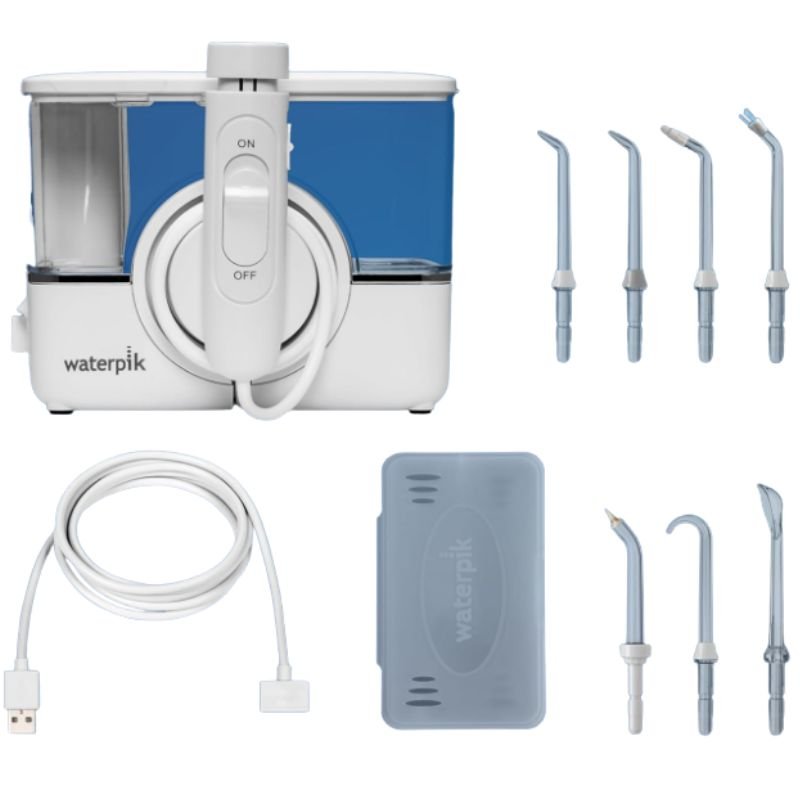
Price: $99.99 | Type: Hybrid | Reservoir: 650ml | Settings: 10 | ADA Accepted: Yes | Implant Tips: Pik Pocket + Implant Denture (both included) | Warranty: 3 years
The ION leads this list because it’s the only water flosser that includes both implant-relevant specialty tips in the box: the Pik Pocket tip for subgingival cleaning around individual implant abutments and the Implant Denture tip for flushing under implant-supported bridges and dentures.
That Implant Denture tip is the differentiator. Its thin, curved design directs water under the pontic section of an implant bridge — the space between the prosthetic teeth and the gum tissue that traps food, bacteria, and plaque. Without this tip, cleaning under a bridge requires a floss threader or an interdental brush, neither of which flushes the entire underside the way a directed water stream does.
The cordless wand is a practical advantage for implant cleaning. When you’re targeting a specific implant site at the back of the mouth, you need precise angle control. The untethered wand moves freely without the cord tension that can make the Aquarius’s wand harder to position precisely. For a single implant at tooth #14 or #19, that manoeuvrability matters.
Ten pressure settings (10–100 PSI), 650ml reservoir (90+ seconds without refilling), ADA acceptance, and a 3-year warranty complete the package. The 7 included tips mean this single device handles implant care, general interdental cleaning, orthodontic maintenance, and tongue cleaning.
Strengths: Only model with both Pik Pocket and Implant Denture tips included; cordless wand for precise implant-site targeting; 10 settings; 650ml reservoir; ADA accepted; 3-year warranty; 7 total tips.
Weaknesses: Most expensive option at $99.99; still needs counter space for the base; louder than cordless-only models.
Best Countertop for Implants: Waterpik Aquarius (WP-660)
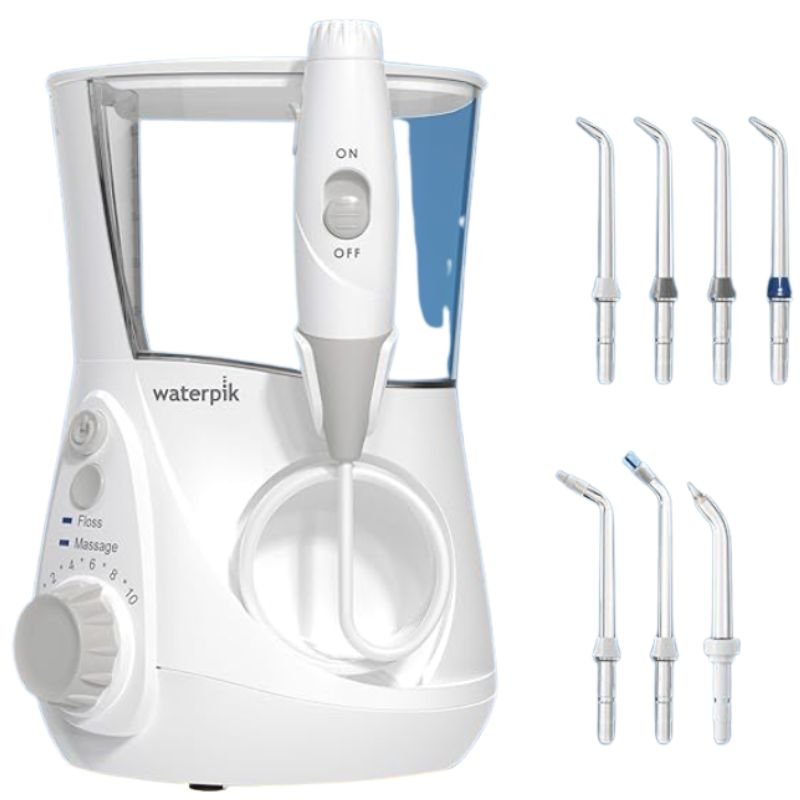
Price: $79.99 | Type: Countertop | Reservoir: 650ml | Settings: 10 (10–100 PSI) | ADA Accepted: Yes | Implant Tips: Pik Pocket (included) | Warranty: 3 years
The Aquarius includes the Pik Pocket periodontal tip — the primary tool for subgingival cleaning around individual implant abutments. It does not include the Implant Denture tip, but this can be purchased separately (~$8–10 for a two-pack) if you have an implant-supported bridge or denture.
For single-tooth implants and two- to three-unit implant bridges, the Aquarius with its Pik Pocket tip provides everything you need at $20 less than the ION. The 10 pressure settings offer the same granularity for progression from post-surgical gentleness to long-term maintenance pressure. The 650ml reservoir handles extended implant cleaning sessions without refilling.
The corded wand is the Aquarius’s only meaningful disadvantage for implant cleaning. When targeting a posterior implant at a specific angle, the cord creates mild tension that the ION’s cordless wand doesn’t. For anterior implants (front teeth), this difference is negligible. For posterior sites, it’s noticeable but workable.
The Aquarius is the right choice if you have single-tooth implants or short bridges and want to save $20 versus the ION. If you have an implant-supported bridge, denture, or All-on-4, the ION’s included Implant Denture tip and cordless wand make it worth the premium.
Strengths: Pik Pocket tip included; 10 settings (10–100 PSI); 650ml reservoir; ADA accepted; 3-year warranty; $20 less than ION; Implant Denture tip available separately.
Weaknesses: No Implant Denture tip in the box (must purchase separately); corded wand slightly limits posterior positioning; countertop only; loud.
Best Gentle Option for Implants: Philips Sonicare Power Flosser 3000
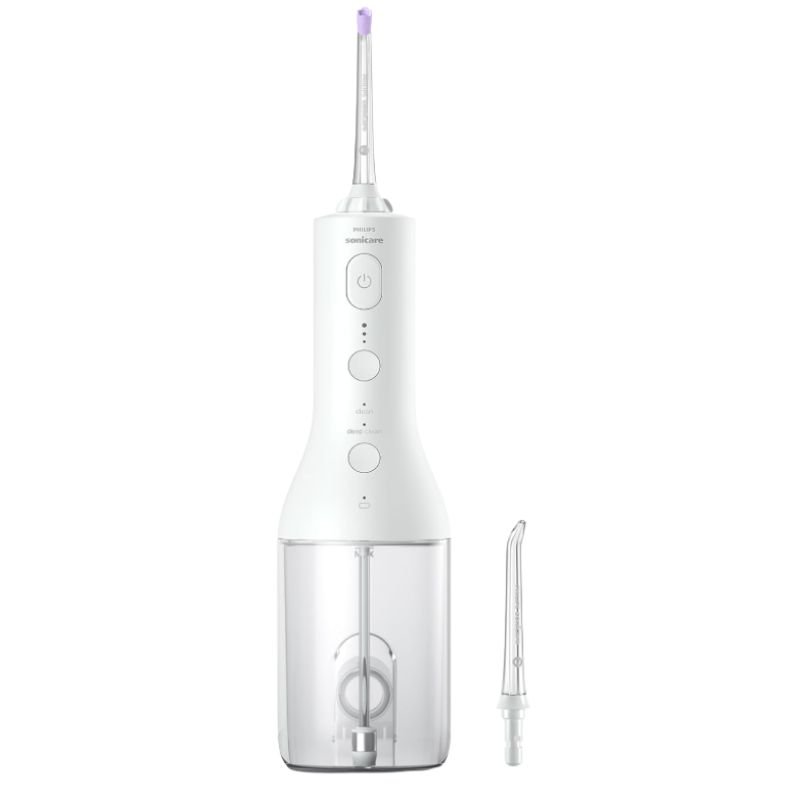
Price: $79.96 | Type: Cordless | Reservoir: 250ml (8 oz) | Modes: 2 (Clean, Deep Clean) × 3 intensities | ADA Accepted: Yes | Implant Tips: None included | Warranty: 2 years
The Sonicare 3000 earns a place on this implant list not for its tip selection — it doesn’t include a periodontal or implant tip — but for the gentleness of its lowest setting. In the early healing weeks after implant placement, when the surgical site is still tender and the tissue seal is forming, the Sonicare’s Clean mode at intensity 1 produces the softest stream available in any water flosser.
The Quad Stream nozzle disperses water across a wider area than a single-jet tip, reducing the concentrated force on any one point. For newly placed implants where a focused jet might disturb the healing tissue, this dispersed pattern is a meaningful advantage. Several implant surgeons have noted in professional forums that they recommend the Sonicare specifically for the first 4–6 weeks of post-surgical home care.
The limitation is clear: without a periodontal pocket or implant-specific tip, the Sonicare doesn’t provide the targeted subgingival irrigation that Waterpik’s Pik Pocket delivers. For long-term implant maintenance — once healing is complete and the tissue has matured — the Waterpik models with their specialty tips are more purpose-built.
The best approach for implant patients who want the gentlest possible start: use the Sonicare during the initial healing phase (first 4–8 weeks post-surgery, with your surgeon’s approval), then transition to a Waterpik with a Pik Pocket tip for long-term maintenance. Or, if budget only allows one device, start with the Waterpik Aquarius on setting 1 — it’s gentle enough for most healed tissue, though not quite as soft as the Sonicare’s lowest setting.
Strengths: Gentlest low setting available; Quad Stream disperses force; ADA accepted; quiet operation; compact cordless design; ideal for early post-surgical healing.
Weaknesses: No periodontal or implant-specific tip; not designed for subgingival pocket irrigation; 250ml reservoir; 2-week battery life; fewer pressure levels than Waterpik.
Best Budget for Implants: Bitvae C6
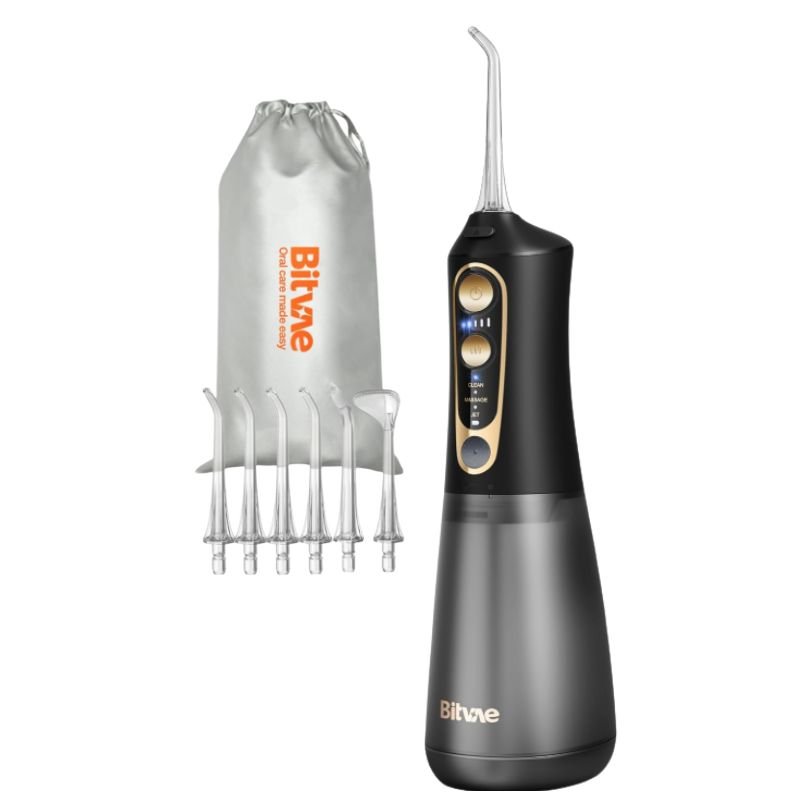
Price: $15.98 | Type: Cordless | Reservoir: 300ml | Settings: 3 modes × 5 levels | ADA Accepted: No | Periodontal Tip: Yes (included) | Warranty: 1 year
The Bitvae C6 includes a periodontal tip and a Soft mode with 5 intensity levels — the two features that matter most for implant home care — at $15.98. For patients who’ve just spent thousands on implant surgery, the idea of spending another $80–100 on a water flosser can feel like one expense too many. The Bitvae removes that objection entirely.
The Soft mode at level 1 is gentle enough for mature implant tissue (fully healed, 3+ months post-surgery). It’s not quite gentle enough for the immediate post-surgical weeks — for that phase, the Sonicare or Waterpik on setting 1 is a safer choice. The periodontal tip provides basic subgingival access, though its design is simpler than the Waterpik Pik Pocket’s soft rubber end.
The 300ml reservoir provides roughly 50–75 seconds of use — adequate for cleaning around 1–3 implant sites plus a general pass, though a refill may be needed for more extensive implant work. The 40-day battery and USB-C charging are practical advantages for consistent daily use.
The honest assessment: if your implant surgeon or prosthodontist specifically recommends a water flosser with a Pik Pocket tip, the Waterpik Aquarius ($79.99) is the right investment. If the recommendation is simply “use a water flosser on a low setting around your implants,” the Bitvae C6 at $15.98 handles that responsibly.
Strengths: $15.98 price removes cost barrier; periodontal tip included; Soft mode with 5 levels; 300ml reservoir; USB-C; 40-day battery.
Weaknesses: No ADA seal; simpler periodontal tip than Waterpik Pik Pocket; no Implant Denture tip option; 1-year warranty; not gentle enough for immediate post-surgical care.
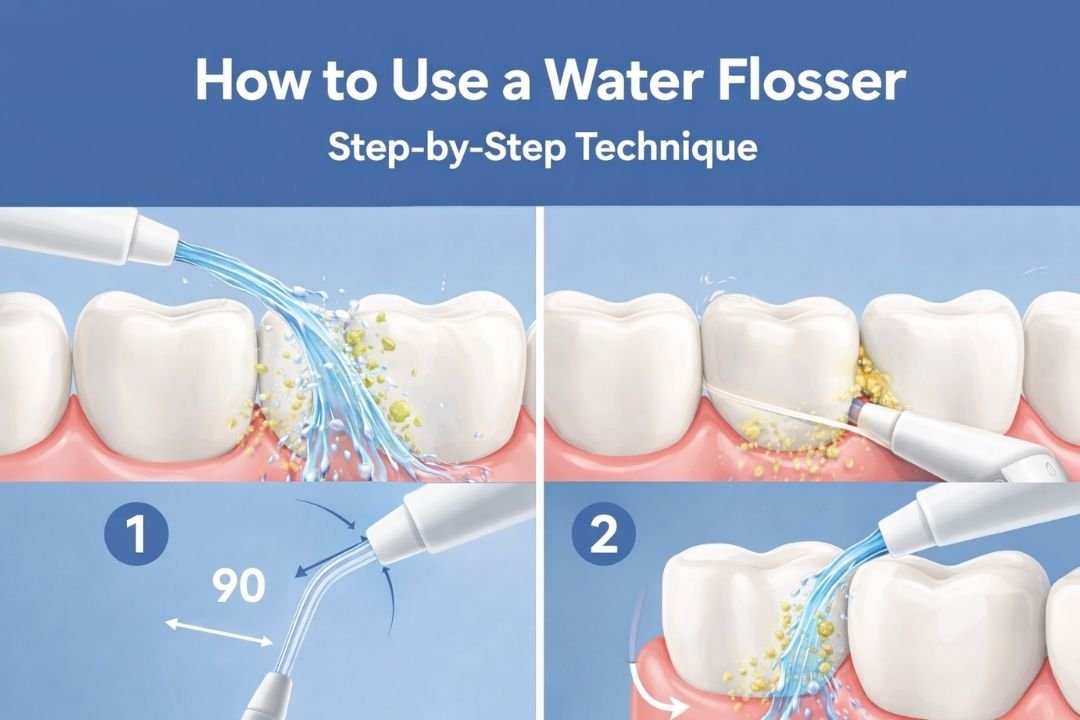
How to Water Floss Around Implants
The technique around implants is more deliberate and gentle than standard water flossing. The peri-implant tissue deserves extra care.
Use the Pik Pocket or periodontal tip
Start your session with the periodontal pocket tip, not the standard jet tip. Place the soft tip at the gum margin of the implant — where the tissue meets the abutment. Don’t push the tip into the sulcus; let the water stream do the reaching. The goal is to gently flush the peri-implant sulcus, not to blast the tissue with direct pressure.
Lowest pressure setting
Setting 1 on a Waterpik (10 PSI). Lowest intensity on a Sonicare. Soft mode, level 1 on a Bitvae. The tissue around implants is more easily traumatised than tissue around natural teeth. As the implant matures and tissue strengthens (typically 3–6 months post-placement), you can gradually increase to a moderate setting. Ask your dentist for guidance on when to progress.
Trace slowly around the entire implant
Move the tip in a slow circle around the implant abutment — front, lingual (tongue side), mesial (toward the centre), and distal (toward the back). Spend 5–10 seconds on each implant site. For a single-tooth implant, this adds about 15–20 seconds to your overall session. For multiple implants, budget accordingly.
For implant bridges: use the Implant Denture tip
If you have an implant-supported bridge, switch to the Implant Denture tip (Waterpik ION includes it; available separately for the Aquarius). Position the curved tip at one end of the bridge, directed into the space between the pontic and the gum tissue. Slowly glide the tip along the underside of the bridge to the other end. This flushes the debris and bacteria that accumulate in the gap between the prosthetic and your gum tissue — an area impossible to clean with string floss alone.
Follow with standard tip for general cleaning
After implant-specific care, switch to the standard jet tip at a moderate pressure for general interdental cleaning of your natural teeth. The two-tip protocol takes about 2–3 minutes total.
For the complete general technique, see: How to Use a Water Flosser Correctly.
Considerations by Implant Type
Not all implants present the same cleaning challenge. Here’s how to adjust your approach.
Single-tooth implants
The simplest scenario. A single implant crown is cleaned much like a natural tooth — water flosser along the gum line, pausing at the mesial and distal contacts, with extra attention to the implant’s peri-implant sulcus using the Pik Pocket tip. The Waterpik Aquarius with a Pik Pocket tip handles this well. The ION’s cordless wand is convenient but not strictly necessary for a single site.
Implant-supported bridges (3+ units)
Bridges create a pontic section — false teeth that sit on the gum tissue with a narrow gap underneath. Food, bacteria, and plaque accumulate in this gap and can’t be reached by standard tips or string floss without a threader. The Waterpik ION’s included Implant Denture tip is specifically designed for this. The Aquarius can use the same tip (purchased separately). This is where the ION’s $20 premium genuinely justifies itself.
All-on-4 / All-on-6 dentures
Full-arch implant-supported dentures present the most complex cleaning challenge. The entire prosthetic sits on the gum tissue with spaces around each implant abutment and under the prosthetic bar. The Implant Denture tip on the ION or Aquarius is essential. Some patients also use an interdental brush to supplement the water flosser. Daily cleaning of All-on-4 prosthetics is critical — these are the implants most vulnerable to peri-implantitis due to the difficulty of maintaining consistent home care.
Healing implants (first 3 months)
Follow your surgeon’s specific instructions. Most implant surgeons advise avoiding the surgical site entirely for the first 1–2 weeks, then beginning gentle cleaning with the lowest pressure setting. The Philips Sonicare 3000’s lowest setting is the gentlest option for this phase. The Waterpik on setting 1 is also appropriate once your surgeon clears you for home cleaning around the site.
Frequently Asked Questions
Is it safe to use a water flosser on implants?
Yes — water flossers are safe and recommended for implant care by prosthodontists and implant surgeons. Use the lowest pressure setting and a periodontal pocket tip for subgingival cleaning. The pulsating water stream is gentle enough for healthy implant tissue when used correctly. Wait for your surgeon’s clearance before using a water flosser on a newly placed implant.
Can a water flosser cause implant failure?
No. The water pressure from a consumer water flosser — even at the highest settings — is not strong enough to damage an osseointegrated (healed) implant or dislodge a properly placed abutment. What can cause implant failure is inadequate cleaning that allows peri-implantitis to develop. A water flosser is part of the prevention strategy, not a risk factor.
Do I need a Waterpik for implants, or will any brand work?
Waterpik has the strongest product offering for implant care — specifically the Pik Pocket and Implant Denture tips, which no other brand replicates. If your dentist recommends subgingival irrigation, Waterpik is the most purpose-built option. For general cleaning around implants at low pressure, any water flosser with a gentle low setting works adequately. The Bitvae C6’s periodontal tip provides basic subgingival access at a fraction of the cost.
What pressure setting should I use around implants?
Start at the lowest setting available. Setting 1 on a Waterpik (10 PSI). Increase gradually over weeks and months as tissue heals and matures. Most implant patients settle between settings 2–4 for long-term maintenance. Never increase through pain — if it hurts, you’re too high.
How often should I water floss around implants?
Once daily at minimum. Some prosthodontists recommend twice daily, particularly in the first year after placement when the peri-implant tissue is still maturing. Consistency is more important than frequency — daily use at low pressure is more protective than aggressive cleaning done sporadically.
Can I use a water flosser instead of string floss for implants?
For most implant situations, a water flosser with a periodontal pocket tip provides more effective cleaning than string floss — particularly for subgingival irrigation and under implant bridges where floss can’t reach. Some dentists recommend supplementing with super floss or interdental brushes for implant bridges. Ask your dental professional for guidance specific to your implant configuration. For the broader comparison, see: Water Flosser vs String Floss.
The Bottom Line
The Waterpik ION WF-12 ($99.99) is the best water flosser for implant patients. It’s the only model that includes both the Pik Pocket tip for subgingival sulcus cleaning and the Implant Denture tip for flushing under bridges and prosthetics. The cordless wand makes targeting specific implant sites easier. For single-tooth implants where the Implant Denture tip isn’t needed, the Waterpik Aquarius ($79.99) delivers the same cleaning performance at $20 less.
For the gentlest possible start — particularly in the early weeks after placement — the Philips Sonicare 3000 ($79.96) offers the softest low setting, though it lacks implant-specific tips for long-term subgingival care.
If budget is the deciding factor, the Bitvae C6 ($15.98) includes a periodontal tip and a gentle Soft mode. It won’t match the Waterpik’s implant-specific engineering, but it’s dramatically better than no subgingival cleaning at all.
Whatever you choose: use it daily, use it gently, and follow your implant surgeon’s specific guidance. The implant is permanent. Protecting it is a daily commitment. A water flosser makes that commitment take 90 seconds instead of 15 minutes.
For the full comparison across all use cases, see our complete guide to the best water flossers of 2026.
Related Guides
- Best Water Flossers of 2026 (Compared and Rated)
- Best Water Flosser for Gum Disease
- How to Use a Water Flosser Correctly
- Do Dentists Recommend Water Flossers?
- Do Water Flossers Actually Remove Plaque?
- Water Flosser vs String Floss: What the Evidence Says
- Best Water Flosser Tips and Nozzles
- Best Countertop Water Flosser