Last updated: August 2026 | By: VerdictLab Editorial Team
A night guard that isn’t cleaned properly becomes a petri dish you put in your mouth every night. Warm, moist, and enclosed, it can provide an ideal environment for bacteria and fungi, while plaque and mineral deposits can accumulate on the surface. The guard itself may still be structurally fine, but the biofilm growing on it introduces problems you bought the guard to avoid: bad breath, gum irritation, and an unpleasant taste that makes you not want to wear it.
The good news is that cleaning a night guard takes about 30 seconds in the morning and a few minutes once a week. The routine is simple. The mistakes people make are simpler — and avoidable once you know what damages the material.
One important caveat upfront: cleaning instructions vary by material and brand. If your night guard came with specific care instructions from the manufacturer, follow those first. The guidance below covers general best practices that apply to most guards.
In This Guide
Daily Cleaning (Every Morning)
Do this immediately after removing the guard, before the saliva dries and hardens into a film. It takes 30 seconds.
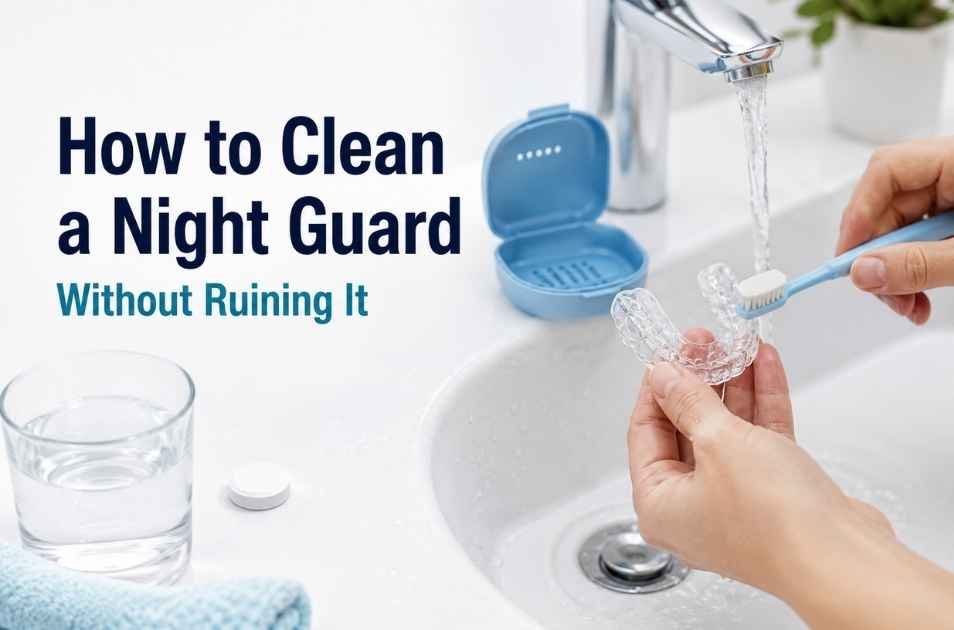
Rinse the guard under cool or lukewarm running water. While the water runs over it, use a soft-bristled toothbrush — not the one you brush your teeth with, a separate one — to gently scrub all surfaces. The outside, the inside that contacts your teeth, and the biting surface. Unless your guard’s manufacturer specifically says toothpaste is safe, skip it — abrasive or whitening toothpastes can scratch some guard materials. Water and the brush are enough. A drop of unscented liquid dish soap is fine if you want a cleaning agent.
That’s it. Rinse, brush, set it somewhere to dry. The mechanical action of the bristles removes the overnight biofilm before it has a chance to mineralise. If you skip this step regularly, you’ll notice a white or yellowish buildup within a few weeks that becomes increasingly difficult to remove.
Some people rinse with cold water only, no brush. This is better than nothing but not as effective — water alone doesn’t dislodge the sticky bacterial film the way bristles do. The brush matters more than anything you add to the water.
Weekly Deep Clean
Once a week, give the guard a more thorough soak. Two approaches work well.
Option A: White vinegar soak
Mix equal parts white vinegar and cool water in a cup. Submerge the guard and let it sit for 15–30 minutes. The mild acidity helps dissolve mineral deposits and reduce surface bacteria. After soaking, rinse thoroughly under running water and scrub with your dedicated soft toothbrush to remove any loosened residue. Let it air-dry completely before storing. If your guard’s care instructions advise against vinegar, use a cleaning tablet instead.
Vinegar is cheap, available everywhere, and works for most guard materials. The guard may taste faintly acidic for the first wear after soaking — a thorough rinse before bed handles that.
Option B: Cleaning tablets
Drop a denture or retainer cleaning tablet into a glass of cool water, add the guard, and follow the timing on the tablet packaging (usually 15–20 minutes). These tablets — like Retainer Brite — are formulated to dissolve biofilm and calcium deposits on dental appliances. Rinse and brush after soaking.
Cleaning tablets are a convenient option for deeper cleaning and odour control, especially when buildup develops faster than brushing alone can manage. They cost roughly $0.20–0.25 per tablet depending on pack size. Whether that premium over free vinegar is worth it depends on how much buildup your guard accumulates — some people’s saliva mineralises faster than others.
Option C: Hydrogen peroxide
Some manufacturers allow short soaks in standard 3% hydrogen peroxide (the drugstore concentration) as a disinfecting option. Compatibility and timing vary by material, so check your guard’s care instructions first. When permitted, a 10–15 minute soak followed by a thorough rinse provides antimicrobial action without the acidity of vinegar. Don’t use higher concentrations.
Pick one method and stay consistent. Weekly soaking prevents the kind of buildup that requires aggressive scrubbing later.
What Not to Use on a Night Guard
Night guard materials — whether hard acrylic, dual-laminate, or thermoplastic — are more sensitive to heat and chemicals than they look. These are the common mistakes:
Hot water. This is the number-one killer of boil-and-bite and thermoplastic guards. Hot water softens the material and warps the fit. A guard that’s been through one hot rinse may no longer seat properly on your teeth. Always use cool or lukewarm water. Never put a night guard in the dishwasher, and never clean it with water from a kettle or a hot tap turned all the way up.
Toothpaste (in most cases). Most toothpastes contain mild abrasives — silica, calcium carbonate, baking soda — designed to scrub enamel clean. Those same abrasives can scratch the surface of a night guard, creating microscopic grooves where bacteria settle. Some manufacturers do allow non-abrasive, non-whitening toothpastes on their specific guards — check your care instructions. When in doubt, use a brush with water only, or add a drop of unscented dish soap.
Alcohol-based mouthwash. Soaking a guard in Listerine or similar alcohol-based mouthwash degrades certain guard materials over time, particularly softer thermoplastics. The alcohol can also dry out the material, making it more brittle. If you want to soak in something antimicrobial, use the hydrogen peroxide method above or a dedicated retainer cleaning tablet.
Bleach. Even diluted. Bleach degrades guard material, leaves a residual taste that’s difficult to remove, and can irritate oral tissue. There’s no reason to use it when gentler methods work.
UV sanitisers (as a replacement for cleaning). Some brands sell UV-C light boxes marketed for retainer and night guard sterilisation. UV can work as a supplementary sanitising step — reducing surface bacteria after a proper clean. But it doesn’t remove the physical biofilm or mineral deposits that harbour bacteria in the first place. If your ultrasonic cleaner or storage case includes a UV feature, there’s no harm in using it as an extra step. Just don’t rely on UV alone and skip the brushing and soaking that do the actual cleaning.
Cleaning Products Worth Buying
You don’t need specialised products to keep a night guard clean. A soft toothbrush and cool water handle daily maintenance. But two products can make the weekly routine easier or help when basic cleaning falls short.
Retainer Brite Cleaning Tablets
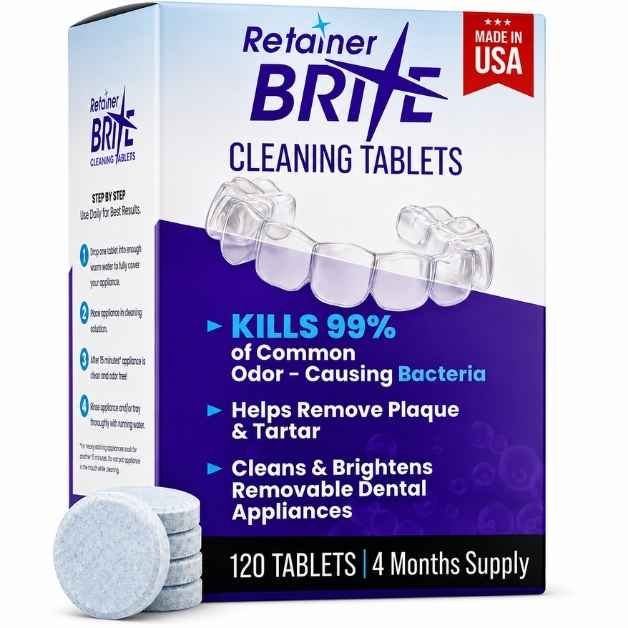
One of the most widely used cleaning tablets for dental appliances — retainers, night guards, and bruxism appliances. Each tablet fizzes for about 15 minutes, dissolving the kind of protein and mineral buildup that brushing alone leaves behind. One note: Retainer Brite contains potassium persulfate, so avoid it if you have a known persulfate allergy.
Ultrasonic Retainer Cleaner
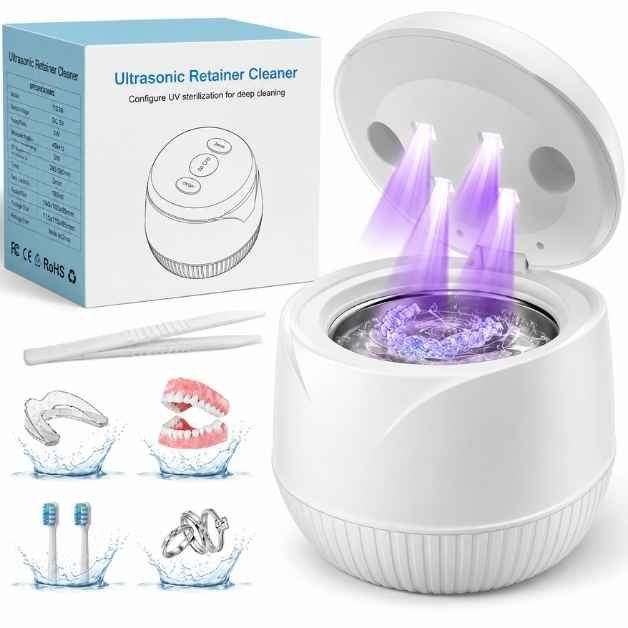
A small ultrasonic bath that vibrates at 45kHz, creating microscopic cavitation bubbles that reach into crevices a toothbrush can’t access. Fill the 200mL tank with water (add a cleaning tablet for extra effectiveness), drop in the guard, and run the cleaner using one of its preset cycles according to the device instructions.
An ultrasonic cleaner is an optional convenience tool, not a necessity. Daily brushing and weekly soaking handle the essentials. But if you’ve noticed persistent odour, visible buildup that scrubbing doesn’t shift, or if your guard has complex geometry (hybrid materials, textured inner surfaces), an ultrasonic cleaner can reach what manual cleaning misses. It doesn’t replace rinsing and brushing — it supplements them. These range from $25–40 and last for years.
Storage and Drying
Where you put the guard after cleaning matters as much as the cleaning itself.
Let it air-dry completely before storing. A damp guard sealed in a case is a humid, enclosed space — ideal for bacterial and fungal growth. After your morning cleaning, set the guard on a clean surface (a paper towel works) and let it dry fully before putting it in its case. This usually takes 30–60 minutes. If you leave for work before it’s dry, leave the case open on the bathroom counter and close it when you get home.
Use a ventilated case. Most guards come with a storage case. The good ones have ventilation holes. If yours doesn’t, either leave the lid slightly cracked or poke a few small holes in it. A sealed, unventilated case traps moisture and accelerates the growth of everything you just cleaned off.
Keep it away from heat. Don’t leave the case on a windowsill in direct sunlight, near a radiator, on a car dashboard, or anywhere temperatures rise above room level. Heat warps thermoplastic and dual-laminate guards. Hard acrylic is more heat-resistant but not immune.
Keep it away from pets. Dogs are attracted to the saliva residue on night guards and will chew through one in minutes. This is more common than you’d expect — dentists and dental lab customer service teams have heard this story thousands of times. Store it somewhere a curious pet can’t reach.
If You Have Hard Water
Hard water — water with high mineral content, typically calcium and magnesium — accelerates buildup on night guards. If your taps leave white deposits on faucets and showerheads, the same minerals are depositing on your guard. You’ll notice a white or chalky film developing faster than it would with soft water.
Two adjustments help. First, increase the weekly deep clean to twice a week. Second, use distilled or filtered water for your soaking solution rather than tap water. The soak is supposed to dissolve deposits, not add more. For daily rinsing, tap water is fine — the brush does the real work. But the soak benefits from cleaner water.
If mineral buildup has already hardened on the guard, try the standard diluted vinegar soak (equal parts vinegar and cool water) for 30 minutes, then scrub with a soft brush. A cleaning tablet soak is another option. If deposits don’t come off with gentle methods, the guard’s surface may be permanently roughened — which means bacteria have more places to hide, and it may be time for a replacement. Don’t escalate to aggressive chemical treatments on an expensive custom guard without checking with the manufacturer or your dentist first.
When to Replace Your Night Guard
Even with perfect cleaning, night guards wear out. The material degrades from nightly grinding, the fit loosens as the guard compresses, and microscopic surface damage accumulates over time. Replacement frequency depends on the material, how aggressively you grind, how well you maintain it, and what the manufacturer recommends.
OTC boil-and-bite guards — roughly every 3–6 months. These use softer materials that compress and lose their shape faster. If it feels noticeably looser than when you first molded it, or if you can see bite-through marks, it’s done.
Custom lab guards (soft) — roughly every 6–12 months. Better material quality extends life, but soft guards still compress under sustained grinding.
Custom lab guards (hybrid or hard) — roughly every 1–3 years, though the range is wide. Heavy grinders may wear through one in under a year. Light grinders sometimes get 3+ years from a single guard. Inspect it regularly and ask your dentist to check the fit at your appointments.
Signs it’s time: visible holes, cracks, or bite-through marks; a fit that’s noticeably looser than when new; persistent odour that doesn’t resolve with deep cleaning; visible discolouration that won’t soak off; rough or pitted surfaces that feel different under your tongue.
For the full comparison of guard types and their expected lifespan, see: Best Night Guard for Teeth Grinding (2026). For cost considerations when replacing, see: Night Guard Cost: Dentist vs Online vs OTC.
Frequently Asked Questions
Can I use toothpaste to clean my night guard?
Generally, no. Most toothpastes contain abrasives that can scratch guard surfaces, creating micro-grooves where bacteria settle. Some manufacturers do permit non-abrasive, non-whitening toothpastes on their specific products — check your care instructions. When in doubt, use a soft toothbrush with water only, or add a drop of unscented liquid dish soap.
How often should I deep-clean my night guard?
Once a week is sufficient for most people. If you have hard water, live in a humid climate, or notice buildup developing faster than weekly cleaning handles, increase to twice a week. Daily cleaning (rinse + brush) should happen every morning without exception.
Is it safe to soak a night guard in mouthwash?
Alcohol-based mouthwash (Listerine, etc.) can degrade certain guard materials over time and dry out the plastic. If you want an antimicrobial soak, use 3% hydrogen peroxide or a retainer cleaning tablet instead. These are formulated for dental appliances; mouthwash is formulated for tissue.
My night guard smells bad even after cleaning. What should I do?
Persistent odour usually means bacteria have embedded in surface damage that routine cleaning can’t reach. Try a 30-minute soak in equal parts white vinegar and cool water, followed by a thorough scrub. An ultrasonic cleaner can sometimes rescue a guard at this stage by reaching crevices manual cleaning misses. If the smell returns within a day or two despite these methods, the guard material is likely degraded beyond recovery and needs replacing.
Can I put my night guard in the dishwasher?
No. Dishwasher temperatures (typically 50–75°C / 120–170°F) will warp thermoplastic and dual-laminate guards. Even hard acrylic guards aren’t rated for dishwasher heat. Cool or lukewarm water only, every time.
Should I clean the case too?
Yes — and most people forget. Wash the case weekly with warm water and a drop of dish soap. Let it air-dry completely before putting the guard back in. A clean guard in a dirty case picks up bacteria from the case surface overnight. If the case develops a persistent odour or visible mould, replace it.
Sources & References
- American Dental Association — Mouthguards
- Retainer Brite (Dentsply Sirona) — How to Use / Product Instructions
- Glass RT et al. — Microbiological contamination of dental devices (Journal of the Tennessee Dental Association, 2010)
- CDC — Infection Control for Dental Devices
Related Guides
- Best Night Guard for Teeth Grinding (2026)
- Best Custom Night Guard (Online Labs Compared)
- Best OTC Night Guard
- Night Guard Cost: Dentist vs Online vs OTC
- Custom vs OTC Night Guard: Is Custom Worth It?
- Signs You Need a Night Guard
- Do Night Guards Work? What the Evidence Says
- Night Guard vs Mouth Guard: What’s the Difference?