Author: verdictlab@gmail.com

  • How to Clean a Night Guard (Without Ruining It)

    How to Clean a Night Guard (Without Ruining It)

    Editorial transparency: VerdictLab earns a commission when you purchase through our links — this never influences our ratings or recommendations. As an Amazon Associate I earn from qualifying purchases. Full disclosure.

    Last updated: August 2026  |  By: VerdictLab Editorial Team

    A night guard that isn’t cleaned properly becomes a petri dish you put in your mouth every night. Warm, moist, enclosed — it’s an ideal environment for bacteria, fungus, and calcium buildup. The guard itself may still be structurally fine, but the biofilm growing on it introduces problems you bought the guard to avoid: bad breath, gum irritation, and an unpleasant taste that makes you not want to wear it.

    The good news is that cleaning a night guard takes about 30 seconds in the morning and a few minutes once a week. The routine is simple. The mistakes people make are simpler — and avoidable once you know what damages the material.

    One important caveat upfront: cleaning instructions vary by material and brand. If your night guard came with specific care instructions from the manufacturer, follow those first. The guidance below covers general best practices that apply to most guards.


    Daily Cleaning (Every Morning)

    Do this immediately after removing the guard, before the saliva dries and hardens into a film. It takes 30 seconds.

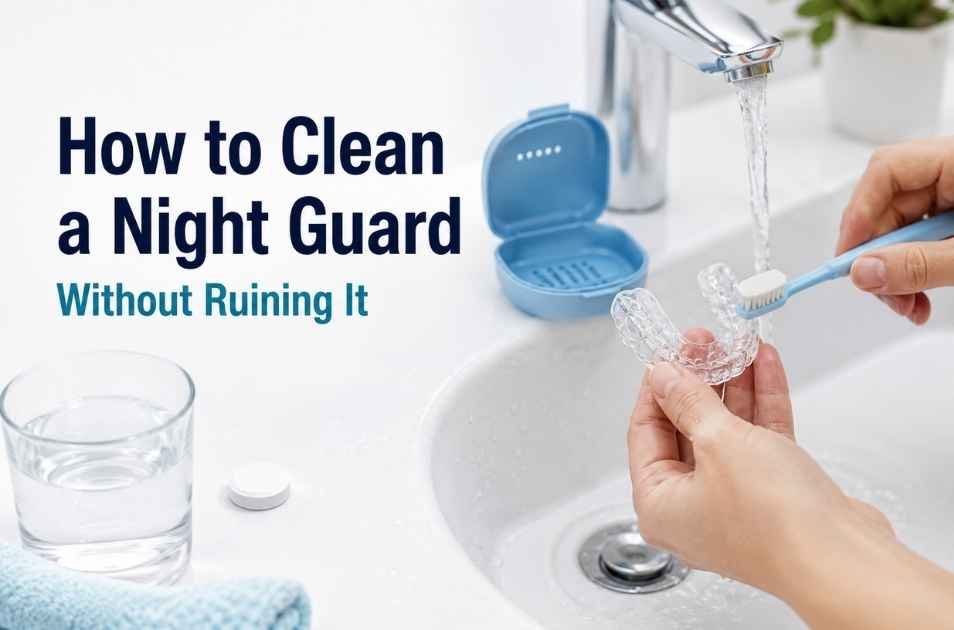
    Rinse the guard under cool or lukewarm running water. While the water runs over it, use a soft-bristled toothbrush — not the one you brush your teeth with, a separate one — to gently scrub all surfaces. The outside, the inside that contacts your teeth, and the biting surface. Unless your guard’s manufacturer specifically says toothpaste is safe, skip it — abrasive or whitening toothpastes can scratch some guard materials. Water and the brush are enough. A drop of unscented liquid dish soap is fine if you want a cleaning agent.

    That’s it. Rinse, brush, set it somewhere to dry. The mechanical action of the bristles removes the overnight biofilm before it has a chance to mineralise. If you skip this step regularly, you’ll notice a white or yellowish buildup within a few weeks that becomes increasingly difficult to remove.

    Some people rinse with cold water only, no brush. This is better than nothing but not as effective — water alone doesn’t dislodge the sticky bacterial film the way bristles do. The brush matters more than anything you add to the water.


    Weekly Deep Clean

    Once a week, give the guard a more thorough soak. Two approaches work well.

    Option A: White vinegar soak

    Mix equal parts white vinegar and cool water in a cup. Submerge the guard and let it sit for 15–30 minutes. The mild acidity helps dissolve mineral deposits and reduce surface bacteria. After soaking, rinse thoroughly under running water and scrub with your dedicated soft toothbrush to remove any loosened residue. Let it air-dry completely before storing. If your guard’s care instructions advise against vinegar, use a cleaning tablet instead.

    Vinegar is cheap, available everywhere, and works for most guard materials. The guard may taste faintly acidic for the first wear after soaking — a thorough rinse before bed handles that.

    Option B: Cleaning tablets

    Drop a denture or retainer cleaning tablet into a glass of cool water, add the guard, and follow the timing on the tablet packaging (usually 15–20 minutes). These tablets — like Retainer Brite — are formulated to dissolve biofilm and calcium deposits on dental appliances. Rinse and brush after soaking.

    Cleaning tablets are a convenient option for deeper cleaning and odour control, especially when buildup develops faster than brushing alone can manage. They cost roughly $0.20–0.25 per tablet depending on pack size. Whether that premium over free vinegar is worth it depends on how much buildup your guard accumulates — some people’s saliva mineralises faster than others.

    Option C: Hydrogen peroxide

    Some manufacturers allow short soaks in standard 3% hydrogen peroxide (the drugstore concentration) as a disinfecting option. Compatibility and timing vary by material, so check your guard’s care instructions first. When permitted, a 10–15 minute soak followed by a thorough rinse provides antimicrobial action without the acidity of vinegar. Don’t use higher concentrations.

    Pick one method and stay consistent. Weekly soaking prevents the kind of buildup that requires aggressive scrubbing later.


    What Not to Use on a Night Guard

    Night guard materials — whether hard acrylic, dual-laminate, or thermoplastic — are more sensitive to heat and chemicals than they look. These are the common mistakes:

    Hot water. This is the number-one killer of boil-and-bite and thermoplastic guards. Hot water softens the material and warps the fit. A guard that’s been through one hot rinse may no longer seat properly on your teeth. Always use cool or lukewarm water. Never put a night guard in the dishwasher, and never clean it with water from a kettle or a hot tap turned all the way up.

    Toothpaste (in most cases). Most toothpastes contain mild abrasives — silica, calcium carbonate, baking soda — designed to scrub enamel clean. Those same abrasives can scratch the surface of a night guard, creating microscopic grooves where bacteria settle. Some manufacturers do allow non-abrasive, non-whitening toothpastes on their specific guards — check your care instructions. When in doubt, use a brush with water only, or add a drop of unscented dish soap.

    Alcohol-based mouthwash. Soaking a guard in Listerine or similar alcohol-based mouthwash degrades certain guard materials over time, particularly softer thermoplastics. The alcohol can also dry out the material, making it more brittle. If you want to soak in something antimicrobial, use the hydrogen peroxide method above or a dedicated retainer cleaning tablet.

    Bleach. Even diluted. Bleach degrades guard material, leaves a residual taste that’s difficult to remove, and can irritate oral tissue. There’s no reason to use it when gentler methods work.

    UV sanitisers (as a replacement for cleaning). Some brands sell UV-C light boxes marketed for retainer and night guard sterilisation. UV can work as a supplementary sanitising step — reducing surface bacteria after a proper clean. But it doesn’t remove the physical biofilm or mineral deposits that harbour bacteria in the first place. If your ultrasonic cleaner or storage case includes a UV feature, there’s no harm in using it as an extra step. Just don’t rely on UV alone and skip the brushing and soaking that do the actual cleaning.


    Cleaning Products Worth Buying

    You don’t need specialised products to keep a night guard clean. A soft toothbrush and cool water handle daily maintenance. But two products can make the weekly routine easier or help when basic cleaning falls short.

    Retainer Brite Cleaning Tablets
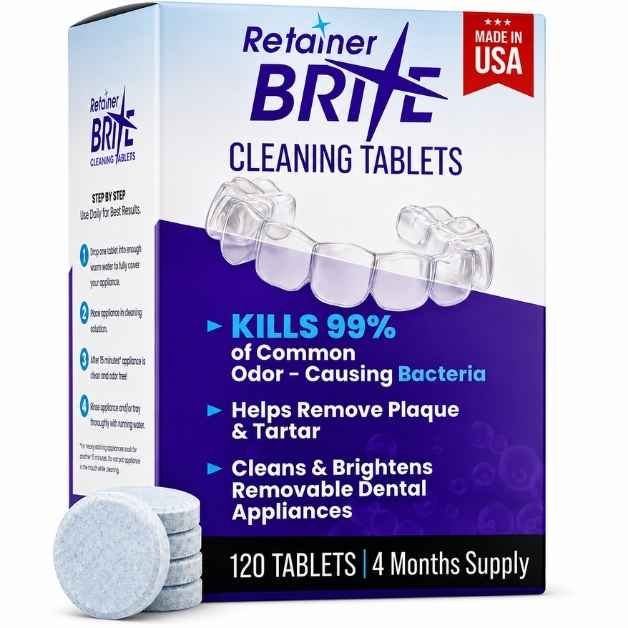
    Retainer Brite cleaning tablets for night guards and retainers

    One of the most widely used cleaning tablets for dental appliances — retainers, night guards, and bruxism appliances. Each tablet fizzes for about 15 minutes, dissolving the kind of protein and mineral buildup that brushing alone leaves behind. One note: Retainer Brite contains potassium persulfate, so avoid it if you have a known persulfate allergy.

    Check Price on Amazon

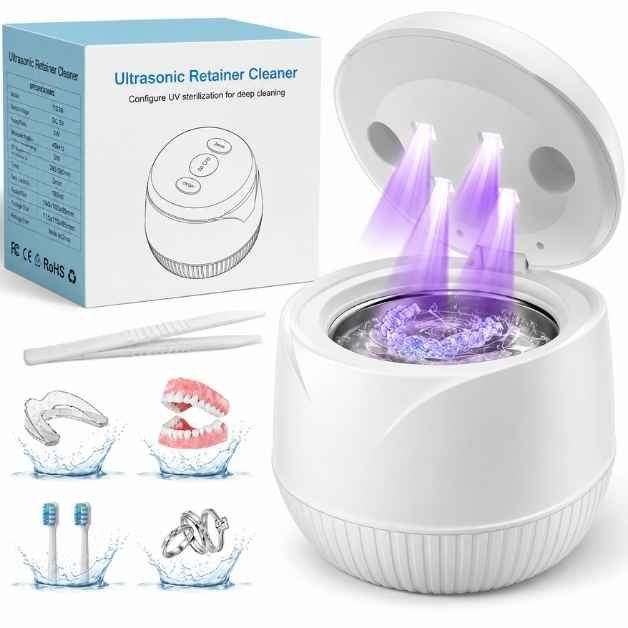
    Ultrasonic Retainer Cleaner

    Ultrasonic retainer and night guard cleaner 200ml

    A small ultrasonic bath that vibrates at 45kHz, creating microscopic cavitation bubbles that reach into crevices a toothbrush can’t access. Fill the 200mL tank with water (add a cleaning tablet for extra effectiveness), drop in the guard, and run the cleaner using one of its preset cycles according to the device instructions.

    An ultrasonic cleaner is an optional convenience tool, not a necessity. Daily brushing and weekly soaking handle the essentials. But if you’ve noticed persistent odour, visible buildup that scrubbing doesn’t shift, or if your guard has complex geometry (hybrid materials, textured inner surfaces), an ultrasonic cleaner can reach what manual cleaning misses. It doesn’t replace rinsing and brushing — it supplements them. These range from $25–40 and last for years.

    Check Price on Amazon


    Storage and Drying

    Where you put the guard after cleaning matters as much as the cleaning itself.

    Let it air-dry completely before storing. A damp guard sealed in a case is a humid, enclosed space — ideal for bacterial and fungal growth. After your morning cleaning, set the guard on a clean surface (a paper towel works) and let it dry fully before putting it in its case. This usually takes 30–60 minutes. If you leave for work before it’s dry, leave the case open on the bathroom counter and close it when you get home.

    Use a ventilated case. Most guards come with a storage case. The good ones have ventilation holes. If yours doesn’t, either leave the lid slightly cracked or poke a few small holes in it. A sealed, unventilated case traps moisture and accelerates the growth of everything you just cleaned off.

    Keep it away from heat. Don’t leave the case on a windowsill in direct sunlight, near a radiator, on a car dashboard, or anywhere temperatures rise above room level. Heat warps thermoplastic and dual-laminate guards. Hard acrylic is more heat-resistant but not immune.

    Keep it away from pets. Dogs are attracted to the saliva residue on night guards and will chew through one in minutes. This is more common than you’d expect — dentists and dental lab customer service teams have heard this story thousands of times. Store it somewhere a curious pet can’t reach.


    If You Have Hard Water

    Hard water — water with high mineral content, typically calcium and magnesium — accelerates buildup on night guards. If your taps leave white deposits on faucets and showerheads, the same minerals are depositing on your guard. You’ll notice a white or chalky film developing faster than it would with soft water.

    Two adjustments help. First, increase the weekly deep clean to twice a week. Second, use distilled or filtered water for your soaking solution rather than tap water. The soak is supposed to dissolve deposits, not add more. For daily rinsing, tap water is fine — the brush does the real work. But the soak benefits from cleaner water.

    If mineral buildup has already hardened on the guard, try the standard diluted vinegar soak (equal parts vinegar and cool water) for 30 minutes, then scrub with a soft brush. A cleaning tablet soak is another option. If deposits don’t come off with gentle methods, the guard’s surface may be permanently roughened — which means bacteria have more places to hide, and it may be time for a replacement. Don’t escalate to aggressive chemical treatments on an expensive custom guard without checking with the manufacturer or your dentist first.


    When to Replace Your Night Guard

    Even with perfect cleaning, night guards wear out. The material degrades from nightly grinding, the fit loosens as the guard compresses, and microscopic surface damage accumulates over time. Replacement frequency depends on the material, how aggressively you grind, how well you maintain it, and what the manufacturer recommends.

    OTC boil-and-bite guards — roughly every 3–6 months. These use softer materials that compress and lose their shape faster. If it feels noticeably looser than when you first molded it, or if you can see bite-through marks, it’s done.

    Custom lab guards (soft) — roughly every 6–12 months. Better material quality extends life, but soft guards still compress under sustained grinding.

    Custom lab guards (hybrid or hard) — roughly every 1–3 years, though the range is wide. Heavy grinders may wear through one in under a year. Light grinders sometimes get 3+ years from a single guard. Inspect it regularly and ask your dentist to check the fit at your appointments.

    Signs it’s time: visible holes, cracks, or bite-through marks; a fit that’s noticeably looser than when new; persistent odour that doesn’t resolve with deep cleaning; visible discolouration that won’t soak off; rough or pitted surfaces that feel different under your tongue.

    For the full comparison of guard types and their expected lifespan, see: Best Night Guard for Teeth Grinding (2026). For cost considerations when replacing, see: Night Guard Cost: Dentist vs Online vs OTC.


    Frequently Asked Questions

    Can I use toothpaste to clean my night guard?

    Generally, no. Most toothpastes contain abrasives that can scratch guard surfaces, creating micro-grooves where bacteria settle. Some manufacturers do permit non-abrasive, non-whitening toothpastes on their specific products — check your care instructions. When in doubt, use a soft toothbrush with water only, or add a drop of unscented liquid dish soap.

    How often should I deep-clean my night guard?

    Once a week is sufficient for most people. If you have hard water, live in a humid climate, or notice buildup developing faster than weekly cleaning handles, increase to twice a week. Daily cleaning (rinse + brush) should happen every morning without exception.

    Is it safe to soak a night guard in mouthwash?

    Alcohol-based mouthwash (Listerine, etc.) can degrade certain guard materials over time and dry out the plastic. If you want an antimicrobial soak, use 3% hydrogen peroxide or a retainer cleaning tablet instead. These are formulated for dental appliances; mouthwash is formulated for tissue.

    My night guard smells bad even after cleaning. What should I do?

    Persistent odour usually means bacteria have embedded in surface damage that routine cleaning can’t reach. Try a 30-minute soak in equal parts white vinegar and cool water, followed by a thorough scrub. An ultrasonic cleaner can sometimes rescue a guard at this stage by reaching crevices manual cleaning misses. If the smell returns within a day or two despite these methods, the guard material is likely degraded beyond recovery and needs replacing.

    Can I put my night guard in the dishwasher?

    No. Dishwasher temperatures (typically 50–75°C / 120–170°F) will warp thermoplastic and dual-laminate guards. Even hard acrylic guards aren’t rated for dishwasher heat. Cool or lukewarm water only, every time.

    Should I clean the case too?

    Yes — and most people forget. Wash the case weekly with warm water and a drop of dish soap. Let it air-dry completely before putting the guard back in. A clean guard in a dirty case picks up bacteria from the case surface overnight. If the case develops a persistent odour or visible mould, replace it.


    Beyond Brushing Oral Health Guide Book
    Get the Free Oral Health Guide
    Download Beyond Brushing — a practical 30,000+ word guide to healthier teeth, gums, and fresher breath after 45.
    Marketing email consent
    • No spam • Unsubscribe anytime


    Sources & References


  • 9 Signs You May Need a Night Guard

    9 Signs You May Need a Night Guard

    Last updated: August 2026  |  By: VerdictLab Editorial Team

    Note: This article is for informational purposes. If you suspect you’re grinding your teeth, see your dentist for a proper evaluation. They can confirm bruxism in minutes by checking your tooth surfaces and jaw muscles — and rule out other conditions that produce similar symptoms.

    Most people who grind their teeth have no idea they’re doing it. Bruxism happens during sleep, which means you’re unconscious for the entire performance. The grinding itself doesn’t wake you up. There’s no alarm. You just accumulate damage — to your enamel, your jaw muscles, your sleep quality — night after night, often for years, until something finally hurts enough to send you to a dentist.

    By that point, the wear is usually visible on your teeth. Enamel doesn’t grow back.

    The earlier you catch it, the less damage accumulates. These are the signs dentists and sleep specialists use to identify bruxism — roughly ordered from the most obvious to the ones people tend to dismiss or attribute to something else.


    1. Your partner hears it

    The earliest warning often comes from someone who shares your bed. Grinding produces an audible sound — a rhythmic scraping or clicking that’s distinct from snoring. Bed partners frequently describe it as unsettling, like someone slowly chewing on gravel.

    If someone has told you that you grind your teeth at night, take it seriously. Teeth grinding has a specific, recognisable sound, and a partner reporting it is a strong reason to get evaluated. Your dentist can then examine your teeth and jaw muscles to confirm whether bruxism is actually causing damage.

    If you sleep alone, this signal doesn’t exist for you. Which makes the remaining signs more important.


    2. Morning jaw pain or stiffness

    Your jaw muscles — the masseters, specifically — are among the strongest muscles in your body relative to their size. When they clench and grind for hours during sleep, they fatigue the way any overworked muscle does. The result is soreness, stiffness, or a tired feeling in the jaw when you wake up. It usually fades within an hour or two of being awake, which is why many people dismiss it as “sleeping funny.”

    The pattern matters more than any single morning. Occasional jaw stiffness could be from sleeping with your face pressed into a pillow. Jaw stiffness most mornings, especially if it’s bilateral (both sides), points strongly toward bruxism.


    3. Morning headaches

    A dull, bilateral headache centred at the temples when you wake up is one of the most common bruxism symptoms — and one of the most frequently misattributed. People blame dehydration, poor sleep, stress, caffeine withdrawal, or their pillow before they consider their jaw.

    The temporalis muscle — the large fan-shaped muscle at the side of your head — contracts during grinding. Hours of sustained contraction can produce a tension-type headache localised at the temples, often described as a pressing, band-like ache that sometimes wraps around the forehead. Morning headaches have many possible causes, though, so this sign alone doesn’t confirm grinding.

    If you’re waking up with frequent headaches, see your doctor to rule out other conditions. If nothing else explains them, mention it to your dentist — bruxism is worth checking for, especially if other signs on this list are present too.


    4. Worn, flattened, or chipped teeth

    This is the sign your dentist spots — usually before you notice it yourself. Bruxism wears down the biting surfaces of teeth over time, producing a characteristic flattened appearance. Canines lose their points. Molars lose their cusps. The edges of front teeth develop tiny chips or become translucent where enamel has thinned.

    Enamel is the hardest substance in the human body, harder than bone. But it’s not indestructible. Tooth-on-tooth grinding wears it down over time, and so can acid erosion, aggressive brushing, and diet. What makes bruxism-related wear distinctive is the pattern — flattened biting surfaces, evenly worn cusps, damage that your dentist recognises as mechanical rather than chemical.

    Run your tongue across your lower front teeth. If the biting edges feel flat or uneven — or if you can see that they’re shorter than they used to be — it’s worth mentioning to your dentist. They can determine whether the wear pattern is consistent with grinding or caused by something else.


    5. Tooth sensitivity that your dentist can’t explain

    Grinding thins enamel. Thinner enamel means less insulation between the nerve inside the tooth and the temperature of what you’re eating. The result is sensitivity to hot and cold that develops gradually, across multiple teeth, without any cavities to explain it.

    Sensitivity from a cavity is usually localised — one tooth, one spot. Sensitivity from bruxism tends to be broader — several teeth, both sides, especially the molars and premolars where grinding force concentrates. If your dentist says “your teeth look fine, no cavities” but you’re wincing at cold water, grinding-related enamel thinning is a likely explanation.


    6. Jaw clicking, popping, or limited opening

    These are TMJ (temporomandibular joint) symptoms. The jaw joint sits just in front of your ear, and bruxism can contribute to problems there — fatiguing the muscles that control jaw movement and adding stress to the joint and its surrounding structures.

    A click or pop when you open your mouth wide is actually common and often harmless on its own. Plenty of people have a clicking jaw that’s been there for years and causes no problems. But clicking accompanied by pain, a jaw that occasionally “locks,” or a gradual reduction in how wide you can open your mouth is worth getting evaluated. TMJ disorders are multifactorial — grinding can coexist with or aggravate them, even if it isn’t the sole cause.

    For more on the TMJ connection, see: Best Night Guard for TMJ.


    7. Earaches with no infection

    The TMJ sits millimetres from the ear canal. When the joint is inflamed from grinding, the pain radiates into the ear in a way that feels indistinguishable from an ear infection — a deep, dull ache, sometimes accompanied by a feeling of fullness or muffled hearing.

    People visit their GP or ENT for this, get told their ears are clear, and leave confused. Unexplained ear pain has many possible causes, but jaw-muscle tension and TMJ problems are among the more common ones — and they’re frequently missed in general practice. If you’ve had persistent ear pain investigated and found no infection, it’s worth mentioning to your dentist. They can check whether your jaw muscles or joint might be contributing.


    8. Tongue indentations or cheek damage

    Check the sides of your tongue in a mirror. If you see scalloped indentations along the edges — a wavy pattern that matches the shape of your teeth — your tongue is being pressed against your teeth during sleep. This happens during clenching, which is a form of bruxism that doesn’t involve lateral grinding movement but does involve sustained pressure.

    Similarly, check the inside of your cheeks. Chewed-up tissue, white ridges along the bite line, or small sores on the inner cheek surface can indicate that you’re biting or pressing your cheeks against your teeth during sleep. Neither of these on its own confirms bruxism, but combined with jaw pain or headaches, the picture becomes clear.


    9. Disrupted sleep you can’t explain

    This one is subtle and easy to miss. Bruxism doesn’t wake you up fully — you don’t bolt upright and think “I was grinding.” But sleep bruxism is associated with brief arousals during the night, and some research suggests it may reduce overall sleep quality even when you’re not consciously aware of it. The result can look like waking up tired despite getting 7–8 hours, feeling unrefreshed, or waking multiple times without a clear reason.

    If you’ve addressed the obvious sleep disruptors — caffeine timing, screen exposure, room temperature, consistent schedule — and you’re still sleeping poorly, bruxism is worth investigating. A sleep study can confirm it definitively, but a dental exam is the faster and cheaper first step.


    What to do if you recognise these signs

    See your dentist first. They can confirm bruxism in a single appointment by examining your tooth wear patterns, checking your jaw muscles for tenderness, and looking at the soft tissue inside your mouth. This is faster, cheaper, and more accessible than a sleep study — though your dentist may refer you for one if they suspect a sleep disorder is contributing.

    Don’t self-diagnose from a list on the internet. Every sign above can also be caused by something else. Headaches have dozens of causes. Jaw pain can be muscular. Tooth sensitivity can be from acid erosion, not grinding. The purpose of this list is to prompt a conversation with your dentist, not to replace one.

    A night guard is the most common next step. If your dentist confirms that grinding is causing or threatening damage, a night guard protects the teeth by absorbing the force instead of your enamel. Some people also find that a properly fitted guard helps with jaw soreness and morning headaches, though results vary by individual. It doesn’t stop the underlying bruxism — you’ll still grind — but the guard takes the damage instead of your teeth. Meanwhile, you and your dentist can work on contributing factors like stress, medications, caffeine, alcohol, or sleep-related issues.

    For the full breakdown of guard types and how to choose, see: Best Night Guard for Teeth Grinding (2026). For the evidence on effectiveness, see: Do Night Guards Work?


    How many signs before you should worry?

    One sign alone — particularly a partner hearing you grind — is enough reason to bring it up with your dentist. The more signs you recognise from this list, the more reason to schedule that appointment sooner rather than later. No checklist confirms a diagnosis on its own, but jaw pain plus headaches, or worn teeth plus sensitivity, are the kind of combinations that make a dentist reach for the examination gloves quickly.

    The people who benefit most from early detection are the ones who catch it before significant enamel loss. A night guard at the “jaw pain and headaches” stage prevents you from reaching the “cracked molar and $1,200 crown” stage. Dental work to repair grinding damage is expensive and irreversible. A night guard costs $12–200 depending on type. The math is simple.

    For causes and remedies beyond a night guard, see: How to Stop Grinding Teeth at Night.


    Frequently Asked Questions

    Can you grind your teeth without knowing it?

    Yes — and most people do. Sleep bruxism is unconscious by definition. You don’t feel it happening, and it rarely wakes you up. The signs are all indirect: jaw pain, headaches, worn teeth, a partner’s report. Many people grind for years before a dentist identifies the damage at a routine check-up.

    Is teeth grinding the same as clenching?

    They’re both classified as bruxism but involve different jaw movements. Grinding is lateral — your jaw moves side to side, scraping upper and lower teeth against each other. Clenching is vertical — your jaw presses upper and lower teeth together without lateral movement. Both damage teeth and fatigue jaw muscles. Some people do both. A night guard protects against either form.

    Can stress cause teeth grinding?

    Stress is the most commonly cited trigger. Anxiety, work pressure, life changes, and emotional tension all correlate with increased bruxism frequency and intensity. But stress isn’t the only factor — medications (particularly SSRIs), sleep disorders, alcohol, caffeine, and smoking are all associated with increased bruxism. Addressing stress alone may reduce grinding but often doesn’t eliminate it entirely. A night guard provides protection regardless of the cause. For the full picture, see: How to Stop Grinding Teeth at Night.

    Should I go to my dentist or my doctor?

    Start with your dentist. They can confirm bruxism faster than a GP because they’re looking directly at the evidence — your tooth surfaces, jaw muscles, and oral tissue. A GP may refer you to a dentist anyway. If your dentist suspects a sleep disorder (like sleep apnea) is contributing to the grinding, they’ll refer you to a sleep specialist for further evaluation.

    At what point is grinding “bad enough” for a night guard?

    Whether you need a night guard depends on what your dentist finds — the severity of the grinding, any existing damage, your symptoms, and your risk factors. Not everyone with mild bruxism needs a guard immediately. But when grinding is causing visible wear, cracking teeth, or producing persistent jaw symptoms, a guard is the most straightforward way to stop the damage from compounding. Light grinders typically do well with a soft or thin guard. Moderate grinders with a hybrid. Heavy grinders with a hard guard. The cost of even a premium custom guard ($100–200 online) is a fraction of the dental work required to repair what grinding breaks. For guard options by severity, see: Best Night Guard for Teeth Grinding (2026).


    Beyond Brushing Oral Health Guide Book
    Get the Free Oral Health Guide
    Download Beyond Brushing — a practical 30,000+ word guide to healthier teeth, gums, and fresher breath after 45.
    Marketing email consent
    • No spam • Unsubscribe anytime


  • Night Guard vs Mouth Guard: What’s the Difference?

    Night Guard vs Mouth Guard: What’s the Difference?
    Last updated: August 2026  |  By: VerdictLab Editorial Team

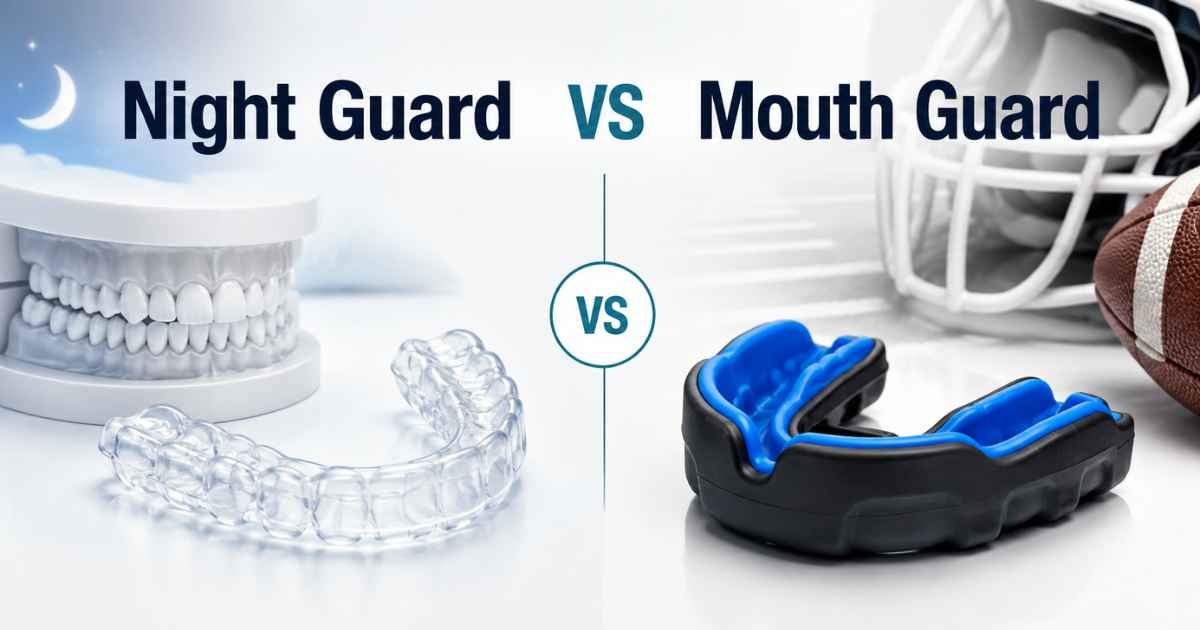
    They look almost identical sitting in a case. Both are made of plastic or rubber. Both go over your teeth. Both come with the vague label “mouth guard” on Amazon listings. But a night guard and a sports mouth guard are designed for fundamentally different problems — and using the wrong one doesn’t just fail to help. It can actively make things worse.

    A night guard absorbs and distributes the slow, sustained grinding force of bruxism. A sports mouth guard absorbs sudden impact. The materials, thickness, fit, and function are different in ways that matter. Here’s the breakdown.


    Quick Comparison Table

    Feature Night Guard (Dental Guard) Sports Mouth Guard
    Purpose Protects teeth from grinding/clenching during sleep Protects teeth, jaw, and soft tissue from impact during sports
    Force Type Slow, sustained pressure (grinding) Sudden impact (collision, fall, blow)
    Material Hard acrylic, dual-laminate, or thermoplastic Soft, shock-absorbing EVA or silicone
    Thickness 1–3mm (thin enough to sleep in) 3–6mm (bulky for maximum shock absorption)
    Fit Precise — custom-molded or boil-and-bite Looser — stock, boil-and-bite, or semi-custom
    Covers Usually upper teeth only Usually upper teeth only (some cover both)
    Worn When During sleep (or daytime for clenching) During sports activity
    Price Range $12–$200 (OTC to custom lab) $2–$50 (stock to boil-and-bite)
    Breathing Designed for nose breathing during sleep Designed for mouth breathing during exertion


    What Is a Night Guard?

    A night guard — also called a dental guard, occlusal splint, or bite guard — is a device worn over the upper teeth (sometimes lower) during sleep to prevent damage from bruxism. Bruxism is the medical term for grinding or clenching your teeth, and it affects an estimated 10–25% of adults. Most people who grind don’t know they’re doing it until a dentist spots the wear patterns or a partner hears it.

    The guard creates a physical barrier between upper and lower teeth. When you grind, the teeth press against the guard material instead of against each other. This prevents enamel wear, tooth fractures, and the jaw muscle fatigue that causes morning headaches and TMJ pain.

    Night guards come in three material categories, each suited to a different severity of grinding:

    Soft guards are made from flexible EVA or silicone. They’re the most comfortable to wear but the least durable — light grinders chew through them in 3–6 months. Best for clenching (pressing teeth together without lateral movement) rather than grinding (lateral movement).

    Hard guards are made from rigid acrylic or copolyester. They last the longest — often 1–3 years with proper care — and provide the most protection for severe grinders. The trade-off is a longer adjustment period. They feel noticeably foreign in your mouth for the first week.

    Dual-laminate (hybrid) guards combine a soft inner layer (for comfort against the teeth) with a hard outer layer (for durability against grinding). This is the most popular category for moderate-to-heavy grinders — the best balance of comfort and protection.

    For the full comparison of current night guard options, see: Best Night Guard for Teeth Grinding (2026).


    What Is a Sports Mouth Guard?

    A sports mouth guard is a thick, shock-absorbing device worn during athletic activity to protect teeth, gums, lips, and jaw from impact injuries. Contact sports (football, hockey, boxing, MMA, rugby, lacrosse) essentially require them. Non-contact sports with collision risk (basketball, soccer, baseball, skateboarding) strongly benefit from them.

    Sports guards are designed around a fundamentally different physics problem. A night guard handles slow, sustained force — the steady pressure of jaw muscles clenching for hours. A sports mouth guard handles sudden, high-energy impact — an elbow to the face, a ball strike, a fall onto concrete. These are different force profiles requiring different material responses.

    Sports guards use soft, thick EVA (ethylene-vinyl acetate) or similar shock-absorbing materials, typically 3–6mm thick. The bulk is the point — the material needs enough volume to absorb and distribute a sudden impact across the entire dental arch rather than concentrating it on a single tooth. They also extend further along the gums and sometimes include lip protection.

    Three types exist:

    Stock mouth guards are pre-formed, one-size-fits-all. They’re cheap ($2–10), available at any sporting goods store, and fit poorly. Better than nothing, but barely. Most athletes find them uncomfortable enough that they stop wearing them.

    Boil-and-bite guards soften in hot water, then mold to your teeth when you bite down. These are the standard for recreational athletes — $10–30, available everywhere, and provide a reasonable fit. Brands like Shock Doctor and Under Armour dominate this category.

    Custom sports guards are made by a dentist from an impression of your teeth. The fit is precise, the protection is superior, and they cost $200–500. Professional and serious competitive athletes typically use custom guards.


    5 Key Differences That Actually Matter

    1. Material hardness

    This is the most important distinction. Night guards — especially for moderate-to-severe grinding — use hard or dual-laminate materials that resist the lateral abrasion of grinding. A soft material would compress and deform under sustained grinding pressure, losing its shape within weeks and potentially encouraging more clenching (your jaw muscles detect the soft material and bite harder).

    Sports mouth guards use soft, flexible materials that compress on impact to absorb shock. A hard night guard used during sports would transmit impact force directly to the teeth instead of absorbing it — the opposite of what you want.

    2. Thickness and profile

    Night guards range from 1mm (ultra-thin daytime guards) to 3mm (heavy grinder protection). They’re designed to be thin enough that you can sleep comfortably with one in your mouth for 7–8 hours. Bulky material keeps you awake.

    Sports guards range from 3mm to 6mm. The extra thickness provides the shock-absorption volume needed for impact protection. You wouldn’t sleep in one — and you shouldn’t try. The bulk interferes with breathing during sleep and can worsen jaw positioning.

    3. Fit precision

    Night guards require a precise fit because they’re worn for extended periods and need to maintain proper jaw alignment. A poorly fitting night guard can shift teeth over time, alter your bite, or cause TMJ symptoms rather than relieve them. Custom night guards (from a dental lab or dentist) are molded to an exact impression of your teeth. Even OTC night guards use boil-and-bite molding for a semi-custom fit.

    Sports guards need a secure fit (so they don’t fall out during play), but millimetre precision is less critical. They’re worn for 1–3 hours of activity, not 8 hours of sleep. A slightly loose sports guard is annoying but not harmful.

    4. Breathing design

    Night guards are designed for nose breathing during sleep. They sit close to the teeth without obstructing the airway. Some premium guards (like SOVA) include perforations that allow airflow through the guard itself.

    Sports guards are designed for mouth breathing during exertion. Many include breathing channels or a thinner front section that allows airflow while you’re running, playing, and panting. Wearing a sports guard during sleep can restrict airflow and worsen snoring or sleep apnea symptoms.

    5. Coverage area

    Night guards typically cover just the biting surfaces of the upper teeth. Some cover the lower teeth instead (particularly for anterior bruxism). They don’t extend far along the gums because gum coverage adds bulk without improving grinding protection.

    Sports guards extend further along the gums and may include labial (lip-side) flanges. This wider coverage protects soft tissue from cuts and lacerations during impact — a concern in sports but not during sleep.


    What Happens If You Use the Wrong One

    Using a sports mouth guard for grinding

    This is the more common mistake — and the more harmful one. People buy a cheap sports mouth guard from a sporting goods store, figure “it goes over my teeth, so it should work for grinding,” and wear it to bed.

    Three problems develop:

    The soft material encourages more clenching. Your jaw muscles detect the compressible material and respond by biting harder — the same reflex that makes you chew gum more aggressively than you’d chew nothing. Several dental studies have documented this effect. A soft sports guard can actually increase grinding force rather than reduce it.

    The guard deforms quickly. A material designed to absorb sudden impact can’t handle 8 hours of sustained grinding pressure. The guard loses its shape within days to weeks, creating an uneven biting surface that can shift your jaw alignment.

    The bulk interferes with sleep. A 4–6mm sports guard is significantly thicker than a 1–2mm night guard. It restricts airflow, promotes mouth breathing, and for people with any degree of sleep apnea or snoring, it can measurably worsen breathing during sleep.

    Using a night guard for sports

    Less common but equally problematic. A thin, hard acrylic night guard provides zero shock absorption. An impact that a sports guard would distribute across the entire arch gets concentrated at the point of contact. The night guard can crack, and the fractured pieces become a secondary injury risk inside your mouth. Hard night guards are explicitly labelled “not for use as a sports mouthpiece” for this reason.

    If you need both — protection from grinding at night and protection during sports — you need two separate devices. No single guard does both jobs well.


    Which Do You Need?

    You need a night guard if:

    • You grind or clench your teeth during sleep (your dentist or partner may have told you)
    • You wake up with jaw pain, headaches, or sore teeth
    • Your dentist has noticed worn enamel, flattened tooth surfaces, or cracked teeth
    • You have TMJ symptoms — clicking jaw, limited opening, ear pain
    • You clench during the day when stressed (a daytime guard exists for this)

    See: Signs You Need a Night Guard for a more detailed symptom guide.

    You need a sports mouth guard if:

    • You play contact sports (football, hockey, boxing, rugby, lacrosse, MMA)
    • You play collision-risk sports (basketball, soccer, baseball, skateboarding)
    • Your league or coach requires one
    • You’ve previously chipped or knocked out a tooth during activity

    You might need both if: you grind at night AND play contact sports. Buy a night guard for sleeping and a sports guard for playing. The two devices serve different purposes and should never be used interchangeably.

    If you’re not sure whether you grind, ask your dentist at your next check-up. They can spot the wear patterns in minutes. For more on whether a night guard would actually help your specific situation, see: Do Night Guards Work? What the Evidence Says.


    Frequently Asked Questions

    Can I use a boil-and-bite sports guard as a night guard?

    No. A boil-and-bite sports guard uses soft, thick EVA material designed for impact absorption, not grinding resistance. It will compress under sustained grinding, lose its shape quickly, and may actually increase clenching force because your jaw muscles respond to the soft material by biting harder. Buy a purpose-made night guard instead — even a $12 OTC option is better than a repurposed sports guard.

    My night guard says “not for use as a sports mouthpiece.” Why?

    Because hard acrylic night guards provide zero shock absorption. An impact during sports would transfer directly through the guard to your teeth, and the guard itself can crack and create sharp fragments inside your mouth. Night guards are designed for slow, sustained pressure — not sudden impact.

    Why are night guards so much more expensive than sports guards?

    Material cost and precision. Night guards use higher-grade materials (dental-grade acrylic, thermoplastic polymers) and require a more precise fit because they’re worn for 7–8 hours every night. Custom night guards from dental labs cost $70–200 online and $300–1,000 from a dentist. Sports guards use cheaper EVA and need less precision, so they cost $2–50. For a cost breakdown, see: Night Guard Cost: Dentist vs Online vs OTC.

    Are there guards that work for both grinding and sports?

    Some manufacturers market “dual-purpose” guards, but no single device optimises for both grinding resistance (hard, thin, precise) and shock absorption (soft, thick, cushioning). These are opposite material requirements. A dual-purpose guard compromises on both. You’re better off with two dedicated devices.

    Which type of night guard is best for me?

    That depends on how heavily you grind. Soft guards for light clenching, dual-laminate (hybrid) for moderate grinding, and hard acrylic for severe bruxism. Custom lab guards (like Remi or Encore) provide the best fit. OTC boil-and-bite guards (like DenTek or SOVA) are a reasonable starting point. For the full comparison, see: Best Night Guard for Teeth Grinding (2026). For custom vs OTC specifically, see: Custom vs OTC Night Guard: Is Custom Worth It?

    Can children use night guards?

    Children do grind their teeth — paediatric bruxism is common, especially during ages 6–12 when permanent teeth are coming in. However, OTC adult night guards don’t fit children’s mouths properly. If your child grinds, consult a paediatric dentist first. They may recommend monitoring rather than a guard, since many children naturally outgrow bruxism. If a guard is needed, it should be dentist-fitted to accommodate a growing jaw.


    Beyond Brushing Oral Health Guide Book
    Get the Free Oral Health Guide
    Download Beyond Brushing — a practical 30,000+ word guide to healthier teeth, gums, and fresher breath after 45.
    Marketing email consent
    • No spam • Unsubscribe anytime


    The Bottom Line

    Night guards protect against grinding. Sports mouth guards protect against impact. Same mouth, different problems, different solutions. Using a sports guard for grinding is the more common — and more harmful — mistake, because the soft material can actually increase clenching force and deform under sustained pressure.

    If you grind your teeth, invest in a purpose-made night guard. If you play contact sports, invest in a purpose-made sports guard. If you do both, buy both. There is no effective shortcut.

    For the full comparison of night guards by type, material, and price, see our complete guide to the best night guards of 2026.


  • Waterpik vs Philips Sonicare Water Flosser: Which Is Better?

    Waterpik vs Philips Sonicare Water Flosser: Which Is Better?

    Editorial transparency: VerdictLab earns a commission when you purchase through our links — this never influences our ratings or recommendations. Our editorial picks are based on specifications, clinical evidence, expert opinions, and real user feedback. As an Amazon Associate I earn from qualifying purchases. Full disclosure.

    Last updated: March 2026  |  By: VerdictLab Editorial Team

    Waterpik and Philips Sonicare are the two most trusted names in water flossers — both carry the ADA Seal of Acceptance, both are recommended by dental professionals, and both produce genuinely effective products. So which one should you buy?

    The short answer: they’re built for different priorities. Waterpik delivers more pressure, more tips, and bigger reservoirs. Philips Sonicare delivers quieter operation, a gentler experience, and a more innovative nozzle design. Neither is categorically better. The right choice depends on what matters most to you.

    In real-world use, most users notice the biggest difference not in cleaning performance — but in noise level and ease of daily use.

    Here’s the detailed comparison.

    The Verdict in 30 Seconds

    • Choose Waterpik if you want: maximum pressure range, specialty tips (orthodontic, periodontal, implant), larger reservoirs, or a countertop option
    • Choose Philips Sonicare if you want: the quietest operation, the gentlest low setting, a more compact cordless design, or innovative Quad Stream technology
    • Both carry the ADA Seal of Acceptance
    • Both are clinically effective at reducing plaque and improving gum health
    • Waterpik offers more models across more price points; Sonicare focuses on a smaller, more refined cordless lineup


    Head-to-Head Comparison Table

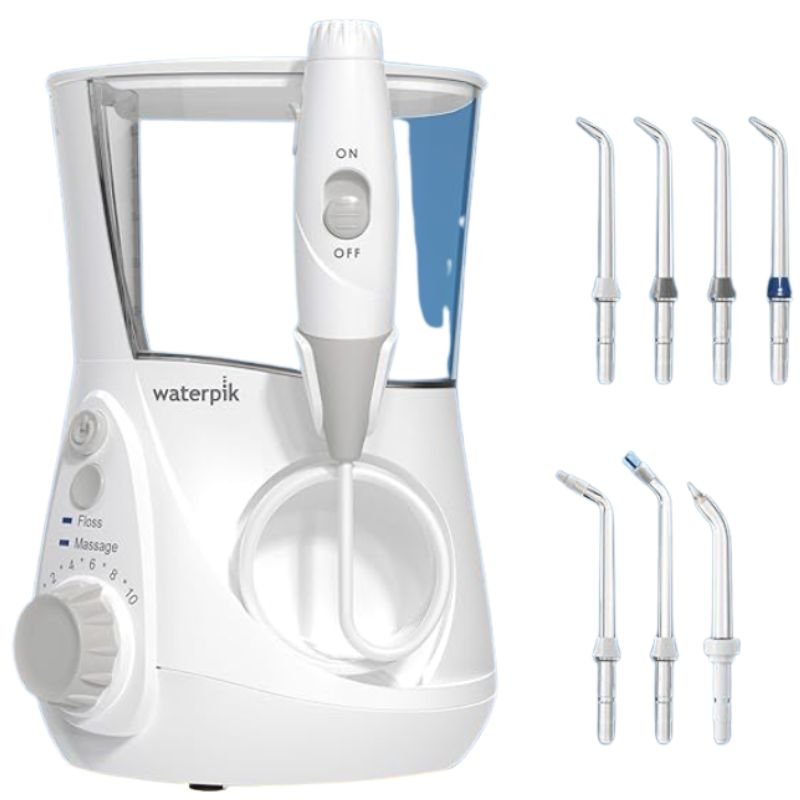
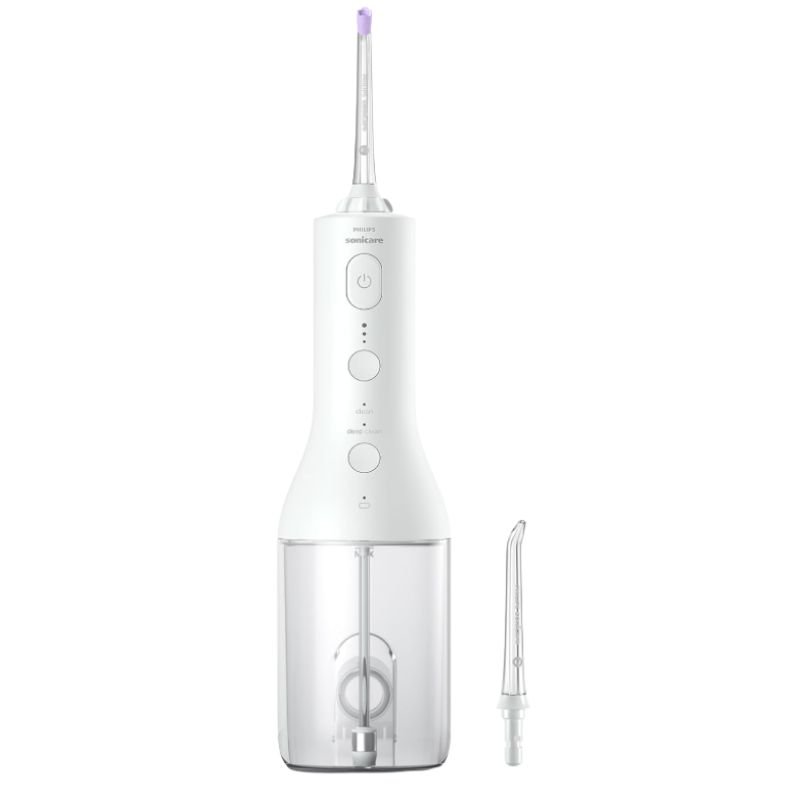
    We’re comparing the flagship models from each brand that most people choose between: the Waterpik Aquarius WP-660 (best-selling countertop), the Waterpik ION WF-12 (hybrid), and the Philips Sonicare Power Flosser 3000 (cordless).

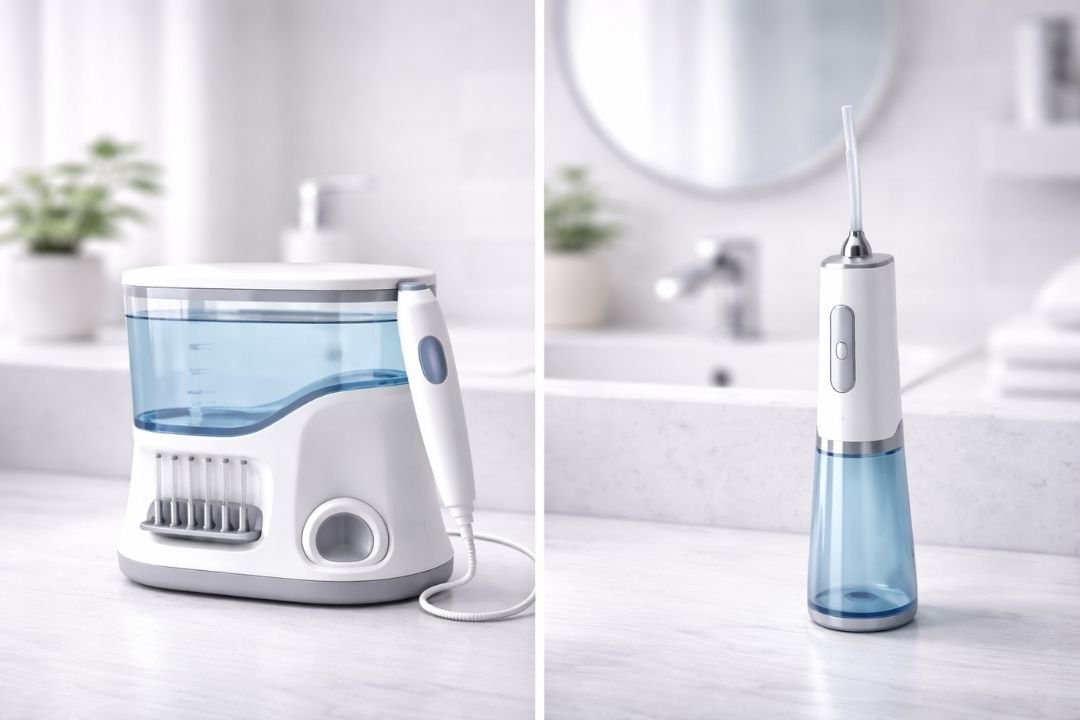
    Feature Waterpik Aquarius (WP-660) Waterpik ION (WF-12) Philips Sonicare 3000
    Price $79.99 $99.99 $79.96
    Type Countertop (corded) Hybrid (cordless wand) Cordless
    Pressure Settings 10 (10–100 PSI) 10 2 modes × 3 levels
    Reservoir 650ml 650ml 250ml (8 oz)
    Included Tips 7 7 2
    Specialty Tips Orthodontic, Pik Pocket, Plaque Seeker, Toothbrush Orthodontic, Pik Pocket, Plaque Seeker, Implant Denture, Tongue Cleaner Quad Stream only
    Noise Level Loud Loud Very quiet
    Battery Corded (N/A) ~4 weeks ~2 weeks
    ADA Seal
    Warranty 3 years 3 years 2 years

    Specifications from manufacturer data. Prices from Amazon at time of publication.


    Pressure and Cleaning Power

    Winner: Waterpik

    The Waterpik Aquarius and ION both deliver 10–100 PSI across 10 numbered settings. That’s the widest range available in any consumer water flosser. Setting 1 is gentle enough for post-surgical tissue. Setting 10 delivers aggressive plaque removal for deep pockets and stubborn debris.

    The Philips Sonicare 3000 offers 2 modes (Clean and Deep Clean) with 3 intensity levels each — 6 effective combinations. Philips doesn’t publish PSI ratings, which makes direct comparison harder. What users consistently report is that the Sonicare’s maximum output feels noticeably less powerful than a Waterpik at settings 7–10. For most daily cleaning, this doesn’t matter. For people who want maximum flushing force — particularly those with deep periodontal pockets or extensive dental work — the Waterpik delivers more.

    The flip side: the Sonicare’s lower maximum pressure is partly by design. The Quad Stream technology disperses force across a wider area, so the cleaning effect is broader even if the concentrated pressure is lower. Different physics, not inferior physics.


    Noise

    Winner: Philips Sonicare (by a wide margin)

    This is the Sonicare’s defining advantage. Independent noise comparisons and thousands of user reviews converge on the same conclusion: the Sonicare 3000 is dramatically quieter than any Waterpik model. Users describe it as “whisper quiet” and “barely audible” — descriptions that have never been applied to a Waterpik product.

    The Waterpik Aquarius at mid-to-high settings reaches 65–70+ dB. That’s louder than a normal conversation (60 dB) and approaching a vacuum cleaner (75 dB). The ION is similarly loud. Early-morning use in a shared household announces itself through walls.

    If noise is anywhere in your top three concerns — apartment living, early-morning routine, shared bathrooms, sleeping children — the Sonicare wins this category decisively. No amount of design refinement on the Waterpik side has closed this gap.


    Reservoir and Session Length

    Winner: Waterpik

    The Waterpik Aquarius and ION both hold 650ml — roughly 90+ seconds of continuous use at a mid-range setting. That’s enough for a thorough full-mouth session, a braces cleaning routine, or two users back-to-back without refilling.

    The Sonicare 3000 holds 250ml (8 oz), providing roughly 60 seconds of use. Philips describes this as “enough water for a 1-minute clean without refilling.” For a standard daily session, that’s adequate. For braces cleaning, implant care, gum disease management, or any situation requiring extra time, you’ll refill once.

    The Waterpik’s reservoir advantage grows with use complexity. If you’re a healthy adult doing a quick daily pass, the Sonicare’s 250ml is fine. If you have orthodontic brackets, three implants, and a bridge, the Waterpik’s 650ml means an uninterrupted session.


    Tips and Nozzles

    Winner: Waterpik (and it’s not close)

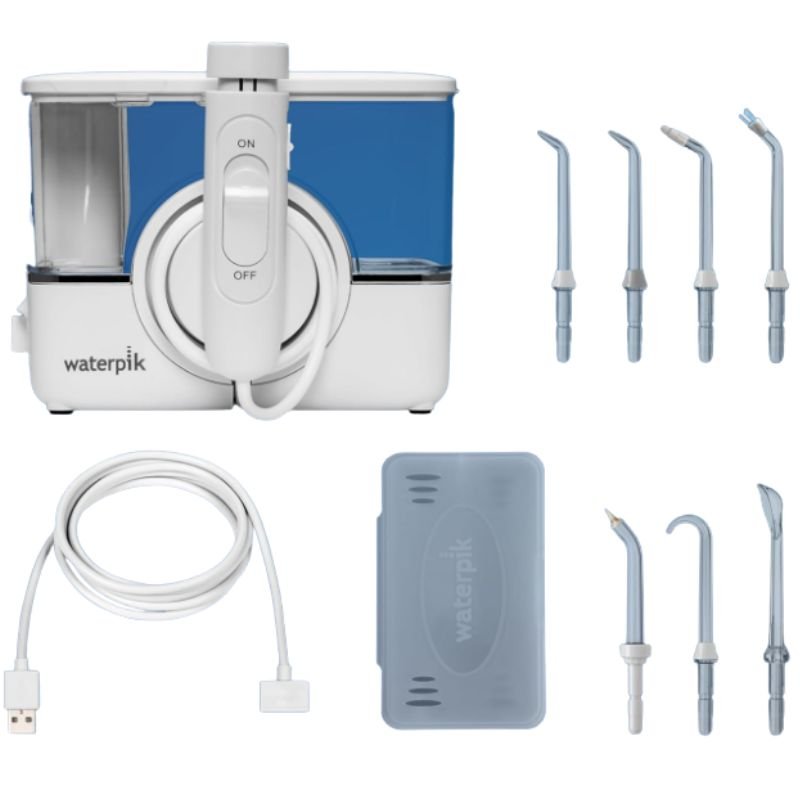
    Waterpik’s tip ecosystem is the deepest in the water flosser market. The Aquarius ships with 7 tips. The ION ships with 7 tips. These include specialty tips that no other brand offers: the Pik Pocket for periodontal pockets, the Plaque Seeker for crowns and implants, the Orthodontic Tip for braces, the Implant Denture Tip (ION only) for cleaning under bridges and dentures, and a Tongue Cleaner. Replacement tips cost ~$8–12 per pack.

    The Sonicare 3000 ships with 2 tips: the F1 Standard nozzle and the F3 Quad Stream nozzle. The Quad Stream is innovative and exclusive to Philips — no competitor offers anything similar. But that’s the entire lineup. No orthodontic tip, no periodontal pocket tip, no implant tip. Replacement tips cost ~$15 per two-pack — roughly double Waterpik’s per-tip cost.

    If you have any specific dental condition — braces, implants, gum disease, bridges — Waterpik’s specialty tips are a meaningful clinical advantage. If you have healthy teeth and gums and just need standard interdental cleaning, the Sonicare’s 2 tips cover that adequately. For a deeper guide, see: Best Water Flosser Tips and Nozzles.


    Technology: Single Jet vs Quad Stream

    Winner: Depends on your preference

    Waterpik uses traditional single-jet pulsation — one focused stream of water delivered in rapid pulses (1,200–1,400 per minute). This produces a concentrated, powerful cleaning action at a specific point. You aim it, it cleans that spot intensely, you move to the next spot.

    Philips Sonicare’s Quad Stream X-shaped nozzle splits the water into four simultaneous streams that cover a wider area. The cleaning action is more diffused — less intense at any single point but reaching more surface area with each pass. The result feels different: less like a pressure washer, more like a wide rinse.

    Neither technology is clinically proven to be superior to the other for plaque removal. Both carry ADA acceptance. The practical difference is user preference: some people prefer the focused intensity of a single jet and the control it provides. Others prefer the broader coverage and gentler feel of the Quad Stream. If you’ve never used either, it’s worth knowing that these are meaningfully different experiences — the Sonicare doesn’t just feel like a quieter Waterpik.


    Battery Life

    Winner: Waterpik ION

    The Waterpik ION’s rechargeable battery lasts approximately 4 weeks per charge. The Sonicare 3000 lasts approximately 2 weeks. Both charge via USB cables (ION uses USB-A magnetic; Sonicare uses a proprietary small-plug cable).

    The Waterpik Aquarius plugs directly into a wall outlet — no battery to manage, no degradation over time, no dead-flosser surprises. If battery management irritates you, the Aquarius eliminates it entirely (at the cost of portability).

    Two weeks (Sonicare) is adequate for daily use but requires more frequent charging awareness. Four weeks (ION) is closer to “set and forget” territory. Neither requires daily charging.


    Build Quality and Design

    Winner: Philips Sonicare

    The Sonicare 3000 is a noticeably more refined product in hand. The materials feel premium, the controls are intuitive, and the overall aesthetic is clean and modern. It looks like it belongs next to a Sonicare electric toothbrush — because it was designed to.

    Waterpik products are functional. The Aquarius is a white plastic appliance that does its job without any visual ambition. The tip storage lid feels fragile after months of use. The ION is better — the magnetic cradle and slimmer wand add some polish — but it still reads as a medical device rather than a consumer electronics product.

    If your water flosser sits on an open shelf and you care about bathroom aesthetics, the Sonicare wins. If it lives in a drawer between uses and you care about performance per dollar, this category doesn’t matter.


    Warranty and Support

    Winner: Waterpik

    Waterpik offers a 3-year limited warranty on the Aquarius and ION. Philips offers a 2-year limited warranty on the Sonicare 3000. Both are manufacturer warranties covering defects in materials and workmanship.

    Waterpik’s US-based customer support (Colorado headquarters) is consistently praised in Amazon reviews for responsiveness. Philips operates larger global support infrastructure but individual interactions are less frequently highlighted as exceptional. Both honour warranty claims reasonably.

    The extra year matters for a device you use 365 times per year. Pump motors, seals, and batteries degrade with daily use — a failure at month 30 is covered by Waterpik, not by Philips.


    Price and Value

    The pricing is surprisingly close at the flagship level:

    • Waterpik Aquarius WP-660: $79.99 — 7 tips, countertop, 3-year warranty
    • Philips Sonicare 3000: $79.96 — 2 tips, cordless, 2-year warranty
    • Waterpik ION WF-12: $99.99 — 7 tips, hybrid, 3-year warranty

    Dollar for dollar, the Waterpik Aquarius delivers more: more tips (7 vs 2), a longer warranty (3 years vs 2), a larger reservoir (650ml vs 250ml), and wider pressure range (10 settings vs 6 combinations). The Sonicare’s premium goes toward quieter engineering, better design, and Quad Stream technology.

    Ongoing costs differ too. Waterpik replacement tips run ~$4–6 per tip. Sonicare replacement tips run ~$7.50 per tip. Over 2–3 years of quarterly tip replacement, the Sonicare’s higher per-tip cost adds up — roughly $15–20 more per year in consumables.

    The value proposition is clear: Waterpik gives you more stuff for the money. Sonicare gives you a more refined experience. Which you value more is personal.


    Who Should Buy Which

    Buy a Waterpik if you:

    • Have braces, implants, bridges, or other dental work (the specialty tips matter)
    • Have gum disease and need a Pik Pocket tip for subgingival cleaning
    • Want the widest pressure range for flexibility as your dental needs change
    • Share the unit with family members (7 tips, large reservoir)
    • Prefer a countertop model with consistent corded power
    • Want the longest warranty (3 years)
    • Prioritise value and tip variety over design

    Best Waterpik options: Waterpik Aquarius WP-660 ($79.99) for countertop, Waterpik ION WF-12 ($99.99) for hybrid cordless.

    Buy a Philips Sonicare if you:

    • Need the quietest possible operation (apartment, shared bathroom, early mornings)
    • Have sensitive gums and want the gentlest available low setting
    • Want a compact cordless design that stores easily and looks clean on a shelf
    • Have healthy teeth and gums with no specialty tip requirements
    • Already use Philips Sonicare toothbrushes and want a matching aesthetic
    • Prefer the wider, gentler Quad Stream cleaning sensation over a focused jet
    • Value design refinement and quiet engineering over raw specs

    Best Sonicare option: Philips Sonicare Power Flosser 3000 ($79.96)

    Still undecided?

    Ask yourself one question: “Is noise a dealbreaker?” If yes, buy the Sonicare. If no, buy the Waterpik that matches your format preference (Aquarius for countertop, ION for hybrid). That single question resolves the decision for most people.


    Frequently Asked Questions

    Is Waterpik or Sonicare better for plaque removal?

    Both are ADA-accepted for plaque removal effectiveness. Most published clinical research has used Waterpik products, giving them a slightly stronger evidence base. The Sonicare’s Quad Stream technology covers more area per pass but with less concentrated force. For practical daily plaque removal with healthy gums, both perform well. For aggressive subgingival plaque removal in deep pockets, Waterpik’s higher maximum pressure and Pik Pocket tip give it an edge. See: Do Water Flossers Actually Remove Plaque?

    Is Philips Sonicare really that much quieter?

    Yes. The difference is not subtle. Users who switch from Waterpik to Sonicare consistently describe the noise reduction as “dramatic” or “night and day.” If you’ve used a Waterpik and found the noise annoying, the Sonicare will feel like a different category of product. This is the single largest experiential difference between the two brands.

    Can I use Waterpik tips on a Philips Sonicare?

    No. The tip connection systems are proprietary and incompatible. Waterpik tips only fit Waterpik flossers. Sonicare nozzles only fit Sonicare flossers. This is worth considering before committing to an ecosystem — Waterpik’s wider tip range gives you more long-term flexibility.

    Which is better for braces?

    Waterpik. It includes an Orthodontic Tip specifically designed for cleaning around brackets, and clinical research shows it removes three times more plaque around brackets than string floss. The Sonicare does not include an orthodontic tip. For detailed braces recommendations, see: Best Water Flosser for Braces.

    Which is better for sensitive gums?

    Philips Sonicare. Its lowest intensity setting is genuinely softer than Waterpik’s setting 1, and the Quad Stream nozzle disperses force across a wider area, reducing the concentrated pressure on any one point. If your gums bleed easily and you want the gentlest possible introduction to water flossing, the Sonicare is the safer starting point. For gum disease specifically, see: Best Water Flosser for Gum Disease.

    Which lasts longer?

    The Waterpik Aquarius has the longevity advantage: it plugs into the wall (no battery to degrade), carries a 3-year warranty, and has a multi-decade track record of reliable long-term performance across 75,000+ Amazon reviews. The Sonicare is a newer product line with a 2-year warranty and a rechargeable battery that will eventually degrade (typically noticeable after 2–3 years of daily use). The Waterpik ION’s battery will also degrade, but its 3-year warranty provides more coverage.

    Are Waterpik and Sonicare the only good brands?

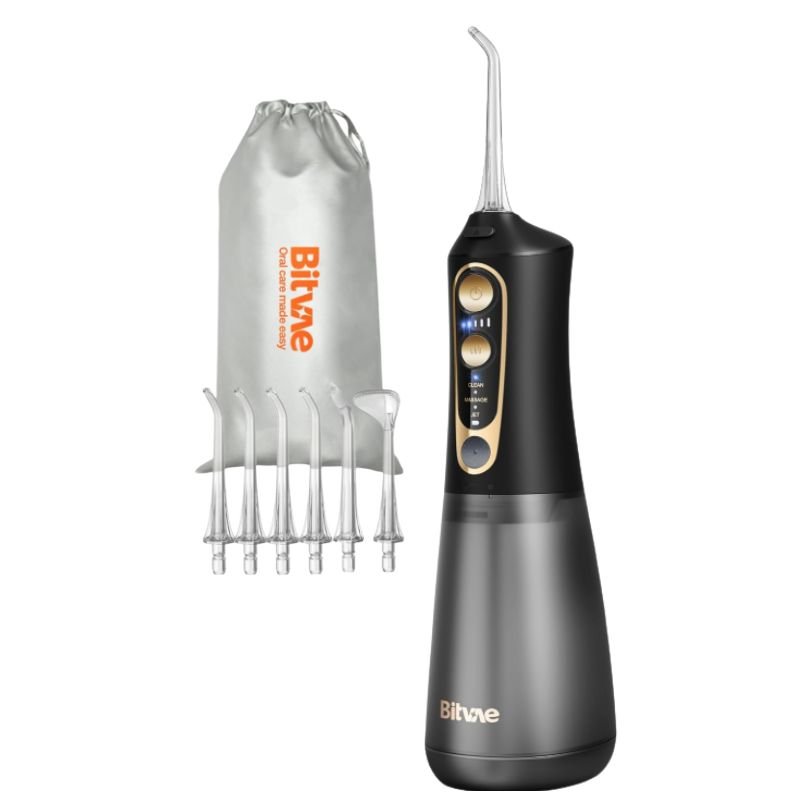
    No. The Bitvae C6 ($15.98) delivers strong performance at a fraction of the price and is worth considering if budget is a factor. It lacks the ADA seal and the specialty tips of Waterpik, but for basic daily interdental cleaning, it competes well. See our full guide for the complete comparison.


    Beyond Brushing Oral Health Guide Book
    Get the Free Oral Health Guide
    Get Beyond Brushing — a practical 30,000+ word guide to healthier teeth, gums, and fresher breath after 45.
    Marketing email consent
    • No spam • Unsubscribe anytime


    The Bottom Line

    Waterpik wins on specs: more pressure, more tips, bigger reservoir, longer warranty, wider clinical evidence base. If you have dental work, gum disease, or want maximum flexibility, Waterpik is the stronger choice. The Aquarius ($79.99) is the best value countertop. The ION ($99.99) adds cordless convenience.

    Philips Sonicare wins on experience: quieter, gentler, better-designed, more compact. If noise matters, gums are sensitive, or aesthetics influence whether you’ll use it daily, the Sonicare 3000 ($79.96) is the better choice.

    Both carry the ADA Seal. Both remove plaque effectively. Both are recommended by dental professionals. The deciding question remains: is noise a dealbreaker? If yes, Sonicare. If no, Waterpik.

    For the full comparison including budget options, see our complete guide to the best water flossers of 2026.


    References

    ADA (MOST IMPORTANT)
    https://www.ada.org/resources/research/science-and-research-institute/ada-seal-of-acceptance

    2. Water Flosser Clinical Evidence
    https://www.ncbi.nlm.nih.gov/pmc/articles/PMC3702002/

    3. Interdental Cleaning Importance (NIH)
    https://www.ncbi.nlm.nih.gov/books/NBK507808/

    4. Harvard Health
    https://www.health.harvard.edu/diseases-and-conditions/bad-breath-halitosis

    5. AADSM https://www.aadsm.org/oral-health-and-overall-health.aspx

  • Best Water Flosser for Implants (2026)

    Best Water Flosser for Implants (2026)

    Editorial transparency: VerdictLab earns a commission when you purchase through our links — this never influences our ratings or recommendations. Our editorial picks are based on specifications, clinical evidence, expert opinions, and real user feedback. As an Amazon Associate I earn from qualifying purchases. Full disclosure.

    Last updated: March 2026  |  By: VerdictLab Editorial Team

    Important: Always follow your implant surgeon’s or prosthodontist’s specific home care instructions. The guidance below is general — your dental professional knows the details of your implant placement, healing stage, and tissue health. When in doubt, ask them before starting any new cleaning routine.

    Dental implants are an investment — in money, in time, and in the surgical process that places them. Protecting that investment means cleaning around the implant abutment and crown more carefully than you clean your natural teeth. The tissue around an implant is structurally different from natural gum tissue and more vulnerable to inflammation. When bacteria accumulate around an implant and aren’t removed, the result is peri-implantitis — the leading cause of implant failure.

    String floss can clean around a single-tooth implant adequately if you’re diligent, but it can’t reach under implant-supported bridges, around All-on-4 dentures, or into the deeper sulcus that often forms around implant abutments. A water flosser with the right tip solves this. Here are the four best options for implant care.

    For our full comparison across all use cases, see the complete VerdictLab guide to the best water flossers of 2026.

    Quick Summary

    • Best overall for implants: Waterpik ION WF-12 ($99.99) — 7 tips including Pik Pocket and Implant Denture, cordless wand for precise angle control
    • Best countertop for implants: Waterpik Aquarius WP-660 ($79.99) — same Pik Pocket tip, widest pressure range, proven reliability
    • Best gentle option: Philips Sonicare Power Flosser 3000 ($79.96) — softest low setting, ADA accepted, ideal for early healing stages
    • Best budget: Bitvae C6 ($15.98) — periodontal tip included, Soft mode, low entry cost


    Why Implants Need Specialised Cleaning

    An implant isn’t a natural tooth — and the tissue around it doesn’t behave like natural gum tissue. Understanding the difference explains why a water flosser matters more for implants than for natural teeth.

    The tissue is structurally weaker. Natural teeth are surrounded by periodontal ligament fibres that anchor gum tissue firmly to the tooth root. Implants lack this ligament. The tissue around an implant relies on a weaker connective tissue seal to the abutment surface. This seal is more easily disrupted by bacteria, which is why peri-implant disease progresses faster than periodontal disease around natural teeth once it starts.

    The sulcus is often deeper. The gap between the implant abutment and the surrounding gum tissue (the peri-implant sulcus) is typically 2–3mm even in health — deeper than the 1–2mm sulcus around natural teeth. This creates a larger space for bacteria to colonise. If peri-implant mucositis (early-stage inflammation) develops, the pocket can deepen further.

    Peri-implantitis is the primary risk. Peri-implantitis — inflammation and bone loss around an implant — affects an estimated 12–22% of implant patients. It’s driven by bacterial biofilm accumulation in the peri-implant sulcus. Once bone loss begins around an implant, it can’t be regenerated as reliably as around natural teeth. Prevention through consistent daily cleaning is far more effective than treatment after the fact.

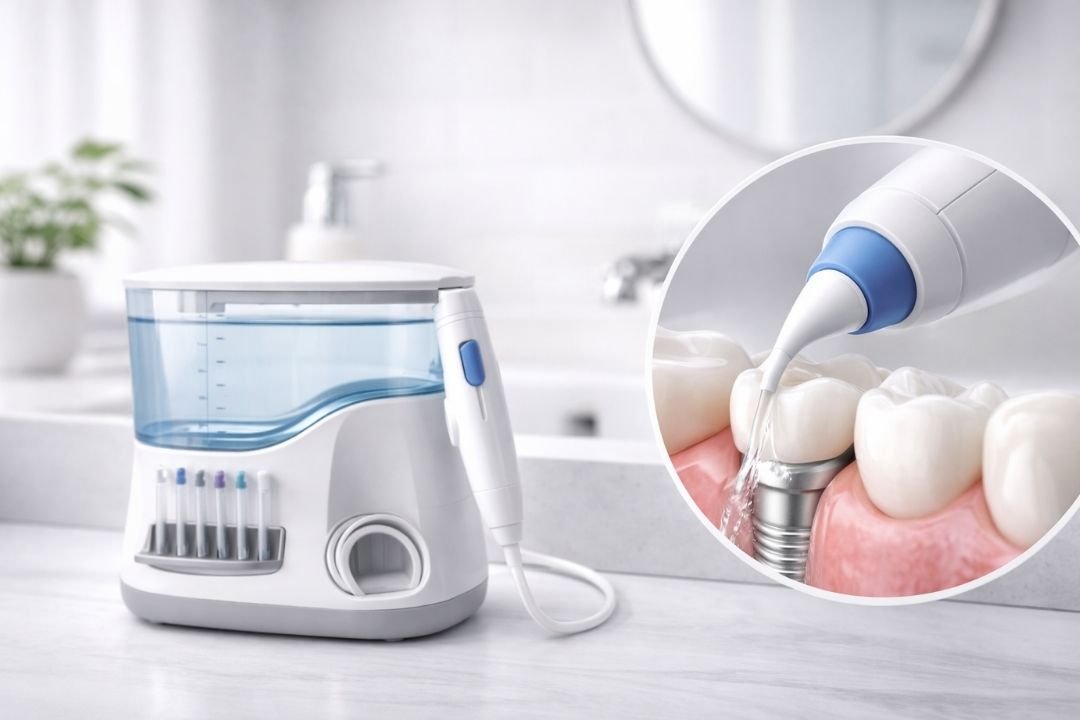
    A water flosser with a periodontal pocket tip delivers a gentle stream directly into the peri-implant sulcus, flushing bacteria from the space where string floss can’t effectively reach. For more on the clinical evidence, see: Do Water Flossers Actually Remove Plaque?


    What to Look for in a Water Flosser for Implants

    A periodontal pocket or implant-specific tip

    This is the single most important feature. A standard jet tip delivers a focused, high-pressure stream that’s too aggressive for the tissue around implants. Two specialty tips matter here:

    The Pik Pocket tip (Waterpik) has a soft, flexible rubber end that delivers a low-pressure, diffused stream below the gum line. It’s designed for subgingival irrigation — gently flushing the peri-implant sulcus without disturbing the tissue seal.

    The Implant Denture tip (Waterpik, included with the ION) is specifically designed for implant-supported bridges and dentures. Its thin, curved end directs water under the prosthetic structure where debris and bacteria accumulate against the gum tissue.

    The Bitvae C6 includes a periodontal tip that serves a similar function. The Philips Sonicare does not include a periodontal or implant-specific tip.

    Gentle low-pressure setting

    The tissue around implants is more sensitive than tissue around natural teeth — both structurally (weaker connective tissue seal) and often clinically (post-surgical healing, early inflammation). You need a water flosser where “setting 1” is actually gentle. The Waterpik Aquarius and ION at setting 1 deliver 10 PSI. The Philips Sonicare’s lowest setting produces even less force. Either is appropriate for implant care.

    Wide pressure range for long-term use

    In the weeks immediately after implant placement, you’ll use the lowest setting only. As healing progresses and the tissue matures over 3–6 months, you’ll gradually increase pressure. A 10-setting model gives you room to progress; a 3-setting model offers less granularity. Since implants are a permanent addition to your mouth, the water flosser you buy now should serve you for years — the wider range accommodates changing needs over that timespan.

    Reservoir capacity

    Implant cleaning takes longer than standard interdental cleaning because each implant site needs focused attention. If you have multiple implants — or an implant-supported bridge — budget 2–3 minutes rather than the standard 60–90 seconds. A 650ml+ countertop reservoir handles this without refilling. Cordless models (200–300ml) will need one refill.


    Best Overall for Implants: Waterpik ION Professional (WF-12)

    Waterpik ION Professional WF-12 with Pik Pocket and Implant Denture tips

    Price: $99.99  |  Type: Hybrid  |  Reservoir: 650ml  |  Settings: 10  |  ADA Accepted: Yes  |  Implant Tips: Pik Pocket + Implant Denture (both included)  |  Warranty: 3 years

    The ION leads this list because it’s the only water flosser that includes both implant-relevant specialty tips in the box: the Pik Pocket tip for subgingival cleaning around individual implant abutments and the Implant Denture tip for flushing under implant-supported bridges and dentures.

    That Implant Denture tip is the differentiator. Its thin, curved design directs water under the pontic section of an implant bridge — the space between the prosthetic teeth and the gum tissue that traps food, bacteria, and plaque. Without this tip, cleaning under a bridge requires a floss threader or an interdental brush, neither of which flushes the entire underside the way a directed water stream does.

    The cordless wand is a practical advantage for implant cleaning. When you’re targeting a specific implant site at the back of the mouth, you need precise angle control. The untethered wand moves freely without the cord tension that can make the Aquarius’s wand harder to position precisely. For a single implant at tooth #14 or #19, that manoeuvrability matters.

    Ten pressure settings (10–100 PSI), 650ml reservoir (90+ seconds without refilling), ADA acceptance, and a 3-year warranty complete the package. The 7 included tips mean this single device handles implant care, general interdental cleaning, orthodontic maintenance, and tongue cleaning.

    Strengths: Only model with both Pik Pocket and Implant Denture tips included; cordless wand for precise implant-site targeting; 10 settings; 650ml reservoir; ADA accepted; 3-year warranty; 7 total tips.

    Weaknesses: Most expensive option at $99.99; still needs counter space for the base; louder than cordless-only models.

    Check Price on Amazon


    Best Countertop for Implants: Waterpik Aquarius (WP-660)

    Waterpik Aquarius WP-660 countertop water flosser with Pik Pocket tip

    Price: $79.99  |  Type: Countertop  |  Reservoir: 650ml  |  Settings: 10 (10–100 PSI)  |  ADA Accepted: Yes  |  Implant Tips: Pik Pocket (included)  |  Warranty: 3 years

    The Aquarius includes the Pik Pocket periodontal tip — the primary tool for subgingival cleaning around individual implant abutments. It does not include the Implant Denture tip, but this can be purchased separately (~$8–10 for a two-pack) if you have an implant-supported bridge or denture.

    For single-tooth implants and two- to three-unit implant bridges, the Aquarius with its Pik Pocket tip provides everything you need at $20 less than the ION. The 10 pressure settings offer the same granularity for progression from post-surgical gentleness to long-term maintenance pressure. The 650ml reservoir handles extended implant cleaning sessions without refilling.

    The corded wand is the Aquarius’s only meaningful disadvantage for implant cleaning. When targeting a posterior implant at a specific angle, the cord creates mild tension that the ION’s cordless wand doesn’t. For anterior implants (front teeth), this difference is negligible. For posterior sites, it’s noticeable but workable.

    The Aquarius is the right choice if you have single-tooth implants or short bridges and want to save $20 versus the ION. If you have an implant-supported bridge, denture, or All-on-4, the ION’s included Implant Denture tip and cordless wand make it worth the premium.

    Strengths: Pik Pocket tip included; 10 settings (10–100 PSI); 650ml reservoir; ADA accepted; 3-year warranty; $20 less than ION; Implant Denture tip available separately.

    Weaknesses: No Implant Denture tip in the box (must purchase separately); corded wand slightly limits posterior positioning; countertop only; loud.

    Check Price on Amazon


    Best Gentle Option for Implants: Philips Sonicare Power Flosser 3000

    Philips Sonicare Power Flosser 3000 cordless

    Price: $79.96  |  Type: Cordless  |  Reservoir: 250ml (8 oz)  |  Modes: 2 (Clean, Deep Clean) × 3 intensities  |  ADA Accepted: Yes  |  Implant Tips: None included  |  Warranty: 2 years

    The Sonicare 3000 earns a place on this implant list not for its tip selection — it doesn’t include a periodontal or implant tip — but for the gentleness of its lowest setting. In the early healing weeks after implant placement, when the surgical site is still tender and the tissue seal is forming, the Sonicare’s Clean mode at intensity 1 produces the softest stream available in any water flosser.

    The Quad Stream nozzle disperses water across a wider area than a single-jet tip, reducing the concentrated force on any one point. For newly placed implants where a focused jet might disturb the healing tissue, this dispersed pattern is a meaningful advantage. Several implant surgeons have noted in professional forums that they recommend the Sonicare specifically for the first 4–6 weeks of post-surgical home care.

    The limitation is clear: without a periodontal pocket or implant-specific tip, the Sonicare doesn’t provide the targeted subgingival irrigation that Waterpik’s Pik Pocket delivers. For long-term implant maintenance — once healing is complete and the tissue has matured — the Waterpik models with their specialty tips are more purpose-built.

    The best approach for implant patients who want the gentlest possible start: use the Sonicare during the initial healing phase (first 4–8 weeks post-surgery, with your surgeon’s approval), then transition to a Waterpik with a Pik Pocket tip for long-term maintenance. Or, if budget only allows one device, start with the Waterpik Aquarius on setting 1 — it’s gentle enough for most healed tissue, though not quite as soft as the Sonicare’s lowest setting.

    Strengths: Gentlest low setting available; Quad Stream disperses force; ADA accepted; quiet operation; compact cordless design; ideal for early post-surgical healing.

    Weaknesses: No periodontal or implant-specific tip; not designed for subgingival pocket irrigation; 250ml reservoir; 2-week battery life; fewer pressure levels than Waterpik.

    Check Price on Amazon


    Best Budget for Implants: Bitvae C6

    Bitvae C6 cordless water flosser with periodontal tip

    Price: $15.98  |  Type: Cordless  |  Reservoir: 300ml  |  Settings: 3 modes × 5 levels  |  ADA Accepted: No  |  Periodontal Tip: Yes (included)  |  Warranty: 1 year

    The Bitvae C6 includes a periodontal tip and a Soft mode with 5 intensity levels — the two features that matter most for implant home care — at $15.98. For patients who’ve just spent thousands on implant surgery, the idea of spending another $80–100 on a water flosser can feel like one expense too many. The Bitvae removes that objection entirely.

    The Soft mode at level 1 is gentle enough for mature implant tissue (fully healed, 3+ months post-surgery). It’s not quite gentle enough for the immediate post-surgical weeks — for that phase, the Sonicare or Waterpik on setting 1 is a safer choice. The periodontal tip provides basic subgingival access, though its design is simpler than the Waterpik Pik Pocket’s soft rubber end.

    The 300ml reservoir provides roughly 50–75 seconds of use — adequate for cleaning around 1–3 implant sites plus a general pass, though a refill may be needed for more extensive implant work. The 40-day battery and USB-C charging are practical advantages for consistent daily use.

    The honest assessment: if your implant surgeon or prosthodontist specifically recommends a water flosser with a Pik Pocket tip, the Waterpik Aquarius ($79.99) is the right investment. If the recommendation is simply “use a water flosser on a low setting around your implants,” the Bitvae C6 at $15.98 handles that responsibly.

    Strengths: $15.98 price removes cost barrier; periodontal tip included; Soft mode with 5 levels; 300ml reservoir; USB-C; 40-day battery.

    Weaknesses: No ADA seal; simpler periodontal tip than Waterpik Pik Pocket; no Implant Denture tip option; 1-year warranty; not gentle enough for immediate post-surgical care.

    Check Price on Amazon


    How to Water Floss Around Implants

    The technique around implants is more deliberate and gentle than standard water flossing. The peri-implant tissue deserves extra care.

    Use the Pik Pocket or periodontal tip

    Start your session with the periodontal pocket tip, not the standard jet tip. Place the soft tip at the gum margin of the implant — where the tissue meets the abutment. Don’t push the tip into the sulcus; let the water stream do the reaching. The goal is to gently flush the peri-implant sulcus, not to blast the tissue with direct pressure.

    Lowest pressure setting

    Setting 1 on a Waterpik (10 PSI). Lowest intensity on a Sonicare. Soft mode, level 1 on a Bitvae. The tissue around implants is more easily traumatised than tissue around natural teeth. As the implant matures and tissue strengthens (typically 3–6 months post-placement), you can gradually increase to a moderate setting. Ask your dentist for guidance on when to progress.

    Trace slowly around the entire implant

    Move the tip in a slow circle around the implant abutment — front, lingual (tongue side), mesial (toward the centre), and distal (toward the back). Spend 5–10 seconds on each implant site. For a single-tooth implant, this adds about 15–20 seconds to your overall session. For multiple implants, budget accordingly.

    For implant bridges: use the Implant Denture tip

    If you have an implant-supported bridge, switch to the Implant Denture tip (Waterpik ION includes it; available separately for the Aquarius). Position the curved tip at one end of the bridge, directed into the space between the pontic and the gum tissue. Slowly glide the tip along the underside of the bridge to the other end. This flushes the debris and bacteria that accumulate in the gap between the prosthetic and your gum tissue — an area impossible to clean with string floss alone.

    Follow with standard tip for general cleaning

    After implant-specific care, switch to the standard jet tip at a moderate pressure for general interdental cleaning of your natural teeth. The two-tip protocol takes about 2–3 minutes total.

    For the complete general technique, see: How to Use a Water Flosser Correctly.


    Considerations by Implant Type

    Not all implants present the same cleaning challenge. Here’s how to adjust your approach.

    Single-tooth implants

    The simplest scenario. A single implant crown is cleaned much like a natural tooth — water flosser along the gum line, pausing at the mesial and distal contacts, with extra attention to the implant’s peri-implant sulcus using the Pik Pocket tip. The Waterpik Aquarius with a Pik Pocket tip handles this well. The ION’s cordless wand is convenient but not strictly necessary for a single site.

    Implant-supported bridges (3+ units)

    Bridges create a pontic section — false teeth that sit on the gum tissue with a narrow gap underneath. Food, bacteria, and plaque accumulate in this gap and can’t be reached by standard tips or string floss without a threader. The Waterpik ION’s included Implant Denture tip is specifically designed for this. The Aquarius can use the same tip (purchased separately). This is where the ION’s $20 premium genuinely justifies itself.

    All-on-4 / All-on-6 dentures

    Full-arch implant-supported dentures present the most complex cleaning challenge. The entire prosthetic sits on the gum tissue with spaces around each implant abutment and under the prosthetic bar. The Implant Denture tip on the ION or Aquarius is essential. Some patients also use an interdental brush to supplement the water flosser. Daily cleaning of All-on-4 prosthetics is critical — these are the implants most vulnerable to peri-implantitis due to the difficulty of maintaining consistent home care.

    Healing implants (first 3 months)

    Follow your surgeon’s specific instructions. Most implant surgeons advise avoiding the surgical site entirely for the first 1–2 weeks, then beginning gentle cleaning with the lowest pressure setting. The Philips Sonicare 3000’s lowest setting is the gentlest option for this phase. The Waterpik on setting 1 is also appropriate once your surgeon clears you for home cleaning around the site.


    Frequently Asked Questions

    Is it safe to use a water flosser on implants?

    Yes — water flossers are safe and recommended for implant care by prosthodontists and implant surgeons. Use the lowest pressure setting and a periodontal pocket tip for subgingival cleaning. The pulsating water stream is gentle enough for healthy implant tissue when used correctly. Wait for your surgeon’s clearance before using a water flosser on a newly placed implant.

    Can a water flosser cause implant failure?

    No. The water pressure from a consumer water flosser — even at the highest settings — is not strong enough to damage an osseointegrated (healed) implant or dislodge a properly placed abutment. What can cause implant failure is inadequate cleaning that allows peri-implantitis to develop. A water flosser is part of the prevention strategy, not a risk factor.

    Do I need a Waterpik for implants, or will any brand work?

    Waterpik has the strongest product offering for implant care — specifically the Pik Pocket and Implant Denture tips, which no other brand replicates. If your dentist recommends subgingival irrigation, Waterpik is the most purpose-built option. For general cleaning around implants at low pressure, any water flosser with a gentle low setting works adequately. The Bitvae C6’s periodontal tip provides basic subgingival access at a fraction of the cost.

    What pressure setting should I use around implants?

    Start at the lowest setting available. Setting 1 on a Waterpik (10 PSI). Increase gradually over weeks and months as tissue heals and matures. Most implant patients settle between settings 2–4 for long-term maintenance. Never increase through pain — if it hurts, you’re too high.

    How often should I water floss around implants?

    Once daily at minimum. Some prosthodontists recommend twice daily, particularly in the first year after placement when the peri-implant tissue is still maturing. Consistency is more important than frequency — daily use at low pressure is more protective than aggressive cleaning done sporadically.

    Can I use a water flosser instead of string floss for implants?

    For most implant situations, a water flosser with a periodontal pocket tip provides more effective cleaning than string floss — particularly for subgingival irrigation and under implant bridges where floss can’t reach. Some dentists recommend supplementing with super floss or interdental brushes for implant bridges. Ask your dental professional for guidance specific to your implant configuration. For the broader comparison, see: Water Flosser vs String Floss.


    Beyond Brushing Oral Health Guide Book
    Get the Free Oral Health Guide
    Download Beyond Brushing — a practical 30,000+ word guide to healthier teeth, gums, and fresher breath after 45.
    Marketing email consent
    • No spam • Unsubscribe anytime


    The Bottom Line

    The Waterpik ION WF-12 ($99.99) is the best water flosser for implant patients. It’s the only model that includes both the Pik Pocket tip for subgingival sulcus cleaning and the Implant Denture tip for flushing under bridges and prosthetics. The cordless wand makes targeting specific implant sites easier. For single-tooth implants where the Implant Denture tip isn’t needed, the Waterpik Aquarius ($79.99) delivers the same cleaning performance at $20 less.

    For the gentlest possible start — particularly in the early weeks after placement — the Philips Sonicare 3000 ($79.96) offers the softest low setting, though it lacks implant-specific tips for long-term subgingival care.

    If budget is the deciding factor, the Bitvae C6 ($15.98) includes a periodontal tip and a gentle Soft mode. It won’t match the Waterpik’s implant-specific engineering, but it’s dramatically better than no subgingival cleaning at all.

    Whatever you choose: use it daily, use it gently, and follow your implant surgeon’s specific guidance. The implant is permanent. Protecting it is a daily commitment. A water flosser makes that commitment take 90 seconds instead of 15 minutes.

    For the full comparison across all use cases, see our complete guide to the best water flossers of 2026.


    References

  • Best Countertop Water Flosser (2026)

    Best Countertop Water Flosser (2026)

    Editorial transparency: VerdictLab earns a commission when you purchase through our links — this never influences our ratings or recommendations. Our editorial picks are based on specifications, clinical evidence, expert opinions, and real user feedback. As an Amazon Associate I earn from qualifying purchases. Full disclosure.

    Last updated: March 2026  |  By: VerdictLab Editorial Team

    Countertop water flossers aren’t glamorous. They take up space, need an outlet, and won’t fit in a toiletry bag. But they do one thing better than any cordless model: deliver strong, consistent pressure through a reservoir big enough that you never stop mid-session to refill.

    For families sharing a single unit, for people with extensive dental work who need longer cleaning sessions, and for anyone who prioritises cleaning power over portability — countertop is still the right format. We compared the three best options available in 2026, from a $29.99 budget pick to the $99.99 hybrid that tries to give you both worlds.

    If portability matters more to you, see our best cordless water flosser guide. For the full comparison across all formats, see the complete VerdictLab water flosser guide.

    Quick Summary

    • Best countertop overall: Waterpik Aquarius WP-660 ($79.99) — 10 settings, 7 tips, 650ml reservoir, ADA accepted, 3-year warranty
    • Best hybrid (countertop + cordless): Waterpik ION WF-12 ($99.99) — cordless wand with countertop reservoir, same power and capacity
    • Best budget countertop: H2ofloss HF-9 ($29.99) — 800ml reservoir, 12 tips, roughly a third of the Aquarius price


    Why Choose a Countertop Water Flosser

    Cordless models have improved dramatically, but countertop water flossers retain three advantages that physics won’t let cordless designs match anytime soon.

    Larger reservoirs mean no refilling. Countertop models hold 650–800ml of water. That translates to 90–120+ seconds of continuous use at a mid-range pressure setting — enough for a thorough full-mouth session, a braces cleaning session, or two users back-to-back without touching the tap. The best cordless models hold 250–300ml and last 50–75 seconds. The difference sounds small on paper, but in practice, stopping to refill mid-session breaks your rhythm and adds friction that erodes the daily habit.

    Wider pressure range. The Waterpik Aquarius and ION both span 10–100 PSI across 10 settings. That’s a range from barely-there gentle (ideal after dental surgery or fresh gum treatment) to genuinely powerful (useful for flushing deep periodontal pockets or stubborn debris around bridges). Cordless models typically offer 3 settings with a narrower spread. If your dental situation changes — braces go on, an implant gets placed, gum disease is diagnosed — a 10-setting countertop model adapts without needing a new device.

    Consistent power delivery. Countertop models plug directly into mains power. There’s no battery degradation over 2–3 years, no gradual pressure loss as the charge drains during a session, and no dead battery surprises. The Aquarius will deliver the same pressure on day one and day one thousand. Cordless models, even good ones, lose a few percent of pressure output as their lithium-ion batteries age.

    The trade-offs are obvious: counter space, a power outlet, no portability, and — for most models — more noise. If those trade-offs don’t bother you, countertop is the format that delivers the most cleaning capability per dollar.


    What to Look for in a Countertop Model

    Reservoir capacity

    Anything under 600ml defeats the purpose of going countertop. The Aquarius and ION hold 650ml (90+ seconds). The H2ofloss holds 800ml (120+ seconds). Bigger is better here — there’s no penalty for excess capacity, and the extra water means families can share the unit with fewer refills between users.

    Pressure settings

    More settings equals finer control. The Waterpik Aquarius and ION offer 10 numbered settings from 10–100 PSI. The H2ofloss uses a stepless dial with 5 marked levels — less precise, but the continuous dial lets you park between levels. Avoid countertop models with fewer than 5 settings; the whole point of a countertop unit is maximum control.

    Tip selection

    Countertop models typically ship with more tips than cordless models because they’re designed to be shared. The Aquarius and ION include 7 tips each. The H2ofloss includes 12. Specialty tips (orthodontic, periodontal pocket, plaque seeker, tongue cleaner) extend the unit’s usefulness as your dental needs evolve. For a detailed breakdown of tip types, see: Best Water Flosser Tips and Nozzles.

    Noise

    Countertop models are louder than cordless models. That’s the trade-off for the larger pump motor that delivers stronger pressure. The H2ofloss “Whisper” is the quietest countertop option, but “whisper” oversells it — it’s quieter than the Aquarius, not quiet. Plan to use your countertop flosser when the household is awake.

    Footprint

    Countertop water flossers need roughly 6 × 6 inches (15 × 15 cm) of counter space plus access to a power outlet. Measure before you buy — particularly in smaller bathrooms. The Aquarius has a slightly smaller footprint than the H2ofloss, though neither is compact by any standard.


    Countertop Water Flosser Comparison Table

    Model Price Reservoir Settings Tips ADA Seal Warranty Best For
    Waterpik Aquarius (WP-660) $79.99 650ml 10 (10–100 PSI) 7 3 years Overall countertop
    Waterpik ION (WF-12) $99.99 650ml 10 7 3 years Hybrid flexibility
    H2ofloss HF-9 $29.99 800ml 5 (dial) 12 1 year Budget / Family

    Specifications from manufacturer data. Prices from Amazon at time of publication and may vary.


    Best Countertop Overall: Waterpik Aquarius (WP-660)

    Waterpik Aquarius WP-660 countertop water flosser with 7 tips

    Price: $79.99  |  Reservoir: 650ml  |  Settings: 10 (10–100 PSI)  |  Modes: Floss + Stream  |  ADA Accepted: Yes  |  Warranty: 3 years

    The Aquarius has been the default countertop recommendation for good reason: it does everything a countertop water flosser should do, reliably, at a mid-range price. It doesn’t try to be clever. It doesn’t have Bluetooth, an app, or a colour-changing LED. It just delivers 10–100 PSI of consistent water pressure through a 650ml reservoir with 10 settings, and it’s done this dependably enough to accumulate 75,000+ Amazon reviews at a 4.6-star average.

    The 10 pressure settings provide genuinely useful range. Setting 1–2 is comfortable the week after a dental procedure. Setting 4–6 is where most daily users settle. Setting 8–10 is aggressive enough to flush stubborn debris from deep pockets and bridge undersides. Two cleaning modes — Floss (pulsating, best for the gum line) and Stream (continuous, best for rinsing wider gaps) — add further versatility.

    The 7 included tips make this a natural family unit. Each person gets a colour-coded Classic Jet tip, and the specialty tips (Orthodontic, Plaque Seeker, Pik Pocket, Toothbrush, Tongue Cleaner) mean the Aquarius adapts as your family’s dental needs change — braces go on, an implant gets placed, a teenager gets their first cavity. One device covers it all.

    The built-in 60-second timer with a 30-second pacer helps build consistent technique. The reservoir is removable and dishwasher-safe (top rack). Waterpik’s 3-year warranty is the longest in the water flosser market.

    What it isn’t: quiet, attractive, or compact. The design is purely functional. The tip storage in the lid works but feels flimsy after a year of daily use. And the noise at higher settings will announce your dental hygiene routine to anyone within earshot. These are the compromises for $79.99 of proven, ADA-accepted performance.

    Strengths: 10 settings spanning 10–100 PSI; 7 tips; Floss + Stream modes; 650ml dishwasher-safe reservoir; ADA accepted; 3-year warranty; 75,000+ reviews at 4.6 stars; proven multi-year reliability.

    Weaknesses: Requires outlet and counter space; loud at higher settings; functional but unattractive design; tip storage lid feels fragile; no cordless option.

    Check Price on Amazon


    Best Hybrid: Waterpik ION Professional (WF-12)

    Waterpik ION Professional WF-12 hybrid water flosser with cordless wand and countertop base

    Price: $99.99  |  Reservoir: 650ml  |  Settings: 10  |  Battery: ~4 weeks  |  ADA Accepted: Yes  |  Warranty: 3 years

    The ION answers a specific question: what if you want countertop capacity and pressure range, but without the wand being physically tethered to the base by a rigid hose? The wand lifts off the reservoir base and operates wirelessly (connected by a flexible water hose, not a power cord). The rechargeable lithium-ion battery in the wand eliminates the power cable from the equation entirely.

    In practice, this means the wand moves more freely than the Aquarius’s — no cord tension pulling at your hand. The magnetic cradle holds the wand when not in use, keeping the counter tidy. The base is 30% smaller than the Aquarius (according to Waterpik), though it still needs dedicated counter space.

    The specs mirror the Aquarius: 650ml reservoir, 10 settings, 90+ seconds of use, 7 tips, ADA accepted, 3-year warranty. The $20 premium over the Aquarius buys you the cordless wand, the rechargeable battery (4 weeks per charge), the magnetic cradle, and USB-A charging.

    Whether that $20 premium is worth it depends on how much the Aquarius’s corded wand bothers you. If the answer is “not at all,” save the $20 and buy the Aquarius. If having a lighter, untethered wand that moves without resistance matters to your daily experience, the ION delivers that. Both provide identical cleaning performance.

    Strengths: Cordless wand eliminates power cord; same 650ml reservoir and 10 settings as Aquarius; 7 tips; ADA accepted; 3-year warranty; 4-week battery; smaller base footprint; magnetic cradle.

    Weaknesses: $20 more than the Aquarius for identical cleaning performance; still needs counter space; louder than cordless-only models; hose can feel stiff initially; battery will degrade over years (unlike the Aquarius’s mains power).

    Check Price on Amazon


    Best Budget Countertop: H2ofloss HF-9

    H2ofloss HF-9 countertop water flosser with 12 tips and 800ml reservoir

    Price: $29.99  |  Reservoir: 800ml  |  Settings: 5 (pressure dial)  |  ADA Accepted: No  |  Warranty: 1 year

    A note on this pick: The H2ofloss HF-9 offers exceptional specifications for its price — the largest reservoir and most tips of any model in this guide. However, Amazon reviews are more mixed than for the Waterpik models above, with some users reporting inconsistent build quality and higher return rates. We include it because the value proposition is genuinely strong, but recommend reading recent user reviews before purchasing. If reliability is your top priority, the Waterpik Aquarius at $79.99 is the safer choice.

    The H2ofloss HF-9 costs roughly a third of the Waterpik Aquarius and beats it on two headline specs: an 800ml reservoir (the largest available in any consumer water flosser) and 12 included tips (compared to Waterpik’s 7). At $29.99, the raw value proposition is difficult to argue with.

    The 800ml tank provides approximately 120+ seconds of use at a mid-range dial setting — enough for two full sessions back-to-back, making it the best option for couples or families who floss one after the other. The 12 colour-coded tips include standard, tongue cleaner, periodontal, orthodontic, and 7 family tips, so each household member gets their own without buying extras.

    The stepless pressure dial with 5 marked levels lacks the precision of Waterpik’s numbered digital settings, but the continuous rotation means you can park the dial between levels for fine-tuning. The power cord stores neatly inside the base — a small design touch that prevents cable clutter.

    The H2ofloss also does something unique in the water flosser market: it sells individual replacement parts directly on its website. If a seal wears out or a valve sticks, you can buy just that component rather than replacing the entire unit. No other brand offers this level of repairability.

    Where the H2ofloss trails the Aquarius: no ADA seal, a dated visual design, a 1-year warranty (versus 3 years), mixed user reviews on build quality consistency, and a less established brand with limited customer support infrastructure. Some Amazon reviewers report units that work flawlessly for years; others report issues within months. The variance is wider than you’ll see with Waterpik.

    The honest recommendation: if $79.99 is within your budget and reliability matters, buy the Aquarius. If $29.99 is the ceiling and you’re willing to accept some brand risk in exchange for more reservoir capacity and more tips, the H2ofloss delivers genuine value.

    Strengths: $29.99 price; largest reservoir (800ml, 120+ seconds); 12 included tips; quieter than Aquarius; power cord stores in base; sells individual replacement parts.

    Weaknesses: No ADA seal; mixed Amazon reviews on build quality; 1-year warranty; dated design; less brand recognition; wider quality variance than Waterpik.

    Check Price on Amazon


    Countertop Water Flosser Maintenance

    Countertop models are more prone to internal buildup than cordless models because the larger reservoir and longer internal tubing create more surface area for mould and mineral deposits. A simple maintenance routine prevents the most common failure modes.

    After every use: Empty the reservoir completely. Leave the lid open or off to air-dry. Eject the tip and store it separately — a wet tip left in the unit creates a sealed pocket where bacteria thrive.

    Weekly: Run a vinegar cycle. Fill the reservoir with warm water and 2 tablespoons of white vinegar. Run the unit until the reservoir empties. Then run a full reservoir of clean warm water to rinse. This dissolves mineral scale inside the tubing and kills bacteria. Takes about 3 minutes total.

    Monthly: Remove the reservoir entirely and scrub the interior with a soft brush. Check the valve where the reservoir meets the base — this is where mould most commonly develops in countertop models. Soak tips in vinegar for 5–10 minutes if you notice calcium buildup. Replace tips every 3–6 months.

    Hard water areas: If your tap water is hard (leaves white deposits on faucets), increase the vinegar cycle to twice weekly. Hard water accelerates mineral buildup inside the tubing, which reduces water flow and eventually clogs the system. Using filtered water in the reservoir prevents this entirely, though it’s an extra step most people won’t sustain.

    For the full maintenance guide covering both countertop and cordless models, see the maintenance section in our main water flosser guide.


    Frequently Asked Questions

    Is a countertop water flosser better than cordless?

    Not categorically better — but better for specific situations. Countertop models deliver wider pressure ranges, larger reservoirs (no refilling), and consistent power without battery degradation. They’re ideal for families, people with extensive dental work, and anyone who prioritises cleaning thoroughness over convenience. Cordless models win on portability, space saving, and shower use. For a detailed comparison, see our cordless water flosser guide.

    How much counter space does a countertop water flosser need?

    Roughly 6 × 6 inches (15 × 15 cm), plus access to a power outlet. The Waterpik ION has a slightly smaller footprint than the Aquarius and H2ofloss. If counter space is severely limited, a cordless model or the ION hybrid may be a better fit.

    Are countertop water flossers louder than cordless?

    Yes, generally. The larger pump motors that deliver higher pressure produce more vibration and noise. Countertop models at high settings can reach 70+ dB. The H2ofloss “Whisper” is noticeably quieter than the Waterpik Aquarius, but still louder than most cordless options. If noise is your primary concern, the Philips Sonicare Power Flosser 3000 is the quietest model in any format.

    Can I use warm water in a countertop water flosser?

    Yes — and you should. Warm water is more comfortable on gum tissue, helps loosen debris, and reduces the gag reflex if you’re cleaning around the back molars or tonsils. Avoid hot water, which can warp internal seals over time. Lukewarm from the tap is ideal.

    How often should I clean the reservoir?

    Empty after every use (don’t let water sit overnight). Run a vinegar cycle weekly. Scrub the interior monthly. In hard water areas, increase the vinegar cycle to twice weekly. The most common complaint about countertop water flossers — internal mould — is almost entirely preventable with this routine.

    Which Waterpik is better — the Aquarius or the ION?

    They deliver identical cleaning performance: same reservoir size, same pressure range, same tips, same ADA acceptance, same warranty. The ION adds a cordless wand (no power cord during use), a magnetic cradle, and a rechargeable battery for $20 more. If the Aquarius’s corded wand doesn’t bother you, save the $20. If you want a lighter, untethered wand, the ION is worth the premium. For a deeper head-to-head, see: Waterpik vs Philips Sonicare Water Flosser.

    Is the H2ofloss HF-9 reliable?

    Amazon reviews are more mixed than for Waterpik. Some users report years of trouble-free operation. Others report issues within months. The quality variance is wider than with established brands. At $29.99, the value proposition is strong enough to justify the risk for many buyers — especially since H2ofloss sells individual replacement parts. But if reliability is non-negotiable, the Waterpik Aquarius is the safer investment.


    Beyond Brushing Oral Health Guide Book
    Get the Free Oral Health Guide
    Get Beyond Brushing — a practical 30,000+ word guide to healthier teeth, gums, and fresher breath after 45.
    Marketing email consent
    • No spam • Unsubscribe anytime


    The Bottom Line

    The Waterpik Aquarius WP-660 ($79.99) is the best countertop water flosser for most households. Ten pressure settings, 7 tips, a 650ml reservoir that doesn’t need refilling, ADA acceptance, and a 3-year warranty. It’s not exciting. It’s reliable — and for a tool you use 365 days a year, reliability is the feature that matters most.

    If you want the Aquarius’s performance with a cordless wand, the Waterpik ION WF-12 ($99.99) delivers exactly that for $20 more. If budget is the priority and you’re comfortable with a less established brand, the H2ofloss HF-9 ($29.99) provides the largest reservoir and most tips at roughly a third of the Aquarius price — with the caveats noted above.

    For the full comparison across all water flosser types — countertop, cordless, and hybrid — see our complete guide to the best water flossers of 2026.


    References

    1. American Dental Association (ADA). Interdental Cleaning and Oral Health

    2. Mayo Clinic. Oral Health: A Window to Overall Health

    3. Harvard Health Publishing. Flossing and Gum Health

    4. Journal of Clinical Dentistry. Effectiveness of Oral Irrigation

    5. Waterpik Clinical Research

  • Best Water Flosser for Gum Disease (2026)

    Best Water Flosser for Gum Disease (2026)

    Editorial transparency: VerdictLab earns a commission when you purchase through our links — this never influences our ratings or recommendations. Our editorial picks are based on specifications, clinical evidence, expert opinions, and real user feedback. As an Amazon Associate I earn from qualifying purchases. Full disclosure.

    Last updated: March 2026  |  By: VerdictLab Editorial Team

    Important: A water flosser is a home maintenance tool, not a treatment for gum disease. If you have symptoms of gum disease — persistent bleeding, swollen gums, receding gum line, loose teeth, or persistent bad breath — see your dentist or periodontist for diagnosis and a treatment plan. A water flosser may be recommended as part of that plan, but it does not replace professional care.

    Gum disease creates a painful cycle. Your gums bleed, so you avoid flossing. You avoid flossing, so plaque builds up. Plaque builds up, so your gums get worse. The bacteria hiding in deepening periodontal pockets need to be flushed out daily — but string floss either can’t reach them or hurts too much to use consistently.

    This is where water flossers earn their strongest clinical endorsement. Research consistently shows they outperform string floss at reducing gum bleeding and gingivitis. Periodontists — the specialists who treat gum disease — are among the most vocal advocates. But not every water flosser is equally suited for inflamed, sensitive gum tissue. You need a model with a genuinely gentle low-pressure setting, a periodontal pocket tip for subgingival cleaning, and enough pressure range to increase as your gums heal.

    Here are the four best options, chosen specifically for gum disease management.

    For our full comparison of all models, see the complete VerdictLab guide to the best water flossers of 2026.

    Quick Summary

    • Best overall for gum disease: Waterpik Aquarius WP-660 ($79.99) — widest pressure range (10–100 PSI), Pik Pocket periodontal tip included, ADA accepted
    • Best hybrid for gum disease: Waterpik ION WF-12 ($99.99) — same specs as Aquarius with cordless wand convenience
    • Best quiet option: Philips Sonicare Power Flosser 3000 ($79.96) — gentlest low setting, quietest operation, ADA accepted
    • Best budget: Bitvae C6 ($15.98) — Soft mode with 5 intensity levels, periodontal tip included, $15.98 entry point


    Why Water Flossers Help With Gum Disease

    Gum disease — whether early-stage gingivitis or more advanced periodontitis — is driven by bacteria that accumulate in the sulcus (the natural groove where tooth meets gum) and in periodontal pockets (the deeper spaces that form as the disease progresses). These pockets can reach 4mm, 5mm, 6mm or deeper. At those depths, bacteria thrive in an oxygen-poor environment, producing the toxins that destroy gum tissue and eventually bone.

    String floss reaches 1–2mm below the gum line at most. It can’t access a 5mm pocket without causing tissue trauma. This is a fundamental limitation — not a technique problem.

    A water flosser delivers a pulsating stream directly into these deeper spaces. The hydraulic action flushes bacteria and debris from pockets that no other home care tool can reach. A 2012 study in the Journal of Clinical Dentistry found water flossing was 93% more effective than string floss at reducing bleeding sites after four weeks — a direct measure of gum inflammation reduction.

    Periodontists — the specialists who treat gum disease professionally — frequently prescribe water flossers with periodontal pocket tips as part of a home maintenance regimen between office visits. The key word is “part of” — a water flosser supplements professional treatment, it doesn’t replace it. But as a daily maintenance tool for managing the bacterial load in diseased pockets, the clinical evidence is clear. For more on professional recommendations, see: Do Dentists Recommend Water Flossers?


    What to Look for in a Water Flosser for Gum Disease

    Gum disease changes the requirements. Features that don’t matter much for healthy gums become critical when tissue is inflamed and pockets are deepened.

    A genuinely gentle low-pressure setting

    Inflamed gums bleed easily. Aggressive water pressure on diseased tissue causes pain, increased bleeding, and — in many cases — the patient abandoning the water flosser entirely. You need a model where “setting 1” is actually gentle, not just “slightly less powerful.” The Waterpik Aquarius at setting 1 (10 PSI) and the Philips Sonicare at its lowest intensity are the gentlest options. The Bitvae C6’s Soft mode at level 1 is also adequate. Avoid models with only 2–3 levels where even the lowest setting feels forceful.

    A periodontal pocket tip

    Standard jet tips deliver a focused, high-pressure stream designed for interdental cleaning. That’s too aggressive for direct application to deepened periodontal pockets. A periodontal pocket tip (Waterpik calls theirs the “Pik Pocket” tip) has a soft, flexible rubber end that delivers a low-pressure, diffused stream designed to gently flush bacteria from pockets without irritating the surrounding tissue. This tip is specifically designed for subgingival use and is the most important accessory for gum disease management.

    The Waterpik Aquarius and ION include a Pik Pocket tip in the box. The Bitvae C6 includes a periodontal tip. The Philips Sonicare does not include one — you’d use the standard nozzle on the lowest intensity setting. For more on tip types, see: Best Water Flosser Tips and Nozzles.

    Wide pressure range for progression

    Gum disease management isn’t static. In the first weeks, you need the gentlest possible setting as your gums adapt and begin healing. Over months of consistent daily use, as inflammation decreases and tissue strengthens, you’ll gradually increase pressure for more effective plaque removal. A model with 10 settings (Waterpik Aquarius and ION) provides the most room for this progression. A 3-level model works but offers less granularity for finding the comfort sweet spot at each stage of recovery.

    ADA Seal of Acceptance

    When your periodontist asks what you’re using at home, an ADA-accepted model with a periodontal pocket tip is the answer that generates confidence. Three brands carry the seal: Waterpik, Philips Sonicare, and Quip.


    Best Overall for Gum Disease: Waterpik Aquarius (WP-660)

    Waterpik Aquarius WP-660 countertop water flosser with Pik Pocket periodontal tip

    Price: $79.99  |  Type: Countertop  |  Reservoir: 650ml  |  Settings: 10 (10–100 PSI)  |  ADA Accepted: Yes  |  Pik Pocket Tip: Yes (included)  |  Warranty: 3 years

    The Aquarius leads this list because it combines the three features that matter most for gum disease: the widest pressure range available (10–100 PSI across 10 settings), an included Pik Pocket periodontal tip, and ADA acceptance.

    The 10 PSI at setting 1 is genuinely gentle — low enough for use on freshly treated or severely inflamed tissue. As your gums heal over weeks and months, the progression to setting 3, then 5, then eventually 7+ happens naturally. That full range means this is the only water flosser you’ll need throughout your treatment journey, from initial sensitivity to long-term maintenance.

    The Pik Pocket tip is the critical differentiator for gum disease. Its soft, tapered rubber end delivers a low-pressure stream designed for subgingival irrigation — reaching into periodontal pockets to flush bacteria without traumatising the pocket lining. Use it on settings 1–3 for pocket cleaning, then switch to the standard Classic Jet tip on a higher setting for general interdental work. This two-tip approach mirrors what many periodontists recommend.

    The 650ml reservoir provides 90+ seconds of continuous use — important because gum disease patients need to spend extra time on affected areas. The Floss Mode (pulsating) is better for the gum line, while Stream Mode (continuous) works well for flushing deeper pockets where you want steady flow rather than pulses.

    Strengths: Widest pressure range (10–100 PSI); Pik Pocket periodontal tip included; ADA accepted; 650ml reservoir; Floss + Stream modes; 3-year warranty; 75,000+ reviews at 4.6 stars.

    Weaknesses: Countertop only (needs outlet and space); loud at higher settings; not portable.

    Check Price on Amazon


    Best Hybrid for Gum Disease: Waterpik ION Professional (WF-12)

    Waterpik ION Professional WF-12 hybrid water flosser with Pik Pocket tip

    Price: $99.99  |  Type: Hybrid  |  Reservoir: 650ml  |  Settings: 10  |  Battery: ~4 weeks  |  ADA Accepted: Yes  |  Pik Pocket Tip: Yes (included)  |  Warranty: 3 years

    The ION delivers everything the Aquarius offers — 10 settings, Pik Pocket tip, 650ml reservoir, ADA acceptance — with a cordless wand that moves more freely during use. For gum disease patients who need to angle the tip carefully into specific pocket sites, the untethered wand eliminates the cord tension that can make precise positioning difficult.

    The practical difference for gum disease management is subtle. Both models deliver identical cleaning performance. The ION’s cordless wand is marginally easier to manoeuvre when you’re targeting specific pocket sites at the back of the mouth — where cord drag from the Aquarius can be noticeable. The $20 premium buys you that manoeuvrability plus the rechargeable battery (4 weeks per charge).

    If you’re choosing between the two specifically for gum disease, the decision comes down to whether that $20 difference matters. The Aquarius at $79.99 provides the same clinical capability. The ION at $99.99 adds convenience. Neither has a cleaning advantage over the other.

    Strengths: Cordless wand for easier pocket-targeting; same 10 settings and Pik Pocket tip as Aquarius; 650ml reservoir; ADA accepted; 3-year warranty; 7 included tips.

    Weaknesses: $20 more than Aquarius for identical cleaning performance; still needs counter space; louder than cordless-only models.

    Check Price on Amazon


    Best Quiet Option: Philips Sonicare Power Flosser 3000

    Philips Sonicare Power Flosser 3000 cordless water flosser

    Price: $79.96  |  Type: Cordless  |  Reservoir: 250ml (8 oz)  |  Modes: 2 (Clean, Deep Clean) × 3 intensities  |  ADA Accepted: Yes  |  Periodontal Tip: Not included  |  Warranty: 2 years

    The Sonicare 3000 earns its place on this gum disease list for one reason: its lowest intensity setting is the gentlest of any water flosser available. If inflamed gums make even the Waterpik’s setting 1 uncomfortable, the Sonicare’s Clean mode at intensity 1 produces a noticeably softer stream — barely there, but still enough to flush loose debris from around the gum line.

    The Quad Stream X-shaped nozzle disperses water into four streams rather than one concentrated jet. For sensitive gum tissue, this wider, lower-force pattern feels less aggressive than a traditional single-stream tip. Users with bleeding gums consistently report the Sonicare causes less initial discomfort than a Waterpik at comparable settings.

    The trade-off for gum disease patients: the Sonicare does not include a periodontal pocket tip. Its standard and Quad Stream nozzles work for gum line and interdental cleaning, but they’re not designed for subgingival irrigation the way Waterpik’s Pik Pocket tip is. If your periodontist specifically recommends subgingival pocket flushing, the Waterpik models above are better suited. If your primary need is gentle daily gum line cleaning with minimal discomfort, the Sonicare delivers that better than anything else.

    The noise advantage is also relevant. Gum disease patients often water floss twice daily (periodontist recommendation). A quiet model makes the morning session less disruptive to the household.

    Strengths: Gentlest low setting available; quietest operation; Quad Stream disperses pressure across wider area; ADA accepted; compact cordless design; IPX7 waterproof.

    Weaknesses: No periodontal pocket tip included (not designed for deep subgingival flushing); 250ml reservoir; only 2 tips; 2-week battery life; fewer pressure levels than Waterpik.

    Check Price on Amazon


    Best Budget for Gum Disease: Bitvae C6

    Bitvae C6 cordless water flosser with periodontal tip

    Price: $15.98  |  Type: Cordless  |  Reservoir: 300ml  |  Settings: 3 modes × 5 levels  |  ADA Accepted: No  |  Periodontal Tip: Yes (included)  |  Warranty: 1 year

    At $15.98, the Bitvae C6 makes water flossing accessible to anyone managing gum disease on a budget. It includes a periodontal tip — the accessory that matters most for subgingival cleaning — and offers a Soft mode with 5 intensity levels, giving you enough granularity to find a comfortable starting point for inflamed tissue.

    The Soft mode at level 1 is gentle enough for most sensitive gums, though it doesn’t quite match the feather-light touch of the Sonicare’s lowest setting. The progression from Soft level 1 through Normal level 3–4 provides a reasonable path as gums improve over weeks of consistent use. The 300ml reservoir is sufficient for a focused gum-disease cleaning session (targeting affected areas plus a quick pass over healthy teeth).

    The inclusion of 6 tips — including the periodontal tip and a tongue scraper (bad breath is a common gum disease symptom) — adds practical value. USB-C charging and a 40-day battery life eliminate the maintenance friction that leads to inconsistent use.

    The limitations matter more for gum disease than for general use. No ADA seal means your periodontist may raise an eyebrow. The 1-year warranty is less reassuring for a tool you’ll rely on daily as part of a clinical management plan. And Bitvae’s periodontal tip is simpler in design than Waterpik’s Pik Pocket — it lacks the specialised soft rubber end that makes the Pik Pocket specifically suited for subgingival irrigation.

    The honest framing: if $79.99 for an Aquarius is manageable, buy the Aquarius — the Pik Pocket tip and ADA acceptance matter for gum disease specifically. If $15.98 is the budget ceiling, the Bitvae C6 with its periodontal tip is dramatically better than not water flossing at all.

    Strengths: $15.98 price; periodontal tip included; Soft mode with 5 levels; 300ml reservoir; USB-C charging; 40-day battery; tongue scraper for halitosis.

    Weaknesses: No ADA seal; simpler periodontal tip design than Waterpik Pik Pocket; 1-year warranty; no clinical evidence base specific to this brand.

    Check Price on Amazon


    How to Water Floss With Gum Disease

    The technique for gum disease differs from general water flossing. The goal shifts from interdental cleaning to subgingival flushing — getting water into and through the periodontal pockets where disease-causing bacteria reside.

    Use the periodontal pocket tip first

    Start your session with the periodontal/Pik Pocket tip, not the standard jet tip. Place the soft tip at the gum line of the first affected area. The tip should rest gently against the gum margin — don’t push it into the pocket. The water stream does the reaching; you just position the delivery point. Spend 5–10 seconds at each affected site, slowly tracing along the pocket opening.

    Lowest pressure setting — non-negotiable

    Setting 1 on a Waterpik (10 PSI). Lowest intensity on a Sonicare. Soft mode, level 1 on a Bitvae. Inflamed tissue is fragile. Higher pressure causes pain, increases bleeding, and can push bacteria deeper into the pocket rather than flushing it out. You can increase pressure gradually — over weeks, not days — as your gums respond to treatment.

    Switch to the standard tip for general cleaning

    After pocket flushing, switch to the standard jet tip on a slightly higher (but still moderate) setting for interdental cleaning of healthy areas. This two-tip protocol takes about 2–3 minutes total but addresses both the disease sites and general oral hygiene in one session.

    Warm water or prescribed rinse

    Warm water is more comfortable on inflamed tissue. Some periodontists prescribe a chlorhexidine rinse or dilute hydrogen peroxide solution to add to the reservoir for antimicrobial flushing. Only use prescribed solutions — don’t add over-the-counter mouthwash unless your dentist specifically approves it. The alcohol and chemicals in many mouthwashes can irritate diseased tissue and damage internal seals.

    Twice daily if your periodontist recommends it

    The ADA recommends interdental cleaning once daily for most people. Periodontists managing active gum disease often recommend twice daily — morning and evening — to keep the bacterial load in pockets consistently low between professional cleanings. Follow your dental professional’s specific guidance.

    For the complete general technique, see: How to Use a Water Flosser Correctly.


    What to Expect: The First Two Weeks

    If you’re starting water flossing with existing gum disease, the first two weeks follow a predictable pattern. Knowing what’s normal prevents the panic that leads people to stop.

    Days 1–3: Bleeding is normal. Even on the lowest pressure setting, water hitting inflamed tissue will likely cause bleeding. This is not damage from the water flosser — it’s evidence of existing inflammation. The bacteria trapped in your pockets have been irritating the tissue for weeks or months. Disturbing them causes a temporary increase in visible bleeding. This is the healing process beginning, not a reason to stop.

    Days 4–7: Bleeding starts to decrease. As the bacterial load in the pockets reduces through daily flushing, the tissue begins calming down. Most users notice a meaningful reduction in bleeding by the end of the first week. Gums may still be tender but the sharp pain of the first session typically fades.

    Days 7–14: Noticeable improvement. Bleeding is significantly reduced or eliminated for most mild-to-moderate cases. Gums feel firmer, less puffy. Bad breath (a common gum disease symptom caused by bacterial byproducts in pockets) often improves noticeably. This is when most people begin to feel the water flosser is “working” and compliance becomes self-reinforcing.

    If bleeding persists beyond two weeks of consistent daily use on the lowest setting, schedule an appointment with your dentist or periodontist. Persistent bleeding may indicate deeper pockets or more advanced disease that requires professional intervention beyond home care.

    For the clinical evidence behind these outcomes, see: Do Water Flossers Actually Remove Plaque?


    Frequently Asked Questions

    Can a water flosser cure gum disease?

    No. A water flosser is a maintenance tool that reduces the bacterial load in periodontal pockets between professional treatments. It can significantly improve gum health metrics — bleeding, inflammation, pocket depth — but it cannot reverse bone loss, repair damaged tissue, or replace professional scaling, root planing, or surgical intervention. Think of it as an essential part of the management plan, not the treatment itself.

    Do periodontists recommend water flossers?

    Yes — periodontists are among the strongest advocates for water flossers. They see patients with deep pockets where string floss can’t reach, and the clinical evidence for water flossers reducing bleeding and gingivitis is particularly relevant to their patient population. Many periodontists prescribe specific water flosser models and tips as part of post-treatment home care instructions. See: Do Dentists Recommend Water Flossers?

    What pressure setting should I use for gum disease?

    Start at the absolute lowest setting your model offers — setting 1 on a Waterpik (10 PSI), lowest intensity on a Philips Sonicare, Soft mode level 1 on a Bitvae. Increase gradually over weeks as your gums heal and tolerate more. Most gum disease patients settle between settings 3–5 on a 10-setting model for long-term maintenance. Never increase pressure through pain — if it hurts, you’re too high.

    Is the Pik Pocket tip necessary for gum disease?

    It’s the most important accessory for gum disease management. Standard jet tips deliver a focused stream designed for interdental spaces — too concentrated for direct subgingival application. The Pik Pocket tip’s soft, flexible end delivers a diffused, low-pressure stream designed specifically for periodontal pockets. If your water flosser doesn’t include one, Waterpik sells them separately (~$8–10 for a two-pack).

    Will my gums bleed when I start?

    Almost certainly, yes — and that’s normal. Bleeding indicates existing inflammation, not damage from the water flosser. Consistent daily use on the lowest setting typically reduces bleeding significantly within 7–14 days. If bleeding persists beyond two weeks, consult your dental professional.

    Can I add mouthwash for gum disease?

    Only if your dentist specifically prescribes it. Chlorhexidine rinse and dilute hydrogen peroxide are sometimes recommended by periodontists for use in a water flosser reservoir. Over-the-counter alcohol-based mouthwash can irritate diseased tissue and damage the flosser’s internal seals. Warm water alone is effective and safe for daily use.

    How often should I water floss with gum disease?

    Once daily at minimum. Many periodontists recommend twice daily (morning and evening) during active treatment phases. Follow your dental professional’s specific guidance — they know the severity of your case and can advise on the optimal frequency for your situation.


    Beyond Brushing Oral Health Guide Book
    Get the Free Oral Health Guide
    Get Beyond Brushing — a practical 30,000+ word guide to healthier teeth, gums, and fresher breath after 45.
    Marketing email consent
    • No spam • Unsubscribe anytime


    The Bottom Line

    The Waterpik Aquarius WP-660 ($79.99) is the best water flosser for gum disease management. The combination of 10 pressure settings starting at 10 PSI, the included Pik Pocket periodontal tip, ADA acceptance, and a 650ml reservoir covers every aspect of a gum disease home care protocol. It’s the model most likely to appear in a periodontist’s recommendation.

    If you want that same performance with a cordless wand, the Waterpik ION WF-12 ($99.99) delivers it for $20 more. If gentleness and quiet operation matter most — particularly for twice-daily sessions — the Philips Sonicare 3000 ($79.96) offers the softest touch, though without a periodontal pocket tip.

    If budget is the constraint, the Bitvae C6 ($15.98) includes a periodontal tip and a Soft mode that makes daily subgingival cleaning possible for under $16. For gum disease specifically, any water flosser used consistently is a significant improvement over no subgingival cleaning at all.

    Remember: a water flosser supplements professional treatment — it doesn’t replace it. If you haven’t seen a dentist about your gum symptoms, start there. Then add daily water flossing to the maintenance plan they prescribe.

    For the full comparison across all use cases, see our complete guide to the best water flossers of 2026.


  • Best Cordless Water Flosser (2026)

    Best Cordless Water Flosser (2026)

    Editorial transparency: VerdictLab earns a commission when you purchase through our links — this never influences our ratings or recommendations. Our editorial picks are based on specifications, clinical evidence, expert opinions, and real user feedback. As an Amazon Associate I earn from qualifying purchases. Full disclosure.

    Last updated: March 2026  |  By: VerdictLab Editorial Team

    Cordless water flossers solve the two biggest objections to countertop models: they don’t need a power outlet and they don’t colonise your bathroom counter. The trade-off has traditionally been weaker pressure and smaller reservoirs — but the current generation of cordless models has narrowed that gap considerably.

    We compared five cordless and hybrid models across the metrics that matter most for portable use: battery life, reservoir capacity, noise, pressure range, and whether they’ll survive being tossed in a travel bag. Here are the five worth considering.

    For a comparison that includes countertop models, see our complete guide to the best water flossers of 2026. If you specifically want a countertop unit, see our best countertop water flosser guide.

    Quick Summary

    • Best cordless overall: Philips Sonicare Power Flosser 3000 ($79.96) — quietest, Quad Stream technology, ADA accepted
    • Best hybrid (cordless + countertop): Waterpik ION WF-12 ($99.99) — 650ml reservoir with cordless wand, 10 settings
    • Best for travel and braces: Waterpik Cordless Advanced WP-580 ($69.99) — compact, ADA accepted, travel bag included
    • Best budget cordless: Bitvae C6 ($15.98) — 40-day battery, 300ml tank, 15 mode/intensity combinations
    • Best battery life: Burst Water Flosser ($69.99) — 80-day battery, attractive design, lifetime warranty with subscription


    Cordless vs Countertop: The Real Trade-offs

    The decision between cordless and countertop isn’t about which is “better” — it’s about which constraints you’re willing to accept.

    Cordless advantages: No power outlet needed, no cord clutter, compact storage, portable for travel, many models are shower-safe, and they don’t claim permanent counter space. Most people who abandon water flossing cite inconvenience — and cordless models reduce that friction significantly.

    Cordless disadvantages: Smaller reservoirs (110–300ml vs 650–800ml for countertop), which means shorter sessions and potential mid-session refills. Generally fewer pressure settings. Battery management — although modern lithium-ion batteries last 2–12 weeks, they do eventually need charging. And slightly lower maximum pressure output than the best countertop models.

    The honest assessment: for most people, a cordless water flosser is the better starting choice. The convenience advantage drives higher daily compliance, and compliance is the single largest determinant of whether water flossing improves your oral health. A cordless model used every day outperforms a countertop model used three times a week because the countertop one is inconvenient to set up.

    The exception is families sharing a single unit, people who need extended session time (braces, extensive dental work), and anyone who values maximum pressure above all else. For those users, see our countertop water flosser guide.


    What Matters Most in a Cordless Water Flosser

    Battery life

    The range among current cordless models is enormous: from roughly 1 week (older models) to 80 days (Burst). For daily use, anything under 2 weeks creates charging anxiety. Anything over 4 weeks means you effectively forget the charger exists until the indicator light reminds you. The Bitvae C6 at 40 days and Burst at 80 days lead the field. The Philips Sonicare at 2 weeks is the shortest in this roundup, though still adequate for most routines.

    Reservoir capacity

    This determines whether you can complete a full session without refilling. A standard full-mouth flossing session takes 60–90 seconds. Rough time-to-empty benchmarks by reservoir size: 110ml gives 20–30 seconds (2–3 refills needed), 200ml gives 40–50 seconds (1 refill), 250–300ml gives 50–75 seconds (usually enough in one fill). The Bitvae C6’s 300ml tank and the Philips Sonicare’s 250ml tank are the most practical for a complete session. The Burst’s 110ml requires multiple refills, which is its most common complaint.

    Noise

    Cordless models are generally quieter than countertop models — smaller pumps produce less vibration. But there’s still meaningful variation. The Philips Sonicare 3000 is consistently cited as the quietest water flosser available in any form factor. The Waterpik cordless models are moderate. If you’re using this in a shared apartment, a hotel room, or before anyone else wakes up, noise matters.

    Waterproofing

    Most current cordless models carry IPX7 waterproof ratings, meaning they can be fully submerged in up to 1 metre of water for 30 minutes. In practical terms, this means shower use is safe and cleaning under running water is fine. The Waterpik WP-580, Bitvae C6, Philips Sonicare 3000, and Burst are all IPX7 rated.

    Travel-friendliness

    Beyond being cordless, travel-friendliness involves size, weight, whether a travel case or bag is included, and charging flexibility. USB-C charging (Bitvae) means any phone charger works. Magnetic USB-A charging (Waterpik) requires the specific cable. Proprietary charging (some Philips models) means packing yet another cable.


    Cordless Water Flosser Comparison Table

    Model Price Reservoir Battery Life Settings Tips ADA Seal Best For
    Philips Sonicare 3000 $79.96 250ml ~2 weeks 2 modes / 3 levels 2 Quiet / Overall
    Waterpik ION (WF-12) $99.99 650ml ~4 weeks 10 7 Hybrid power
    Waterpik WP-580 $69.99 207ml ~4 weeks 3 4 Travel / Braces
    Bitvae C6 $15.98 300ml ~40 days 3 modes / 5 levels 6 Budget
    Burst Water Flosser $69.99 110ml ~80 days 3 1 Battery / Design

    Specifications from manufacturer data. Prices from Amazon at time of publication and may vary.


    Best Cordless Overall: Philips Sonicare Power Flosser 3000

    Philips Sonicare Power Flosser 3000 cordless water flosser with Standard and Quad Stream nozzles

    Price: $79.96  |  Reservoir: 250ml (8 oz)  |  Modes: 2 (Clean, Deep Clean) × 3 intensities  |  Battery: ~2 weeks  |  ADA Accepted: Yes  |  Warranty: 2 years

    The Sonicare 3000 earns the top cordless spot for one reason no competitor can match: noise — or rather, the absence of it. Where Waterpik cordless models produce a noticeable mechanical hum, the Sonicare operates at a level users consistently describe as “whisper quiet.” If you share a bathroom, use your flosser early in the morning, or simply find the drone of a water flosser irritating, this is the model that solves that problem.

    The technology behind the quiet operation is the Quad Stream X-shaped nozzle. Instead of a single concentrated jet, it disperses water into four streams that cover a wider area with less focused force. The result is a gentler, more thorough cleaning sensation — less targeted power, more surface coverage. For general gum health, this approach works well. For aggressive plaque removal in deep pockets, a Waterpik’s focused jet at higher settings still has the edge.

    Two cleaning modes — Clean (continuous flow with 15-second pauses) and Deep Clean (pulse wave technology) — combined with three intensity levels give you six effective combinations. The 250ml reservoir holds enough water for a careful full-mouth session, though heavy users will notice the tank depleting toward the final quadrant.

    The 2-week battery life is the shortest in this roundup, which is the primary trade-off for the Sonicare’s other advantages. It charges via an included USB stand, not USB-C, so you’ll need to bring the cable when traveling.

    Included tips: 2 — F1 Standard nozzle, F3 Quad Stream nozzle. Additional tips ~$15 per two-pack.

    Strengths: Quietest cordless water flosser available; Quad Stream technology; ADA accepted; 2 modes × 3 intensities; compact and elegant design; IPX7 waterproof.

    Weaknesses: Shortest battery life in this roundup (~2 weeks); only 2 tips included; proprietary charging stand; replacement tips are pricey.

    Check Price on Amazon


    Best Hybrid: Waterpik ION Professional (WF-12)

    Waterpik ION Professional WF-12 hybrid water flosser with 7 tips

    Price: $99.99  |  Reservoir: 650ml  |  Settings: 10  |  Battery: ~4 weeks  |  ADA Accepted: Yes  |  Warranty: 3 years

    The ION appears in this cordless guide because its wand is genuinely cordless — it lifts off the base for cable-free use. The reservoir stays on the counter connected by a flexible hose, which means you get the 650ml capacity and 10 pressure settings of a countertop model with the hand manoeuvrability of a cordless unit.

    If the main reason you want a cordless water flosser is hand freedom rather than portability or space saving, the ION is the best of both worlds. The 90+ seconds of reservoir life eliminates refilling. The 10 pressure settings provide the finest control in any water flosser. The 7 included tips cover every use case from general cleaning to orthodontics to implants.

    Where the ION falls short of a true cordless model: it still needs counter space for the base. It’s not portable in the way the WP-580 or Bitvae are — you won’t toss this in a travel bag. And the hose, while flexible, tethers you within a few feet of the base. If “cordless” to you means “no counter footprint and fully portable,” skip the ION and look at the three fully cordless options below.

    Included tips: 7 — Precision (x2), Plaque Seeker, Orthodontic, Pik Pocket, Implant Denture, Tongue Cleaner.

    Strengths: Cordless wand with countertop reservoir capacity (650ml); 10 pressure settings; 7 tips; ADA accepted; 3-year warranty; 4-week battery.

    Weaknesses: Not fully portable (base stays on counter); hose limits range; most expensive option; louder than purely cordless models.

    Check Price on Amazon


    Best for Travel: Waterpik Cordless Advanced (WP-580)

    Waterpik Cordless Advanced WP-580 with travel bag and tip storage

    Price: $69.99  |  Reservoir: 207ml (7 oz)  |  Settings: 3  |  Battery: ~4 weeks  |  ADA Accepted: Yes  |  Warranty: 2 years

    For people whose primary need is a water flosser they can take on trips, the WP-580 is purpose-built. It includes a microfiber travel bag, a tip storage case, and a compact form factor that fits into a toiletry bag without dominating it. The magnetic USB charging cable is small and travel-friendly. The unit is IPX7 waterproof, so hotel shower use is safe.

    The 4-week battery life per charge is the most travel-relevant spec. A two-week business trip or a month-long holiday doesn’t require packing a charger if you charge before departure. Global voltage compatibility means the charger works with international outlets.

    ADA acceptance and the inclusion of 4 tips (including an Orthodontic Tip and Plaque Seeker) make this the most credentialed portable option available. It’s also the go-to recommendation for braces patients — see our dedicated guide on the best water flosser for braces.

    The 207ml reservoir and 3 pressure settings are the compromises for portability. At ~45 seconds per fill on a medium setting, plan on one refill per session. The limited pressure range means less granularity than the Sonicare’s 6 combinations or the ION’s 10 settings.

    Strengths: Travel bag + tip case included; 4-week battery; ADA accepted; compact form factor; 4 tips including orthodontic; IPX7 waterproof; global voltage.

    Weaknesses: Smallest reservoir among Waterpik picks (207ml, ~45 seconds); only 3 pressure settings; magnetic charging cable is proprietary.

    Check Price on Amazon


    Best Budget Cordless: Bitvae C6

    Bitvae C6 cordless water flosser with 6 tips and travel bag

    Price: $15.98  |  Reservoir: 300ml  |  Settings: 3 modes × 5 levels  |  Battery: ~40 days  |  ADA Accepted: No  |  Warranty: 1 year

    The Bitvae C6 has no business being this capable at $15.98. Its 300ml reservoir is the largest among the fully cordless models in this roundup — 20% larger than the Philips Sonicare and 45% larger than the Waterpik WP-580. Its 40-day battery life means charging roughly nine times per year. It charges via USB-C, which is the cable you already own five of.

    The 15 mode/intensity combinations (3 modes × 5 levels) provide more granularity than either Waterpik cordless model. The Soft mode at level 1 is gentle enough for sensitive gums, while Normal mode at level 5 delivers enough pressure for effective plaque disruption. Six included tips — standard, orthodontic, periodontal, and tongue scraper — cover more use cases out of the box than the Philips Sonicare’s 2 tips.

    The trade-offs are real but proportional to the price. No ADA seal, a 1-year warranty (half of Philips, a third of Waterpik), and build quality that feels functional rather than premium. The button occasionally requires a deliberate press. The plastic doesn’t have the density of a Waterpik or the elegance of a Philips. Bitvae as a brand doesn’t have the decades of reliability data that Waterpik carries.

    For someone testing whether water flossing will become a daily habit, a student on a tight budget, or a household that wants a second cordless flosser for travel, the Bitvae C6 is the lowest-risk entry point available.

    Strengths: $15.98 price; largest cordless reservoir (300ml); 40-day battery; USB-C charging; 6 tips; 15 mode/intensity combinations; IPX7 waterproof.

    Weaknesses: No ADA seal; 1-year warranty; build quality is adequate but not premium; newer brand with limited long-term reliability data.

    Check Price on Amazon


    Best Battery Life: Burst Water Flosser

    Burst Water Flosser in black with waterproof design

    Price: $69.99  |  Reservoir: 110ml  |  Settings: 3 (Standard, Turbo, Pulse)  |  Battery: ~80 days  |  ADA Accepted: No  |  Warranty: 1 year (limited lifetime with subscription)

    The Burst makes this list for two reasons: an 80-day battery life that dwarfs every competitor, and a design that looks like it belongs in a product photography studio rather than a bathroom drawer. If charging your water flosser is the kind of minor friction that leads you to skip sessions, the Burst eliminates it almost entirely — you charge it roughly four times per year.

    The 360-degree rotating nozzle and waterproof IPX7 design are practical features. The warranty structure is unique: 1 year standard, extending to a limited lifetime if you subscribe to the tip replacement plan (~$5 every 3 months).

    The Burst earns its place in this roundup, but with a significant caveat: the 110ml reservoir. It depletes in roughly 20–30 seconds at a medium setting. That’s 2–3 refills for a full-mouth session. Amazon reviews confirm this is the number one complaint. For targeted, quick cleaning — rinsing after lunch, cleaning a specific area between dental appointments — the small reservoir is manageable. For a thorough daily routine, the refill friction is real.

    Pressure output also trails the Waterpik and Bitvae at comparable settings, according to user feedback. And at $69.99 with only 1 included tip, the per-dollar value is lower than the Bitvae C6, which offers more tips, a larger reservoir, and longer-than-average battery life at less than a quarter of the price.

    Strengths: 80-day battery (best in class); attractive matte design; 360° rotating nozzle; IPX7 waterproof; limited lifetime warranty with subscription.

    Weaknesses: 110ml reservoir (smallest here, 2–3 refills per session); only 1 tip included; lower pressure than competitors; $69.99 with fewer accessories than cheaper models; lifetime warranty requires active subscription.

    Check Price on Amazon


    Frequently Asked Questions

    Are cordless water flossers as effective as countertop models?

    For plaque removal and gum health, yes — the cleaning mechanism is the same. Cordless models may have lower maximum pressure and smaller reservoirs, but clinical effectiveness at moderate pressure settings is comparable. The primary advantage of countertop models is convenience for longer sessions (no refilling) and wider pressure range, not fundamentally better cleaning.

    How long do cordless water flosser batteries last?

    In this roundup, battery life ranges from approximately 2 weeks (Philips Sonicare 3000) to 80 days (Burst). The Waterpik ION and WP-580 last about 4 weeks each. The Bitvae C6 lasts roughly 40 days. All use rechargeable lithium-ion batteries. Actual battery life depends on pressure setting used and session length.

    Can I use a cordless water flosser in the shower?

    All five models in this roundup carry IPX7 waterproof ratings, making them safe for shower use. Using a water flosser in the shower eliminates the splashing problem entirely — the most common complaint from new users. Just ensure the charging port is covered or sealed before water exposure.

    Which cordless water flosser has the biggest tank?

    Among fully cordless models, the Bitvae C6 has the largest reservoir at 300ml. The Philips Sonicare 3000 follows at 250ml. The Waterpik ION has a 650ml reservoir, but it’s a hybrid (the reservoir sits on the counter). For a deeper comparison including countertop models, see our main water flosser guide.

    Is a cordless water flosser good for travel?

    Cordless water flossers are the best option for travel. The Waterpik WP-580 is specifically designed for it — compact form factor, travel bag, tip case, and 4-week battery. The Bitvae C6 is the budget travel option with USB-C charging from any phone charger and a 40-day battery. The Burst also travels well but the tiny reservoir is more limiting for full sessions away from a convenient refill point.

    Do I need an ADA-accepted cordless water flosser?

    The ADA Seal confirms a product has been independently evaluated for safety and effectiveness. It’s a meaningful trust signal but not a requirement. Three cordless-compatible models in this roundup carry the seal: Philips Sonicare 3000, Waterpik ION, and Waterpik WP-580. The Bitvae C6 and Burst do not — but that reflects the brands not having applied for the review, not a finding of ineffectiveness. For more context, see: Do Dentists Recommend Water Flossers?


    Beyond Brushing Oral Health Guide Book
    Get the Free Oral Health Guide
    Get Beyond Brushing — a practical 30,000+ word guide to healthier teeth, gums, and fresher breath after 45.
    Marketing email consent
    • No spam • Unsubscribe anytime


    The Bottom Line

    The Philips Sonicare Power Flosser 3000 ($79.96) is the best cordless water flosser for most people. The noise advantage alone justifies choosing it over louder competitors — it’s the kind of difference that determines whether water flossing becomes a permanent habit or an abandoned experiment. ADA acceptance, the innovative Quad Stream technology, and a compact design round out a strong package.

    If you want cordless hand freedom without sacrificing countertop reservoir capacity, the Waterpik ION ($99.99) is the hybrid solution. For dedicated travellers or braces patients, the Waterpik Cordless Advanced WP-580 ($69.99) is purpose-built.

    If budget is the deciding factor, the Bitvae C6 ($15.98) delivers more reservoir capacity, more tips, and longer battery life than models costing four times as much. At that price, there’s almost no reason not to try cordless water flossing.

    For a comparison that includes countertop models, see our complete guide to the best water flossers of 2026.


    References

    1. American Dental Association (ADA). Oral Health and Interdental Cleaning

    2. Mayo Clinic. Dental Care: How to Keep Your Teeth Healthy

    3. Harvard Health Publishing. Flossing and Oral Hygiene Benefits

    4. Waterpik Clinical Research. Effectiveness of Water Flossers

    5. Philips Sonicare. Power Flosser Technology Overview

  • Best Water Flosser for Braces (2026)

    Best Water Flosser for Braces (2026)

    Editorial transparency: VerdictLab earns a commission when you purchase through our links — this never influences our ratings or recommendations. Our editorial picks are based on specifications, clinical evidence, expert opinions, and real user feedback. As an Amazon Associate I earn from qualifying purchases. Full disclosure.

    Last updated: March 2026  |  By: VerdictLab Editorial Team

    Braces make flossing miserable. Threading string floss under archwires, navigating around brackets, trying not to snap the wire — it takes 10–15 minutes of careful work that most people (especially teenagers) abandon within weeks. A water flosser changes this from a dreaded chore into a 90-second routine.

    But not every water flosser works well with braces. You need a model with an orthodontic tip designed for bracket cleaning, adjustable pressure that starts low enough for sensitive gums, and ideally an ADA Seal of Acceptance confirming it’s safe for orthodontic use. We compared the options and narrowed it to four picks — from a premium countertop to a $15.98 budget cordless.

    For our full comparison of all water flosser types, see the complete VerdictLab guide to the best water flossers of 2026.

    Quick Summary

    • Best overall for braces: Waterpik Cordless Advanced WP-580 ($69.99) — purpose-built orthodontic tip, ADA accepted, travel-friendly
    • Best countertop for braces: Waterpik Aquarius WP-660 ($79.99) — 10 pressure settings, 7 tips including orthodontic, longest reservoir life
    • Best premium for braces: Waterpik ION WF-12 ($99.99) — hybrid design, 7 tips, best of both worlds
    • Best budget for braces: Bitvae C6 ($15.98) — includes orthodontic tip, 15 mode/intensity combinations, remarkable value


    Why Braces Need a Water Flosser

    Brackets, archwires, bands, and ligatures create dozens of crevices that trap food particles and plaque. A toothbrush can clean the front surfaces reasonably well, but it can’t reach between the bracket base and the tooth surface, under the archwire, or in the gaps between bands and gum tissue. These are exactly the areas where decalcification (white spots), cavities, and gum inflammation develop during orthodontic treatment.

    String floss with a threader can technically reach these areas, but the process is so tedious that compliance rates among orthodontic patients are poor. Studies consistently show that patients instructed to string floss with braces rarely maintain the habit beyond a few weeks.

    A water flosser changes the equation. A 2005 study published in the Journal of Clinical Dentistry found that a Waterpik with an orthodontic tip removed three times more plaque around brackets than string floss. The time investment drops from 10–15 minutes to about 90 seconds. For teenagers — who account for the majority of braces patients — that difference in effort is the difference between daily compliance and complete abandonment.

    Most orthodontists now recommend water flossers for patients in active treatment, and some include them in their treatment starter kits. For more on professional recommendations, see: Do Dentists Recommend Water Flossers?


    What to Look for in a Water Flosser for Braces

    Not every water flosser is equally suited for orthodontic use. Four features matter most.

    Orthodontic tip

    This is the most important feature. An orthodontic tip has a tapered, soft-bristle end designed to brush around bracket bases while the water stream flushes debris from behind them. A standard jet tip works for general interdental cleaning, but it doesn’t provide the bristle contact needed to clean the bracket-to-tooth junction effectively. Models from Waterpik and Bitvae include orthodontic tips; Philips Sonicare and Burst do not.

    Adjustable pressure starting low

    Gums around braces are frequently inflamed, especially in the first months of treatment and after adjustments. A water flosser that starts at a genuinely low pressure setting prevents pain and bleeding. Models with 10 settings (Waterpik Aquarius, Waterpik ION) offer the most granularity. Budget models with 3–5 levels work if the lowest setting is gentle enough — the Bitvae C6’s Soft mode at intensity 1 is adequate.

    ADA Seal of Acceptance

    Three brands carry the ADA Seal for their water flossers: Waterpik, Philips Sonicare, and Quip. For braces specifically, Waterpik is the only brand with clinical research demonstrating orthodontic effectiveness. If your orthodontist asks what you’re using, “an ADA-accepted water flosser with an orthodontic tip” is a stronger answer than a brand they’ve never heard of.

    Reservoir size

    Braces require more thorough cleaning than unbanded teeth — each bracket adds a cleaning zone. Budget an extra 30 seconds beyond a standard flossing session, which means a larger reservoir helps. Countertop models (650–800ml) handle this easily. Cordless models (200–300ml) may require one refill during a braces cleaning session.


    Best Overall for Braces: Waterpik Cordless Advanced (WP-580)

    Waterpik Cordless Advanced WP-580 water flosser with orthodontic tip, plaque seeker tip, and travel bag

    Price: $69.99  |  Type: Cordless  |  Reservoir: 207ml  |  Settings: 3  |  ADA Accepted: Yes  |  Orthodontic Tip: Yes (included)  |  Warranty: 2 years

    The Cordless Advanced is the most recommended water flosser for braces — by orthodontists, by review sites, and by the orthodontic patient community. The reason is straightforward: it was designed with this use case in mind.

    The included Orthodontic Tip has a tapered brush end that navigates around brackets and under wires without snagging. The Plaque Seeker tip complements it by targeting the bracket-to-tooth junction from the side with thin bristles. Together, they cover the two main angles needed for thorough bracket cleaning — direct approach and lateral approach.

    The cordless form factor matters for braces patients specifically. Teenagers using this in a shared bathroom don’t need to negotiate counter space or a power outlet. The travel bag means it goes to sleepaway camp, college dorms, or orthodontic appointments without hassle. Battery life of approximately 4 weeks per charge eliminates daily charging friction.

    The trade-off is the 207ml reservoir. At a medium setting, it provides roughly 45 seconds of use — enough for a standard session but tight for the more thorough cleaning braces demand. Plan on one refill per session. The three pressure settings are also less granular than the Aquarius’s 10, though the low setting is gentle enough for freshly-adjusted gums.

    Strengths: Purpose-built orthodontic + plaque seeker tips; ADA accepted; compact and portable; travel bag included; 4-week battery; 2-year warranty.

    Weaknesses: Small 207ml reservoir (one refill needed for braces); only 3 pressure settings; no countertop option.

    Check Price on Amazon


    Best Countertop for Braces: Waterpik Aquarius (WP-660)

    Waterpik Aquarius WP-660 countertop water flosser with 7 tips including orthodontic tip

    Price: $79.99  |  Type: Countertop  |  Reservoir: 650ml  |  Settings: 10 (10–100 PSI)  |  ADA Accepted: Yes  |  Orthodontic Tip: Yes (included)  |  Warranty: 3 years

    If you have counter space and a power outlet, the Aquarius is the more thorough option for braces cleaning. The 650ml reservoir provides roughly 90 seconds of continuous use — enough for a full braces session without refilling. That uninterrupted session makes a practical difference: refilling mid-clean breaks your rhythm and adds friction that reduces compliance over time.

    The 10 pressure settings offer significantly more control than the Cordless Advanced’s 3. After an orthodontic adjustment — when gums are sore and brackets are freshly tightened — dropping to setting 1 or 2 makes the experience comfortable rather than painful. By the end of the month, you can work up to setting 5 or 6 for more effective plaque removal. This adjustability matters across the 18–24 month duration of typical orthodontic treatment.

    The Aquarius includes the same Orthodontic Tip as the Cordless Advanced, plus a Plaque Seeker and Pik Pocket tip — giving you three specialised approaches for bracket cleaning. The 7-tip total also makes this a strong family option if multiple household members share the unit (each person uses their own colour-coded tip).

    The downsides are the same as any countertop model: it needs dedicated counter space, a power outlet, and it’s louder than cordless alternatives. Not portable, not shower-friendly.

    Strengths: 650ml reservoir (no refills needed); 10 pressure settings for fine-tuned comfort; orthodontic + plaque seeker + Pik Pocket tips; ADA accepted; 3-year warranty; ideal for families.

    Weaknesses: Countertop only (not portable); requires outlet; loud; takes up counter space.

    Check Price on Amazon


    Best Premium for Braces: Waterpik ION Professional (WF-12)

    Waterpik ION Professional WF-12 hybrid water flosser with 7 tips

    Price: $99.99  |  Type: Hybrid  |  Reservoir: 650ml  |  Settings: 10  |  ADA Accepted: Yes  |  Orthodontic Tip: Yes (included)  |  Warranty: 3 years

    The ION gives you everything the Aquarius offers — 650ml reservoir, 10 pressure settings, 7 tips including orthodontic — with cordless convenience. The wand lifts off the countertop base for cable-free use, which matters in the smaller bathrooms where teenagers typically operate.

    For braces patients specifically, the ION’s 90+ second reservoir life combined with the cordless wand means you get the cleaning thoroughness of a countertop model with the manoeuvrability to reach every bracket from every angle. The 4-week rechargeable battery adds to the convenience.

    The $99.99 price is the main barrier. For a teenager’s braces — a temporary condition lasting 18–24 months — the $69.99 Cordless Advanced handles the job effectively at a lower investment. The ION makes more sense if you plan to continue using it after braces come off, or if the household shares the unit.

    Strengths: Hybrid cordless + countertop; 650ml reservoir; 10 settings; 7 tips; ADA accepted; 3-year warranty; long-term value beyond braces.

    Weaknesses: Most expensive option; louder than fully cordless models; still needs counter space for the base.

    Check Price on Amazon


    Best Budget for Braces: Bitvae C6

    Bitvae C6 cordless water flosser with 6 tips including orthodontic tip

    Price: $15.98  |  Type: Cordless  |  Reservoir: 300ml  |  Settings: 3 modes × 5 levels  |  ADA Accepted: No  |  Orthodontic Tip: Yes (included)  |  Warranty: 1 year

    At $15.98, the Bitvae C6 removes the cost objection entirely. It includes an orthodontic tip, which is the essential requirement for braces cleaning, and the Soft mode at its lowest intensity delivers a gentle enough stream for post-adjustment sensitivity.

    The 300ml reservoir is actually larger than the Waterpik Cordless Advanced (207ml), providing roughly 50–75 seconds of use depending on the mode — close to enough for a full braces session. The 15 mode/intensity combinations (3 modes × 5 levels) offer more granularity than the WP-580’s 3 settings, which is an unexpected advantage at this price point.

    The 40-day battery life and USB-C charging are practical wins for a teenager who won’t remember to charge their water flosser regularly. Charging from a laptop, phone charger, or portable battery means it works wherever they are.

    The trade-offs are what you’d expect at this price: no ADA seal, less proven long-term reliability than Waterpik, a 1-year warranty, and build quality that feels functional rather than premium. The orthodontic tip design is also simpler than Waterpik’s — it lacks the specialised bristle arrangement of the Waterpik Orthodontic Tip. But for a student, a budget-conscious family, or anyone testing whether water flossing will become a habit before investing more, the Bitvae C6 is a legitimate option.

    Strengths: $15.98 price; orthodontic tip included; 300ml reservoir; 15 mode/intensity combinations; 40-day battery; USB-C charging.

    Weaknesses: No ADA seal; simpler orthodontic tip design; 1-year warranty; less proven brand reliability; build quality is functional, not premium.

    Check Price on Amazon


    How to Water Floss With Braces: Technique Guide

    The technique for braces differs from standard water flossing. Brackets and wires create additional surfaces that need deliberate attention.

    Start on the lowest pressure setting

    This matters even more with braces than without. Brackets can trap water pressure between the wire and gum tissue, amplifying the force. Begin at setting 1 (or the lowest available) and increase gradually over 1–2 weeks. Most braces patients settle at a mid-range setting — 3–5 on a 10-setting model.

    Use the orthodontic tip

    Switch from the standard jet tip to the orthodontic tip for your entire session. The tapered bristle end is designed to brush around bracket bases while the water stream flushes behind them. A standard tip works for the gum line between brackets, but it misses the bracket-to-tooth junction where decalcification is most likely to occur.

    Clean each bracket from multiple angles

    Don’t just sweep along the gum line as you would without braces. At each bracket, approach from three directions: above the bracket (between bracket and gum), below the bracket (between bracket and biting edge), and from the side (along the archwire). Spend 3–5 seconds per bracket rather than the 2–3 seconds per gap in standard water flossing.

    Don’t forget the inner surfaces

    Lingual brackets (braces on the inner surface of teeth) and lingual wires require the same attention. Even with traditional labial braces, the inner gum line still needs cleaning — plaque doesn’t limit itself to the side with brackets.

    Budget extra time

    A standard water flossing session takes 60–90 seconds. With braces, plan for 2–3 minutes. Each bracket adds a cleaning zone, and thoroughness matters more than speed when orthodontic hardware is trapping debris against your tooth surfaces.

    For the complete water flossing technique (beyond braces-specific guidance), see: How to Use a Water Flosser Correctly.


    Mistakes to Avoid When Water Flossing With Braces

    Using too high a pressure after an adjustment. Gums are most sensitive in the days following an orthodontic adjustment. What felt comfortable at setting 5 last week may cause pain and bleeding at the same setting after wires are tightened. Drop back to setting 1–2 after every adjustment and work your way up again.

    Only cleaning the front of the brackets. The most plaque accumulates behind and underneath brackets — the areas you can’t see. Direct the water stream at angles that flush behind the bracket base, not just at the visible front surface.

    Skipping the gum line. Brackets naturally draw your attention, but the gum line between brackets still needs the same attention it would get without braces. Gingivitis during orthodontic treatment is common and largely preventable with thorough gum line cleaning.

    Replacing brushing with water flossing. A water flosser is an interdental tool — it cleans between and behind teeth and brackets. Your toothbrush still handles the front and biting surfaces. Use both, every session. The recommended order: water floss first, then brush. For the research behind this sequence, see: Water Flosser vs String Floss.

    Using a water flosser without an orthodontic tip for the entire treatment. A standard jet tip is fine for the gum line, but it won’t effectively clean the bracket-to-tooth junction. Use the orthodontic tip for at least part of each session — ideally the entire session during the first year of treatment when plaque management is most critical.


    Frequently Asked Questions

    Do orthodontists recommend water flossers?

    Yes. Most orthodontists now recommend water flossers for patients with braces, particularly those who struggle with string floss compliance. A 2005 study found water flossers with an orthodontic tip removed three times more plaque around brackets than string floss. Many orthodontic practices include water flossers in their treatment starter packs. See: Do Dentists Recommend Water Flossers?

    Can a water flosser damage braces?

    No — when used correctly. The water pressure from a water flosser is not strong enough to dislodge brackets or bend wires. Even at the highest settings, the hydraulic force is within safe limits for orthodontic hardware. If a bracket comes loose after using a water flosser, the adhesive was likely already failing. Start on the lowest setting for comfort, not because of any risk to the braces themselves.

    Is a Waterpik better than other brands for braces?

    Waterpik has the strongest evidence base for orthodontic use — they’re the only brand with published clinical studies demonstrating plaque removal around brackets. Their Orthodontic Tip is also more purpose-built than competitors’ versions, with a specialised bristle arrangement. That said, any water flosser with an orthodontic-style tip on a low pressure setting will be significantly better than no interdental cleaning at all. The Bitvae C6 at $15.98 is a legitimate alternative if budget is the primary constraint.

    Should I still string floss with braces if I use a water flosser?

    Your orthodontist can give the most personalised answer, but for most braces patients, a water flosser with an orthodontic tip provides effective interdental cleaning on its own. Adding string floss with a threader provides additional mechanical plaque removal at tight contact points — but the compliance rate for this combination is low. A water flosser used daily is more effective than a water flosser plus string floss used inconsistently.

    What pressure setting should I use with braces?

    Start at the lowest setting (setting 1 on a Waterpik, Soft mode on a Bitvae). Increase gradually over 1–2 weeks. Most braces patients settle between settings 3 and 5 on a 10-setting model. Drop back to the lowest setting for 2–3 days after every orthodontic adjustment, then work your way back up.

    How often should I water floss with braces?

    Once daily at minimum — ideally before brushing in the evening. Some orthodontists recommend twice daily (morning and evening) during active treatment, particularly if plaque buildup is a concern at your appointments. Consistency matters more than frequency: daily use produces better outcomes than aggressive twice-daily sessions done sporadically.

    Can kids use a water flosser with braces?

    Yes. Children aged 6 and older can use a water flosser safely under supervision. For younger children, use the lowest pressure setting and supervise the first several sessions to ensure proper technique. The Bitvae C6’s Soft mode at its lowest intensity is gentle enough for children, and the $15.98 price point makes it a low-risk investment. Waterpik also rates their products for ages 6 and up.


    Beyond Brushing Oral Health Guide Book
    Get the Free Oral Health Guide
    Get Beyond Brushing — a practical 30,000+ word guide to healthier teeth, gums, and fresher breath after 45.
    Marketing email consent
    • No spam • Unsubscribe anytime


    The Bottom Line

    The Waterpik Cordless Advanced WP-580 ($69.99) is the best water flosser for most braces patients. It has the orthodontic tip that matters, ADA acceptance that orthodontists trust, and portability that teenagers need. The Aquarius ($79.99) is the better choice if counter space is available and you want the longest uninterrupted session time. The ION ($99.99) makes sense if you plan to use it well beyond braces removal.

    If cost is the deciding factor, the Bitvae C6 ($15.98) includes an orthodontic tip and delivers enough performance that the barrier to daily compliance drops to nearly zero. A $15.98 water flosser used every day will keep braces cleaner than a $100 model used sporadically.

    For a broader comparison of all water flosser types — not just those suited for braces — see our complete guide to the best water flossers of 2026.


    References

    1. Journal of Clinical Dentistry — Effectiveness of Water Flosser with Orthodontic Tip

    2. American Dental Association (ADA) — Oral Hygiene with Braces

    3. Mayo Clinic — Oral Health and Hygiene

    4. Waterpik Clinical Research

  • Water Flosser for Tonsil Stones: Does It Work?

    Water Flosser for Tonsil Stones: Does It Work?

    Last updated: March 2026  |  Reviewed by: VerdictLab Editorial Team

    Tonsil stones are one of those problems people search for at 2 AM — annoying, embarrassing, and poorly explained by most health content online. If you’ve landed here, you probably already know what they are and want to know whether a water flosser can help get rid of them.

    The short answer: yes, many people use water flossers to dislodge tonsil stones, and it works. But the technique matters significantly, and doing it wrong can cause pain, gagging, or tissue irritation. Here’s what you need to know before pointing a pressurised water stream at the back of your throat.

    Key Takeaways

    • Water flossers can dislodge tonsil stones — many people report success with this method
    • Use the lowest pressure setting only — tonsil tissue is far more delicate than gum tissue
    • This is not an FDA-approved or dentist-recommended use of a water flosser — it’s an off-label home remedy
    • Persistent or recurring tonsil stones may indicate an underlying condition worth discussing with your doctor
    • A water flosser is better for prevention (regular flushing of tonsil crypts) than extraction of large, deeply embedded stones


    What Are Tonsil Stones?

    Tonsil stones (tonsilloliths) are small, pale, calcified deposits that form in the crevices — called crypts — of the palatine tonsils at the back of the throat. They’re composed of bacteria, food debris, dead cells, and mucus that accumulate in these crypts and gradually harden over time.

    They range in size from a grain of rice to a small pea. Most are harmless but unpleasant: they cause bad breath (halitosis), a feeling of something stuck in the throat, mild sore throat, and occasionally ear pain (referred pain through shared nerve pathways). They’re surprisingly common — research suggests they affect roughly 10% of the population, though mild cases often go unnoticed.

    People with larger or more numerous tonsil crypts are more prone to tonsil stones. Other contributing factors include chronic post-nasal drip, poor oral hygiene, and large tonsils. They are not dangerous, but they are persistent — once your tonsils start producing them, they tend to recur.


    Can a Water Flosser Remove Tonsil Stones?

    Yes — with caveats. A water flosser’s pulsating stream can dislodge tonsil stones from the crypts where they’re lodged, particularly smaller stones that haven’t deeply calcified. The hydraulic action flushes the crypt, loosening the stone and washing it out.

    This is a widely reported home remedy with considerable anecdotal support. Online forums, Reddit threads, and ENT patient communities include thousands of accounts from people who use water flossers for tonsil stone removal regularly. Some ENT specialists have acknowledged it as a reasonable home approach for small, accessible stones.

    However, it’s important to be clear about what this is and isn’t:

    What it is: An off-label home remedy that many people find effective for dislodging small to medium tonsil stones and for preventive flushing of tonsil crypts.

    What it isn’t: An FDA-approved, clinically validated treatment. No water flosser manufacturer markets their product for tonsil stone removal. No clinical studies have specifically examined water flosser effectiveness for this purpose. The technique is based on user experience and logical extrapolation of the device’s hydraulic action — not controlled research.

    If your tonsil stones are large, deeply embedded, or causing significant symptoms, a visit to an ENT specialist is the appropriate first step — not a water flosser.


    How to Use a Water Flosser for Tonsil Stones (Step by Step)

    If you’re going to try this — and many people do successfully — technique is everything. Tonsil tissue is significantly more sensitive than gum tissue, and the gag reflex adds a complication that interdental flossing doesn’t involve.

    Step 1 — Set the pressure to the absolute lowest level

    This is non-negotiable. The lowest setting on your water flosser is designed for sensitive gum tissue, which is considerably tougher than tonsil tissue. Even the lowest setting will feel strong against the back of your throat. On a Waterpik with 10 settings, use setting 1. On a cordless model with 3 levels, use the lowest or “Soft” mode. If your water flosser doesn’t have a genuinely gentle low setting, this method may not be suitable.

    Step 2 — Use warm water

    Fill the reservoir with warm (not hot) water. Cold water hitting the back of the throat increases the gag reflex and causes tonsil tissue to tighten. Warm water is more comfortable and may help loosen the stone slightly before the water stream contacts it.

    Step 3 — Use a standard tip, not a specialty tip

    The standard Classic Jet tip produces the widest, least concentrated stream. Do not use a periodontal pocket tip or plaque seeker tip — these produce a more focused, higher-pressure stream at the nozzle point that could irritate or damage tonsil tissue.

    Step 4 — Position yourself over a sink with good lighting

    You need to see what you’re doing. Use a mirror, open your mouth wide, and use a flashlight or your phone’s torch to illuminate the tonsil area. Locate the stone before turning on the water flosser. Trying to find the stone while water is spraying into the back of your throat is an unpleasant experience you only need once.

    Step 5 — Aim the stream adjacent to the stone, not directly at it

    Point the water stream at the tissue immediately surrounding the tonsil stone — not at the stone itself. The goal is to flush the crypt and dislodge the stone from its edges, not to blast it with a direct jet. Direct impact on the stone can push it deeper or cause the surrounding tissue to bleed.

    Step 6 — Use short bursts

    Don’t run the water flosser continuously at the back of your throat. Use the pause button (if your model has one) or the on/off switch to deliver short 2–3 second bursts. This gives you time to spit, breathe, and manage the gag reflex between pulses. Most stones dislodge within 3–5 short bursts if they’re going to come out at all.

    Step 7 — Stop if it hurts or if the stone doesn’t budge

    If the stone doesn’t come out after 5–6 attempts, it’s either too deeply embedded or too large for this method. Continuing will only irritate the tissue. Move on to another method or consult your doctor. Mild discomfort is expected; actual pain means stop.


    Risks and What to Avoid

    Too much pressure. The single biggest risk. Tonsil tissue is delicate vascular tissue — not designed to withstand the forces that gum tissue handles routinely. Using medium or high pressure can cause bleeding, swelling, and tissue damage. Always use the lowest setting.

    Gagging and aspiration. Water in the back of the throat triggers the gag reflex. Leaning forward over the sink and keeping your mouth open so water drains out (rather than pooling at the back of the throat) reduces this risk. Never attempt this lying down.

    Pushing stones deeper. A direct, forceful water stream aimed at the stone itself can push it further into the crypt rather than dislodging it. Aim at the surrounding tissue to flush the stone out from its edges.

    Infection risk. If you’ve recently had a sore throat, tonsillitis, or any infection in the throat area, do not use a water flosser on your tonsils. The water pressure can spread bacteria into inflamed tissue and worsen the infection.

    Overuse. Using a water flosser on your tonsils daily at anything above the lowest pressure can cause chronic irritation. Limit tonsil use to when you can see or feel a stone, or use the preventive protocol below no more than a few times per week.


    Using a Water Flosser for Prevention

    Where water flossers may be most valuable for tonsil stone sufferers isn’t removal — it’s prevention. Regular, gentle flushing of the tonsil crypts removes the debris that accumulates and eventually hardens into stones.

    The preventive protocol is simpler and lower-risk than stone removal:

    2–3 times per week (not daily), after your regular teeth-cleaning routine, set the water flosser to the lowest pressure setting and gently direct the stream across each tonsil for 5–10 seconds per side. The goal isn’t to blast anything out — it’s to flush the crypts of soft debris before it has a chance to calcify.

    Combine this with good general oral hygiene: brushing twice daily, interdental cleaning (water flossing or string flossing your teeth), tongue scraping, and staying hydrated. Reducing the bacterial load in your mouth reduces the raw material that forms tonsil stones.

    Gargling with warm salt water after meals is another low-cost preventive measure that pairs well with water flosser maintenance.


    Which Water Flosser Works Best for This?

    The ideal water flosser for tonsil stone management has two non-negotiable features: a genuinely gentle low-pressure setting and a standard tip that produces a wide, diffused stream.

    The Philips Sonicare Power Flosser 3000 ($79.96) is a strong fit. Its lowest intensity setting produces one of the gentlest streams available, and the Quad Stream nozzle disperses water across a wider area — reducing the concentrated force that can irritate tonsil tissue.

    The Bitvae C6 ($15.98) is the budget option. Its Soft mode at the lowest intensity level produces a gentle stream, and the $15.98 price point means you’re not investing heavily in a tool for off-label use.

    The Waterpik ION ($99.99) and Waterpik Aquarius ($79.99) both work at their lowest setting (setting 1 out of 10), though even their lowest setting is somewhat stronger than the Philips Sonicare’s lowest — Waterpik models are optimised for gum line cleaning, not throat tissue. They’re effective but require more care with positioning.

    For a full comparison of all models, see our best water flosser guide.


    Other Methods for Tonsil Stone Removal

    A water flosser is one of several home approaches. Others include:

    Cotton swabs. Gently pressing a damp cotton swab against the tissue below the stone can pop it out. This is the most common home method and works well for visible, superficial stones. The risk is gagging and minor tissue irritation.

    Gargling. Vigorous gargling with warm salt water (1/2 teaspoon salt in 8 oz of warm water) can dislodge loose stones and is the lowest-risk method. It’s less effective for firmly embedded stones but works well for small or partially dislodged ones.

    Coughing. Some people find that a series of forceful coughs dislodges superficial stones. This works occasionally but isn’t reliable for embedded stones.

    Medical intervention. For persistent, large, or frequently recurring tonsil stones, an ENT specialist can remove them manually, perform cryptolysis (smoothing the tonsil surface with laser or coblation to reduce crypt depth), or in severe cases, recommend tonsillectomy. These are clinical decisions made by a doctor based on your specific situation.


    When to See a Doctor

    Tonsil stones are typically harmless, but see your doctor or an ENT specialist if you experience:

    • Stones that recur frequently (weekly or more often) despite good oral hygiene
    • Stones large enough to cause difficulty swallowing or persistent throat pain
    • Bleeding from the tonsil area that doesn’t stop quickly
    • Signs of infection: fever, significant swelling, or pus around the tonsils
    • Persistent bad breath that doesn’t improve with oral hygiene and tonsil stone management
    • Tonsil stones on only one side, combined with other symptoms (asymmetric tonsil issues warrant medical evaluation)

    A water flosser is a maintenance tool for minor, recurring tonsil stones. It is not a substitute for medical evaluation of persistent or symptomatic tonsil conditions.


    Frequently Asked Questions

    Can a Waterpik remove tonsil stones?

    Many people report successfully using a Waterpik on the lowest setting (setting 1) to dislodge tonsil stones. It’s not an FDA-approved use of the device, but the hydraulic action can flush small to medium stones from tonsil crypts when done carefully. Always use the lowest pressure and aim adjacent to the stone, not directly at it.

    What pressure setting should I use for tonsil stones?

    The absolute lowest setting your water flosser offers. Tonsil tissue is far more delicate than gum tissue, and even the lowest settings on most water flossers produce noticeable force. On a Waterpik with 10 settings, use 1. On a 3-level cordless model, use the lowest or “Soft” mode.

    Is it safe to use a water flosser on tonsils?

    It can be safe when done correctly — low pressure, warm water, short bursts, standard tip, and stopping if there’s pain or bleeding. Risks include tissue irritation, gagging, and pushing stones deeper. It’s not a medically validated procedure, so proceed with caution and consult your doctor if you have concerns about your tonsils.

    How often should I use a water flosser for tonsil stone prevention?

    For prevention (not active removal), 2–3 times per week on the lowest setting is sufficient. Brief 5–10 second passes across each tonsil flush debris before it calcifies. Daily use at any elevated pressure can cause chronic tissue irritation.

    Will tonsil stones come back after removal?

    Usually, yes. Tonsil stones tend to recur in people whose tonsil anatomy (deep crypts) predisposes them. Removal addresses the current stone; prevention addresses the underlying pattern. Regular preventive flushing, good oral hygiene, and adequate hydration reduce recurrence frequency but may not eliminate it entirely. If recurrence is frequent and bothersome, discuss cryptolysis or tonsillectomy with an ENT specialist.

    Can a water flosser make tonsil stones worse?

    It can if used incorrectly. High pressure, direct impact on the stone, or frequent aggressive use can push stones deeper into crypts, cause tissue swelling, or create minor wounds that trap more debris. Proper technique (lowest pressure, aim at surrounding tissue, short bursts) avoids these problems.

    The Bottom Line

    A water flosser can dislodge tonsil stones — and for many people, it does. The technique requires the lowest pressure setting, warm water, short bursts aimed adjacent to the stone, and the discipline to stop if it’s not working. It’s more effective as a preventive tool (regular flushing of tonsil crypts) than as a brute-force extraction method for large or deeply embedded stones.

    This is an off-label use, not a clinically validated treatment. For persistent, large, or symptomatic tonsil stones, consult an ENT specialist. For the occasional small stone and ongoing crypt maintenance, a water flosser on the lowest setting is a reasonable and widely used home approach.

    If you don’t yet own a water flosser, our guide to the best water flossers of 2026 covers seven models — the Philips Sonicare 3000 and Bitvae C6 are particularly well-suited for this use due to their gentle low-pressure settings.


    References

    This article is for informational purposes only and does not constitute medical advice. Consult a qualified healthcare professional for diagnosis or treatment.